SETTING UP THE COFFEE MAKER
Plug in the appliance and it will perform a self-diagnosis cycle,
indicated by sequential flashing of the four buttons.
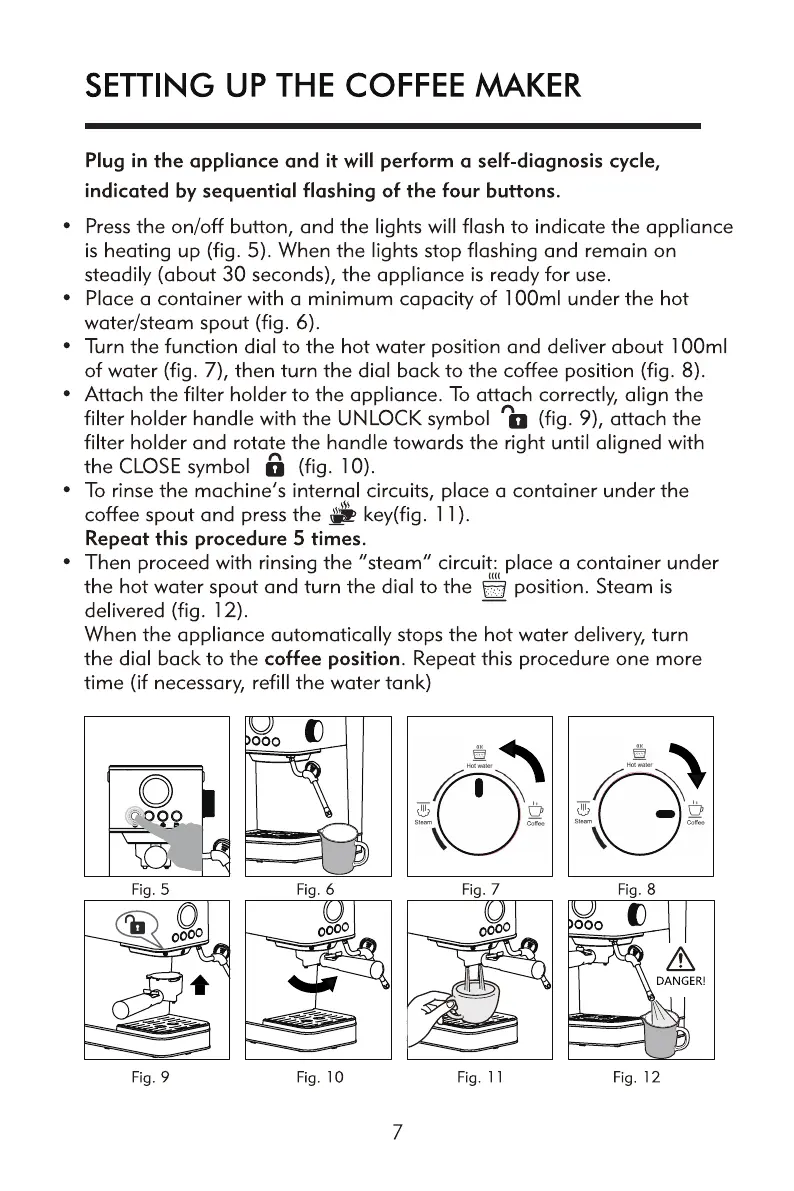
• Pressthe on/off button, and the lights will flash to indicate the appliance
is heating up (fig. 5). When the lights stop flashing and remain on
steadily (about 30 seconds), the appliance is ready for use.
• Place a container with a minimum capacity of 100ml under the hot
water/steam spout (fig. 6).
• Turn the function dial to the hot water position and deliver about 100ml
of water (fig. 7), then turn the dial back to the coffee position (fig. 8).
• Attach the filter holder to the appliance. To attach correctly, align the
filter holder handle with the UNLOCK symbol D (fig. 9), attach the
filter holder and rotate the handle towards the right until aligned with
a (fig. 10).
the CLOSE symbol
• To rinse the machine's internal circuits, place a container under the
coffee spout and press the key(fig. 11).
Repeat this procedure 5 times.
Then proceed with rinsing the "steam" circuit: place a container under
the hot water spout and turn the dial to the position. Steam is
delivered (fig. 12).
When the appliance automatically stops the hot water delivery, turn
the dial back to the coffee position. Repeat this procedure one more
time (if necessary, refill the water tank)
Fig. 5
Fig. 9
Fig. 6
0000
Fig. 10
Fig. 7
0000
Fig. II
Fig. 8
ooo
DANGER!
Fig. 12
 Loading...