EasyManua.ls Logo

Kolcraft Transitional 3 Drawer Dresser User Manual

Kolcraft Transitional 3 Drawer Dresser
44 pages
To Next Page IconTo Next Page
Page #1 background imageLoading...
Page #1 background image
Q013-R4
Transitional 3 Drawer Dresser Assembly Instructions
THIS INSTRUCTION BOOKLET CONTAINS IMPORTANT SAFETY INFORMATION. PLEASE READ
AND KEEP FOR
FUTURE REFERENCE.
READ INSTRUCTIONS CAREFULLY BEFORE ASSEMBLY
Manufactured by:
Kolcraft Enterprises, Inc.
1100 W Monroe St
Chicago, IL 60607
www.kolcraft.com
(800) 453-7673
Record manufacturing date and factory code
from product label here:
Question and Answer IconNeed help?

Do you have a question about the Kolcraft Transitional 3 Drawer Dresser and is the answer not in the manual?

Kolcraft Transitional 3 Drawer Dresser Specifications

General IconGeneral
TypeDresser
Number of Drawers3
MaterialWood
ColorWhite
Assembly RequiredYes
Product NameKolcraft Transitional 3 Drawer Dresser
CategoryIndoor Furnishing

Summary

Transitional 3 Drawer Dresser Assembly Instructions

Care and Maintenance Guide

Kolcraft Nursery Furniture Limited Warranty

Parts Identification

Assembly System Overview

QuickBlocks Assembly Technology

Explains the unique QuickBlock system for tool-free furniture assembly.

Dresser Main Body Assembly Steps

Step 1: Attach Left Side to Back Panel

Connects the Left Side panel to the Back panel using QuickBlocks and clips.

Step 2: Attach Right Side to Back Panel

Connects the Right Side panel to the Back panel using QuickBlocks and clips.

Step 3: Attach Face Frame to Dresser Body

Connects the Face Frame to the dresser sides using QuickBlocks and clips.

Step 4: Attach Top Panel to Dresser Body

Secures the Top panel to the main dresser structure using QuickBlocks.

Drawer Assembly and Final Steps

Drawer Assembly Step 1: Attach Drawer Sides

Slides drawer sides into grooves on the drawer front, ensuring glides face out.

Drawer Assembly Step 2: Insert Drawer Bottom

Slides the drawer bottom into grooves on the drawer sides and front.

Drawer Assembly Step 3: Attach Drawer Back

Connects the drawer back to the sides and bottom using QuickBlocks and clips.

Drawer Assembly Step 4: Attach Drawer Knobs

Attaches drawer knobs to the drawer front using screws.

Step 5: Insert Drawers and Install Wall Mount

Slides assembled drawers into tracks and installs the safety wall mounting kit.
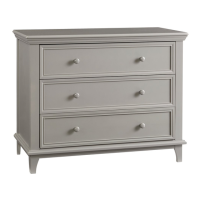
Related product manuals