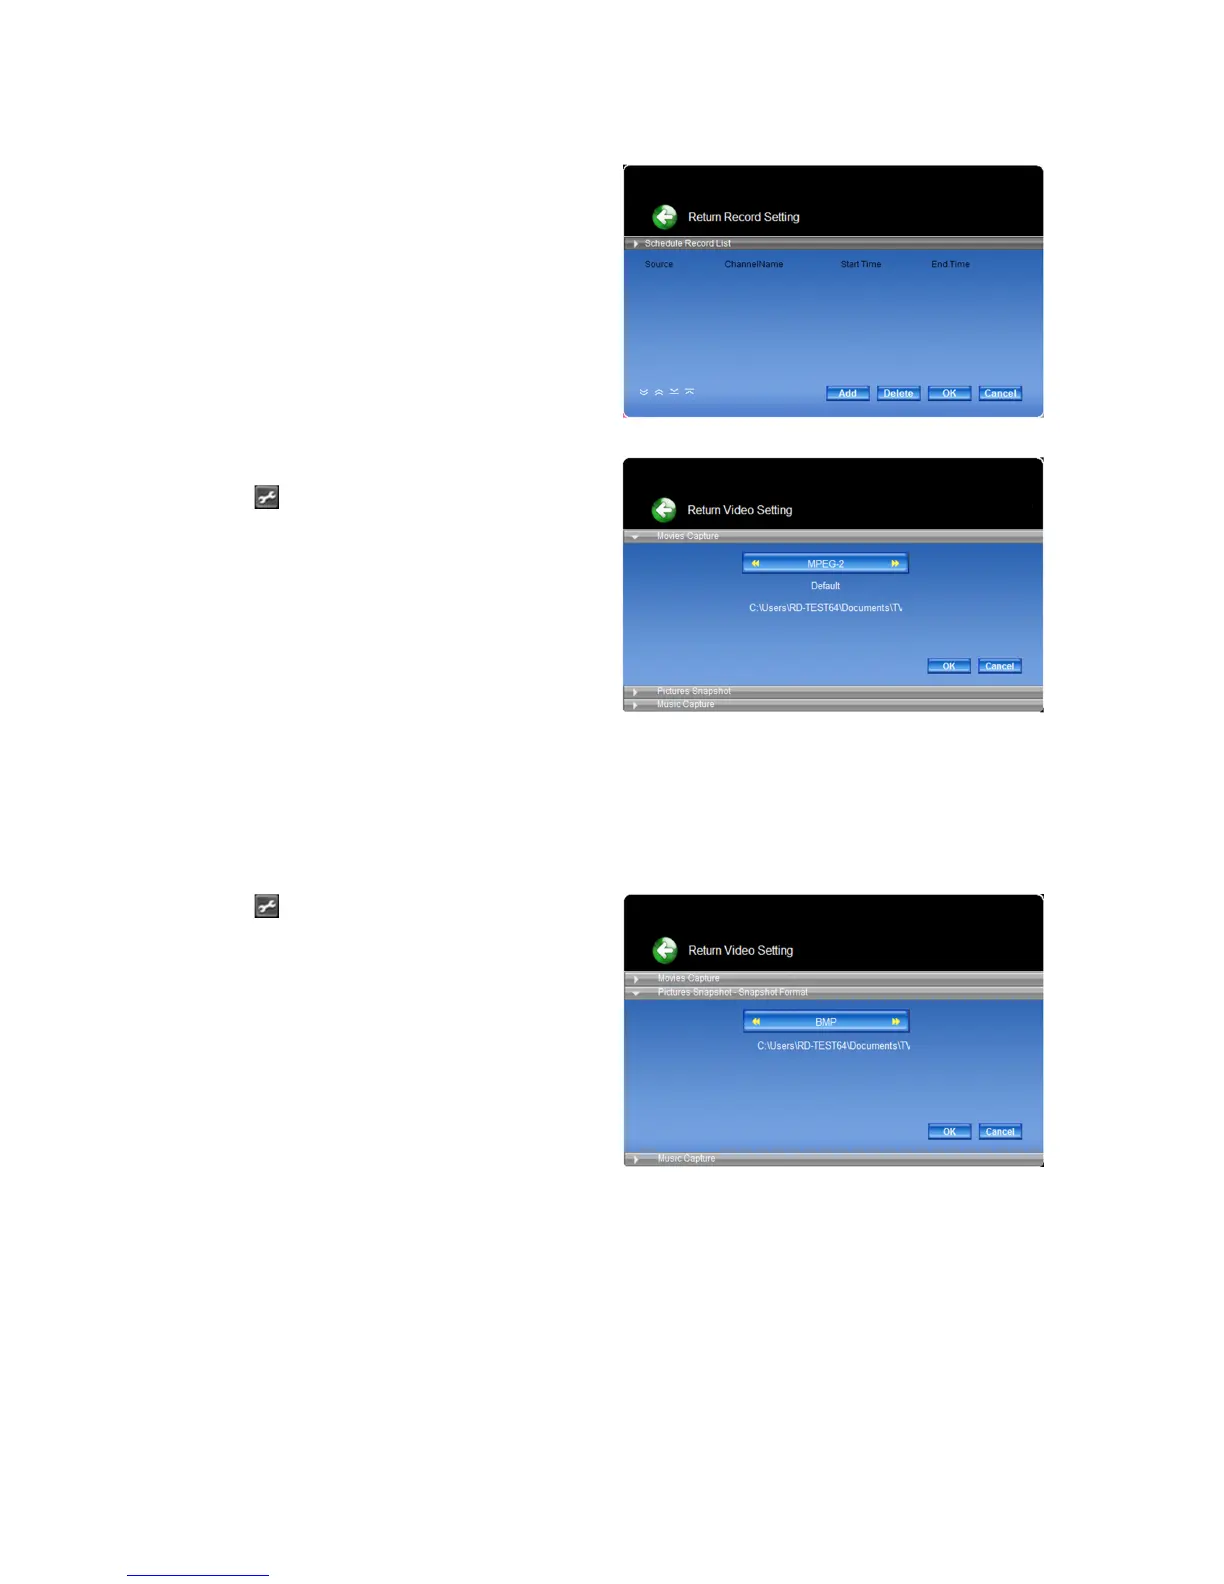
3.2) Scheduled Recording
Schedule recording allows you to create a list of
preset schedules of your favourite programs.
(See picture G)
Press “Add” to congurate the “Source”, “Channel
name”, “Start time” and “End time” for the recording.
picture G
3.3) Record settings
3.3.1) Movie capture setting
Click the
button in the upper right corner of the
main screen. Choose the “Record” option in order
to congurate the video capture setting.
(See picture H)
● Set up file format:
Determine the le format you want to record
including DVR-MS / MPEG-1 / MPEG-2 / H.264.
Press the “OK” button to conrm.
● Set up capture size:
The resolution of the recorded le is related to the
capture size. The default option will use the best
capture size depending on you device.
● Set up capture file save folder:
Select the storage path for your capture les.
picture H
3.3.2) Picture snapshot setting
Click the
button in the upper right corner of the
main screen. Choose the “Record” option in order
to congurate the pictures snapshot setting.
● Set up file format:
Determine the le format you want to record
including BPM / JPEG. Press the “OK” button to
conrm.
● Set up capture file save folder:
Select the storage path for your snapshot les.
picture I