Do you have a question about the Konica Minolta PS7000C MKII and is the answer not in the manual?
Place original face up, aligning top edge against stopper and spine with center mark.
Place original face up, aligning top edge against stopper. Align center or edges for spread/split scans.
Place 3D object face up on book table. Use white paper for optimum exposure.
Ensure originals are not askew, edges are within stopper, and pages lie flat without gaps.
Ensure page inclination <50°. Adjust table height for horizontal pages and effective auto focus.
Lower glass plate to flatten documents after placing, and lift gently after scanning.
Make scan selections for page, size, mode, and exposure on the Image DIVA screen.
Click or touch the 'Scan' button on the Image DIVA screen to begin the scanning process.
View scanned image in preview, click 'Print' button, and observe 'Now Printing' status.
Press the manual switch button to initiate scans, using left or right side switches for specific pages.
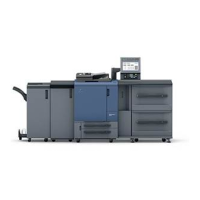
The Konica Minolta PS7000C MKII is a full-color digital book scanner designed for efficient and high-quality digitization of various originals, including books, sheets, and 3D objects. This quick guide outlines its primary functions and operational aspects.
The PS7000C MKII serves as a versatile scanning solution, capable of capturing images from a wide range of materials. Its core function is to convert physical documents and objects into digital formats, making it suitable for libraries, archives, and other institutions requiring preservation and accessibility of printed materials. The scanner supports full-color scanning, ensuring accurate reproduction of original content. It integrates with Image DIVA software for scan management, preview, and printing.
While specific technical specifications like resolution (DPI), scanning speed, and file formats are not detailed in this quick guide, the device is presented as a "FULL COLOR DIGITAL BOOK SCANNER," implying its capability to capture images with a broad color gamut. The scanner features a book table designed to accommodate various original types, including books, sheets, and 3D objects. The effective Auto Focus range is specified as 50 mm (2 inches) to 100 mm (4 inches) above the usual height of the book table, indicating a precise focusing mechanism for optimal image clarity. The maximum inclination of a page at the center of a book for correct image reading is 50 degrees.
The scanner offers flexible placement options for different types of originals:
For a Book Original:
For a Sheet Original:
For a 3D Object:
An optional glass plate unit can be used to flatten documents and books for better scanning results:
The scanning process is managed through the Image DIVA software:
In addition to software control, scans can also be initiated using physical manual switches on the device:
The quick guide does not explicitly detail maintenance features. However, the "CAUTION!" note regarding the optional cradle highlights a safety aspect related to moving parts, advising users to be careful to avoid catching fingernails when adjusting the cradle. This implies that users may need to interact with and adjust physical components of the scanner, which could be part of routine setup or minor adjustments rather than dedicated maintenance procedures. Regular cleaning of the book table and glass plate (if applicable) would be standard practice for maintaining image quality, though not explicitly mentioned.
| Brand | Konica Minolta |
|---|---|
| Model | PS7000C MKII |
| Category | Scanner |
| Language | English |