18
19
User Manual
Testing & Filling
Filling & Maintenance
Once all the water blocks have been connected,
the system can be filled with coolant. The fill port is
located on top of the reservoir. Remove the large
slot-headed screw (with a screwdriver or large
coin).
WARNING: Most coolants are electrically conductive. Use caution
when filling the system, and keep all liquids away from electronics and
power cables. In case of emergency during installation, immediately
unplug the primary AC power cable. Dry the system thoroughly before
proceeding.
!
CAUTION: When filling, the
cooling system should be higher
than all other liquid components
to avoid spillage.
!
When empty, the cooling unit should
be placed above all other water
blocks when adding liquid. Otherwise,
coolant can be forced out the fill port
instead of into the hoses.
Slowly fill the system. To maintain the product warranty, use only Koolance
approved coolant. Many alternative liquids and additives can cause permanent
damage to the cooling unit (through chemical reaction, corrosion, biological growth,
thermal expansion, viscosity, etc.).
The liquid coolant should be filled to about 6mm (1/4”) from the reservoir’s top. Do
not overfill.
If your pump has a speed control option, set it to the lowest level during
this time. Allow the pump to run until the liquid noise subsides.
During this process, cooling systems often need to be tilted gently
to allow air to escape from the pump and radiator. Until the pump
is “burped” in this manner, it can cavitate and there will be no
circulation. (This does NOT indicate a problem with the pump.)
The reservoir level will decrease during this procedure. Remove the fill
port cap and add more liquid when needed. If you frequently hear this
rushing noise in the future, it indicates the need for more coolant.
Replace the fill port on the reservoir. Do not overtighten the fill port.
The cooling system should be powered on to assist in the filling process. This also
allows you to check hose connections and make sure there are no tubing folds,
leaks, or blockages. If cooling a computer, this can be done without powering on
other hardware for extra safety (see below).
CAUTION: Jumping the incorrect ATX power supply pins can cause
permanent damage to the power supply.
!
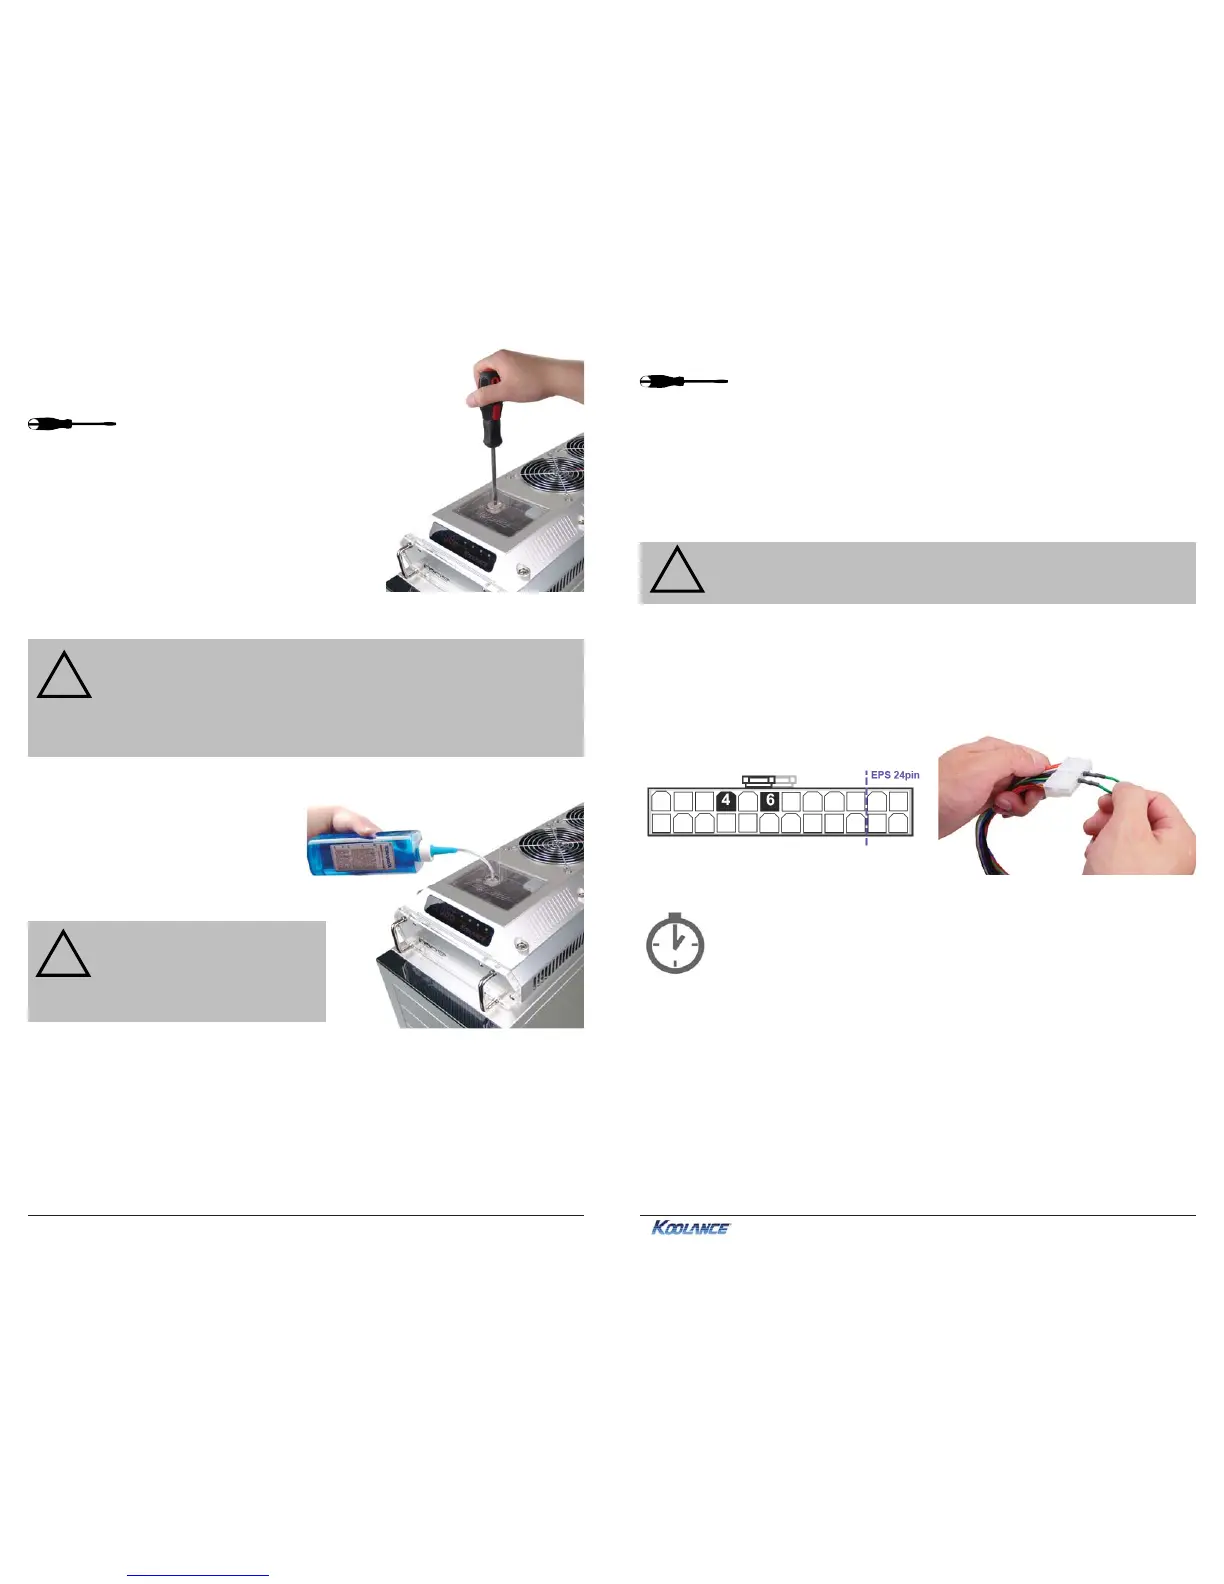
Make sure the AC power cord is attached to the power supply. If the power supply
has a rear switch, it must be set to the ON (-) position. Using the included green
Jumper Wire, insert the metal prongs into the fourth and sixth holes on the 20-24
pin ATX motherboard power supply plug (usually green and a black ground wire;
See diagram).
That’s it! Replace the ATX motherboard connection and boot-up the computer.