Do you have a question about the Koolbreeze Climateasy 12NG and is the answer not in the manual?
Step-by-step guide for setting up the portable air conditioner's exhaust system and placement.
Essential safety guidelines for domestic and commercial building wiring and smoke alarms.
Details the functions of each button on the remote control for operating the appliance.
Explains the buttons and indicators on the unit's display panel for control and feedback.
Instructions for cleaning the air filter to ensure optimal performance and longevity.
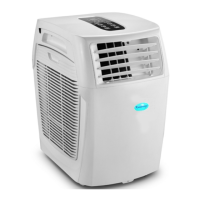
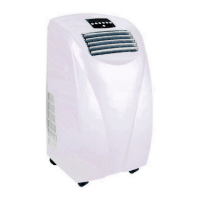
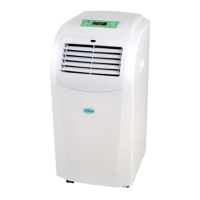
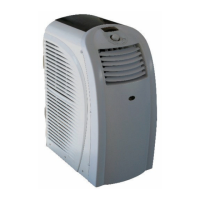
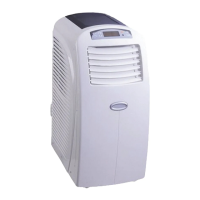
The Koolbreeze Climateasy 12NG is a portable air conditioner designed to provide a comfortable indoor environment through various functions, including air conditioning, heating, cooling, and dehumidifying. This versatile appliance is controlled via a remote control and features an LED display panel for easy operation. It offers three fan speeds and a 24-hour timer, allowing users to customize its operation to their specific needs.
Upon receiving the product, it is crucial to inspect it, including its cable and plug, for any signs of damage. If any damage is found, the product should not be used, and the supplier must be contacted immediately. As the appliance contains refrigerant gas, it must be kept upright at all times. After unpacking, it is recommended to wait three hours for the refrigerant gas to stabilize before use.
Installation involves placing the CLIMATEASY 12NG on a firm, flat, and level surface. The exhaust hose needs to be connected by expanding a small section of one end and screwing it into the indoor adapter, which then slides into a slot at the back of the unit. The other end of the hose is expanded and screwed into a fish-tail-shaped adapter. A two-part window adapter is then slid to the correct length to fit the window, which should be closed as much as possible to secure the adapter. The fish-tail adapter clips into the aperture in the window adapter. It is important to keep the hose as straight as possible, avoiding dips where moisture from the exhaust air could condense and fill the tube with water. The hose must not be crushed. While the hose can expand up to 1.8 meters, a shorter length ensures more efficient operation. The hose should not be extended or replaced with another type.
The remote control requires two AAA batteries, inserted with correct polarity. If the remote control is not used for a month or longer, the batteries should be removed. The supplied batteries are not rechargeable and should not be disposed of in a fire, as they may explode.
For domestic use, wiring should be tested periodically by a qualified electrician, at least every 10 years or upon change of occupancy. For office, retail premises, and buildings like village halls, wiring inspection is recommended every five years. Fitting smoke alarms in all buildings is advised and mandatory for new constructions.
This appliance is not intended for use by persons (including children) with reduced physical, sensory, or mental capabilities, or lack of experience and knowledge, unless supervised or instructed by a responsible person. Children should be supervised to prevent them from playing with the appliance. The appliance must be placed on a firm, flat surface and kept upright at all times. A minimum clearance of 300mm (1 foot) should be maintained between the sides of the appliance and any flammable materials, and 900mm (3 feet) from the top. It should not be placed on soft surfaces or covered. Air intakes and exhausts must not be obstructed. The appliance is for indoor use only and is not suitable for boats, caravans, bathrooms, or wet locations. The mains lead should not be placed beneath a carpet or rug. It must not be used in locations where paint, petrol, or other flammable liquids are used or stored. Always transport and store the appliance in an upright position. Care must be taken to prevent the appliance from falling over when there is water in the bucket. It must be vented outside the space being cooled or heated.
For office environments, the product must be safety-tested annually by a qualified electrician (PAT Tested) to comply with Electricity at Work Regulations. Regular PAT testing is also recommended for domestic use.
Before first use, the appliance should remain in an upright position for three hours. Plug the mains lead into a 13 Amp mains socket (unless permanently installed). If using an extension lead, ensure it is rated at 13 Amps or more and fully unwound. Switch the unit on at the mains socket.
The "ON/OFF" button starts the unit, illuminating the Power indicator. There will be a short delay (up to 3.5 minutes) before operation begins. The "MODE" button allows selection between Cooling, Dehumidifying, Fan, and Heating modes.
In Cooling mode, the unit cools if the room temperature exceeds the selected temperature. Use the TEMP+ and TEMP- buttons to set the desired room temperature. Once reached, the compressor stops, and the fan continues to run.
Dehumidifying mode removes humidity without affecting room temperature. The fan operates at its lowest speed. For optimal results, the exhaust tube should not be used; instead, a permanent drainage pipe should be fitted to the drain outlet.
Fan mode circulates air without altering room temperature or humidity. Changing fan speed will adjust the fan, though a discernable change may not be evident due to the fan type.
In Heating mode, the unit heats if the room temperature is below the selected temperature. Use the TEMP+ and TEMP- buttons to select the desired room temperature. Heating performance decreases if the outdoor temperature falls below 7°C. To set up Heat mode, the exhaust hose must be reversed.
The "SPEED" button adjusts the fan speed (low, medium, or high) in all modes except dehumidifying. The fan speed is indicated by the speed of segments on the windmill symbol on the LED display.
The TEMP+ and TEMP- buttons allow selection of the desired room temperature, ranging from 16°C to 31°C. Setting a lower temperature while heating or a higher temperature while cooling can reduce power consumption.
The "SWING" button controls the oscillation of the louvres.
If the "WATER FULL" indicator lights up, the condensate water tank is full, and the E2 error code will display, causing the unit to stop. This is rare, as most collected water evaporates through the exhaust air tube. To empty the water, switch off the unit, wait three minutes, disconnect from the mains, place a drainage pan under the drain outlet plug (at the bottom, rear center), remove the bung, drain the water, replace the bung, and reconnect. For continuous drainage, an 18mm diameter tube (not supplied) can be fitted to the drain outlet, ensuring it runs downhill. Unplug the CLIMATEASY 12NG when not in use.
The timer allows the unit to run for a selected time (1 to 24 hours) before turning OFF, or to wait for a selected time (1 to 24 hours) before turning ON. To set a timed turn-off, press the timer button while the unit is ON, then use the + and - buttons to set the delay. To set a timed turn-on, press the timer button while the unit is OFF (but connected to mains), then use the + and - buttons to set the delay. To cancel the timer, press the POWER button.
In cooling mode, pressing the SLEEP key increases the temperature by 1°C after one hour and by a maximum of 2°C after two hours. Pressing SLEEP again cancels this setting. In heating mode, pressing the SLEEP key decreases the temperature by 1°C after one hour and by a maximum of 2°C after two hours.
The display shows the current setting temperature or timer setting. When the temperature or timer is adjusted, the new setting is shown temporarily before returning to the current setting. The display also shows error codes if a fault occurs.
Before cleaning, turn off and disconnect the appliance from the mains supply. The case can be cleaned with a damp cloth and a drop of washing-up liquid to remove dust or dirt. Avoid strong detergents or solvents, as they may damage the plastic.
To clean the filter, unclip it from the side panel, remove dust and dirt with a vacuum cleaner. The filter should be cleaned every two weeks for optimal performance. Use a dry 1-inch (25mm) paintbrush to remove dust from the grilles. If the mains lead is damaged, it must be replaced by the manufacturer or an authorized service center.
If the CLIMATEASY 12NG is not operating, check that the mains plug is firmly in the socket and switched ON. A delay of up to 3.5 minutes occurs before operation starts after switching on.
Before storing, empty all water from the drain and run the appliance in "fan only" mode for a few hours to thoroughly dry the inside. Clean the filter, unplug the mains cable, and store the appliance in its original box in an upright position.
This appliance must not be disposed of with domestic household waste. Most local authorities offer specific collection systems for appliances, free of charge to the end-user. When replacing an old appliance with a new one, the retailer may take the old appliance for disposal. This air conditioner contains R410a refrigerant gas. At the end of its life, the product must be disposed of according to local regulations.
For EU regulation EN12102, this is a "local air conditioner" and produces less than 65Dbl sound energy.
| power supply | 230V ~ |
|---|---|
| power consumption (cooling) | 1250W |
| power consumption (heating) | 1250 W |
| heating capacity | 3500 W (12000 BTU/hour) |
|---|---|
| cooling capacity | 3500 W (12000 BTU/hour) |
| dehumidifying capacity | 28 litres/day |
| working temperature (cooling) | 16 - 32 °C |
|---|---|
| working temperature (heating) | 7 - 23 °C |
| air flow | 420 m[3]/h |
| dimensions | 350×535×600 mm |
|---|---|
| net weight | 28 kg |