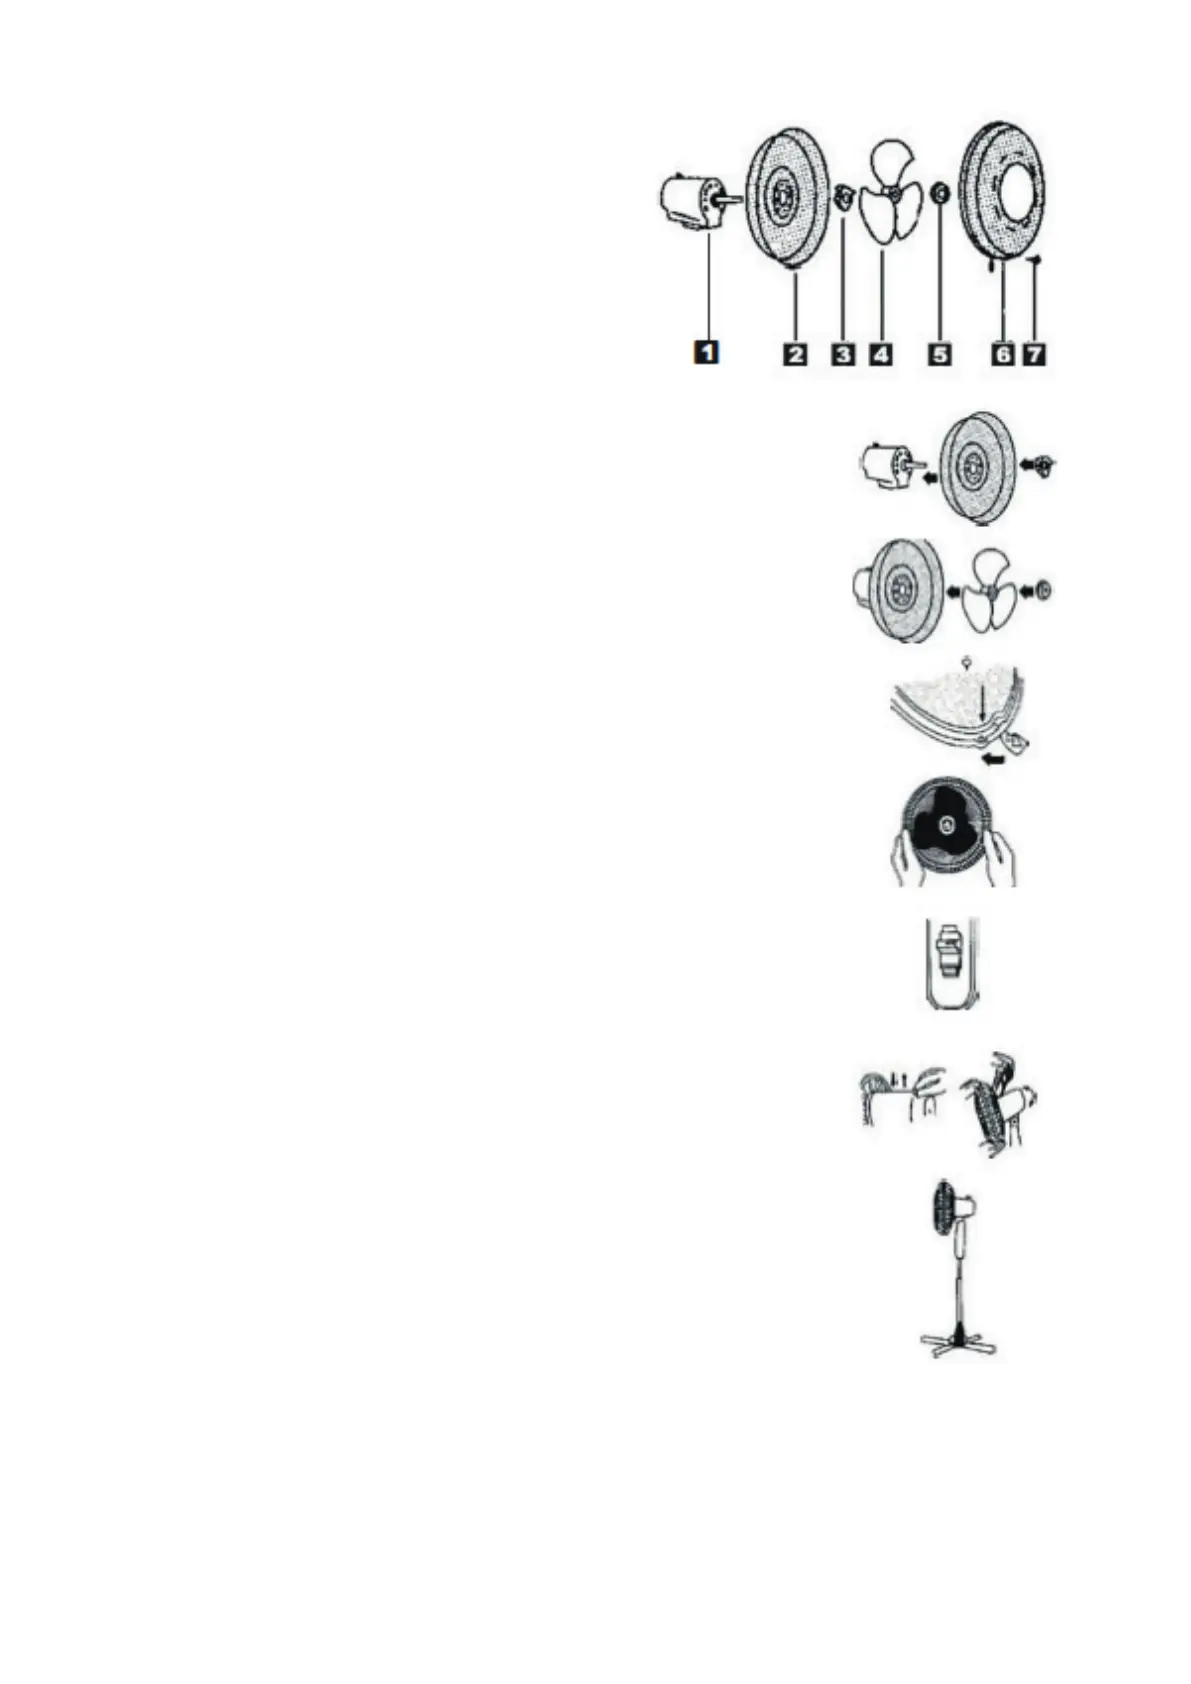
ASSEMBLING THE FAN PROPELLER
COMPONENTI
1. Motor
2. Rear safety grille
3. Safety grille locking nut
4. Propeller
5. Nut lock
6. Front safety grille
7. Screw
1. Mount the rear grille on the engine and secure it with the nut.
2. Place the propeller on the motor shaft and secure it with the nut.
3. Assemble the front grille in one of the following two ways depending
on your fan model:
(1) Assemble the grille by placing the hook at the top above the rear
grille. Join the two grills together and position the safety catches
(2) Assemble the front shell with the logo. Taking care to loosen the
locking ring nut positioned on the base support rod, insert the
rod holding the motor body as assembled into the support rod.
Tighten the ring nut.
(3) Mount the front and rear grids making sure that the clips can be
closed to block the safety grids of the fan.
PRECAUTIONS
Do not operate the fan, if the blade is damaged or cracked.
OPERATING INSTRUCTIONS:
1. Speed control: you can adjust the speed of the fan using a button
or a knob of the switch. Use the button or the knob according to the
following instructions:
(1) Using the knob: slide the knob to one of the three speed positions
(1-2-3) in order to switch on the fan. Set the knob to “O” position in
order to switch o the fan.
(2) Using the buttons: simply press one of the three buttons
indicating the speed level (1-2-3) in order to switch on the
appliance. Press the “O” button to switch o the fan.
2. Oscillation: press the knob in order to activate it. Block the knob in
order to stop the fan.
3. Tilt function: switch o the appliance before adjusting the inclination. You can direct the airflow
upwards or downwards simply moving the safety grid of the fan.
4. Adjusting the height: Loosen the height knob, adjust the fan at desired position then tighten the
knob again.