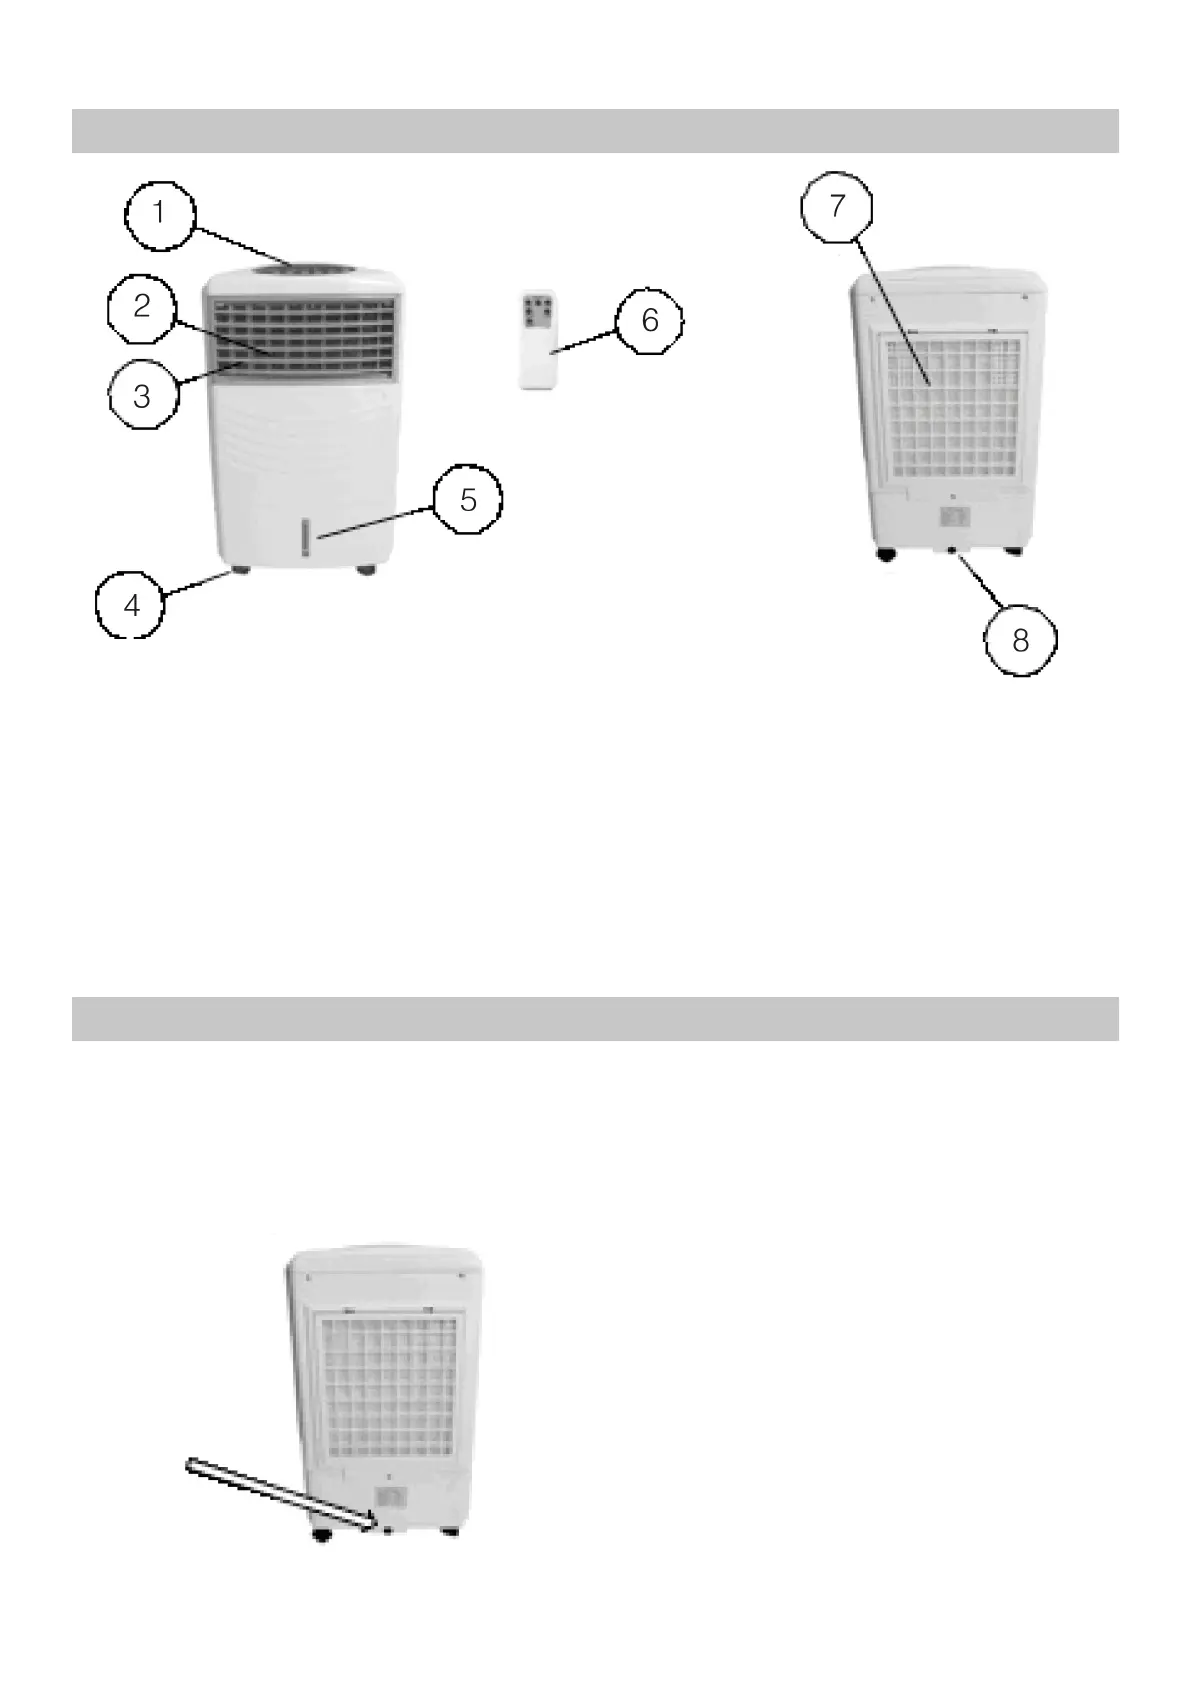
COMPONENTS CHANGE IMAGES
1 Control Panel
2 Left-Right bale
3 Up-Down bale
4 Castor Wheels
5 Water Level control Window
6 Remote Control
7 Rear Mesh Filter
8 Drain Plug
Note: 2 x AAA batteries for the Remote Control are not included
Preparation
• When ready to use the cooler, make sure that the power switch is set to OFF and the unit is
disconnected from the power point.
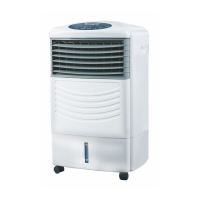
• Ensure the rubber drain plug is fully inserted into the hole (located in the rear of the unit at the
bottom).
Drain Plug