8. Position the Flaring Cone over the Adapter.
See Figure C.
9. Turn the Handle of the Yoke driving the Adapter into the
end of the tube. The tube will flare. Continue flaring
until the shoulder of the Adapter touches the Flaring Bar.
10. Back off the Yoke and remove the Adapter.
11. Reposition Flaring Cone over tubing and screw the
Yoke down again on the end of the tube until the tubing
folds back on itself, forming a 45 degree double flare.
12. Loosen the Yoke, and the wing nuts. Rem
ove the Yoke
and Flaring Bar from the tube.
13. Clean and lightly lubricate the tool, and store it out of
reach of children.
Maintenance and Servicing
1. Before each use, inspect general condition of tool. Check for misalignment or binding of moving parts,
cracked or broken parts, and any other condition that may affect its safe operation. Do not use
damaged equipment.
2. After use, clean external surfaces. Then dry and lubricate all moving parts. Do not use solvents.
3. Wh
en storing, keep Flaring Tool and its accessories in its Carrying Case and store in a clean, dry,
safe location.
4. CAUTION! All maintenance, service, and repairs not mentioned in this manual must only be
performed by a qualified service technician.
Page 3
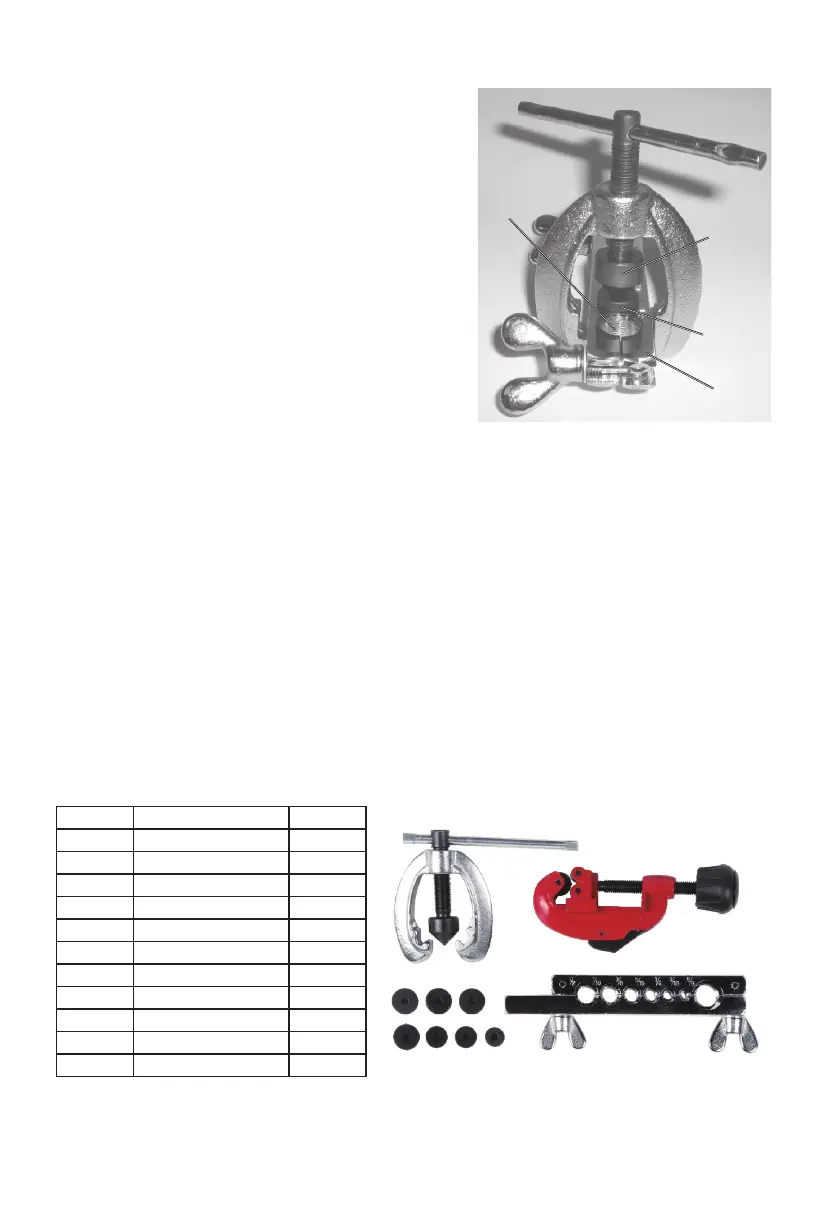
Flaring
Cone
Flaring Bar
Adapter
Tube
Figure C
Parts List and Diagram
1
2
3
4
56
7
8
9
10
Qty
1
1
1
1
1
1
1
1
1
Description
Part
1
2
3
4
5
6
7
8
9
110
Yoke
Flaring Bar
3/16" Adapter
1/4" Adapter
3/8" Adapter
7/16" Adapter
1/2" Adapter
5/8" Adapter
5/16" Adapter
Tube Cutter
111
Carrying Case (not shown)
support@koopool.com
 Loading...