III. Instruction for Use
1. Code connection for remote control:
Before starting up the product, connect the remote control and the skateboard in the
way of code connection. Each product is connected before delivery. Hereby we explain the
way for the connection.
Operating Steps:
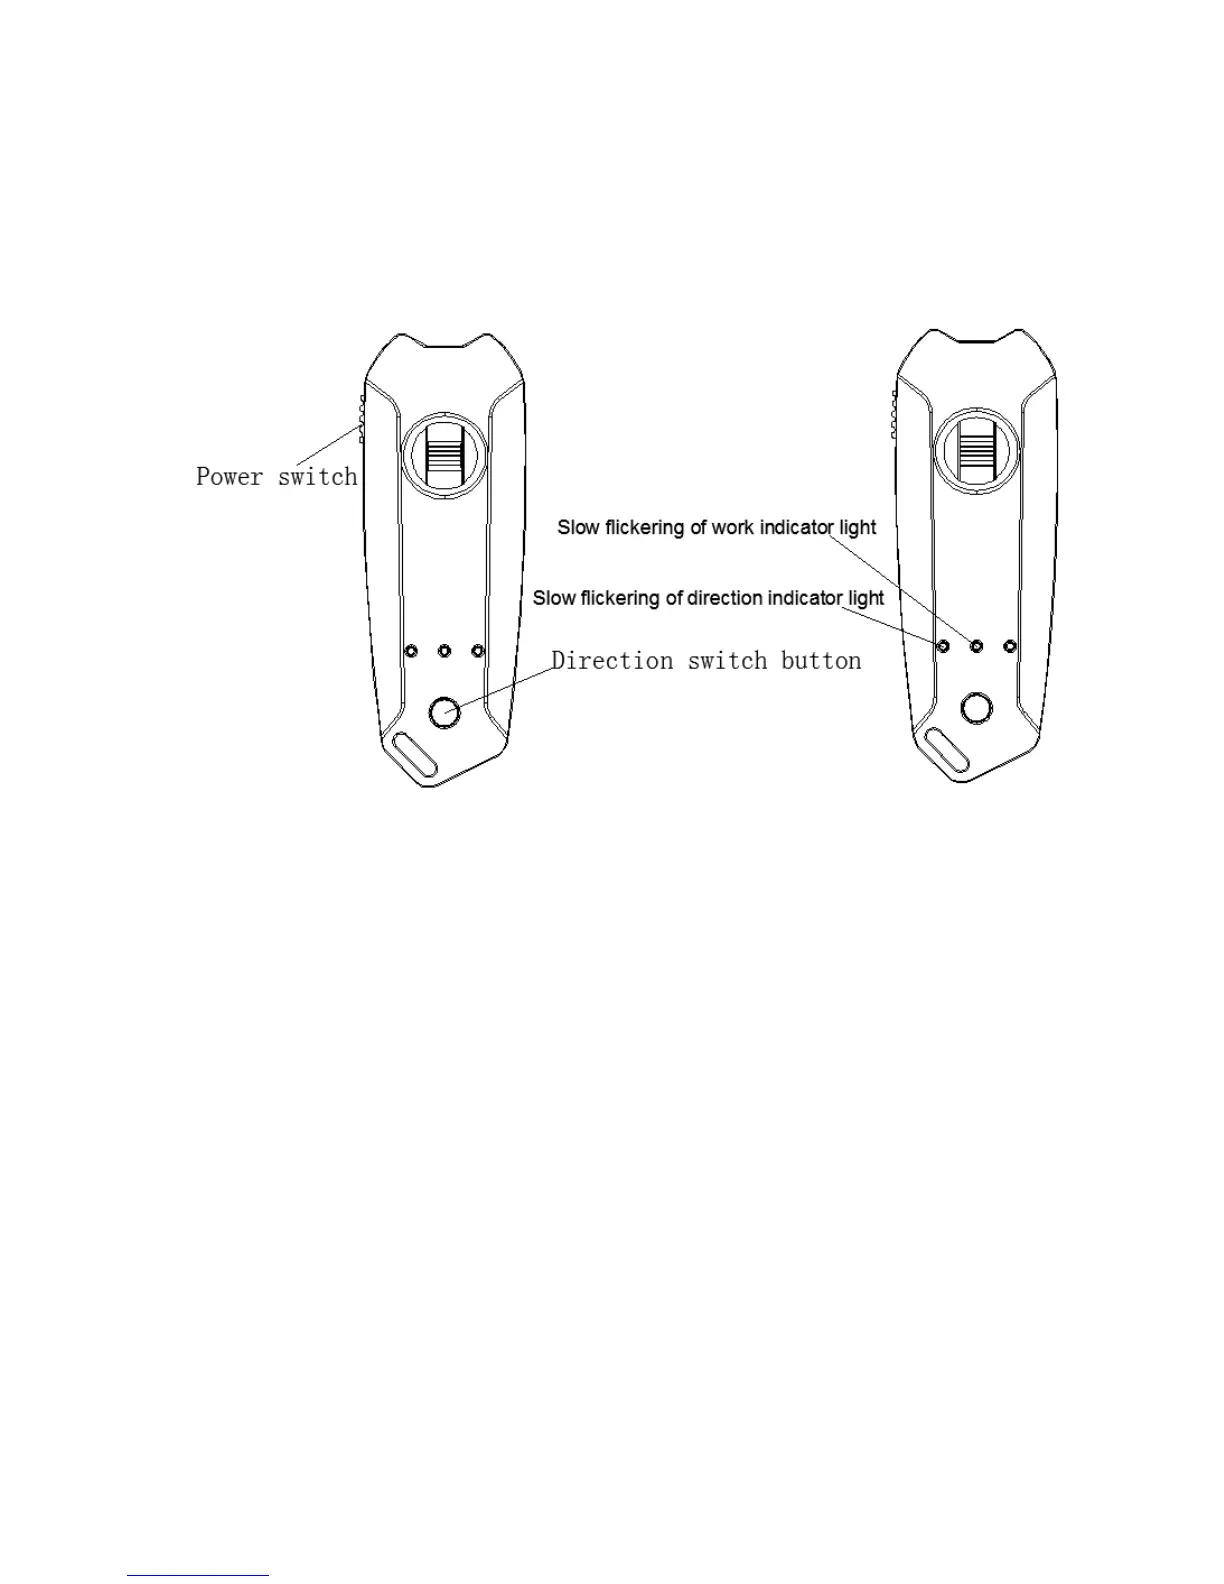
Step 1: Press and hold the direction switch button and switch on the power of remote control.
The signal indicator light and switch indicator light will flicker slowly at the same time.
Step 2: After that, press and hold the power switch of the electric skateboard for 3 seconds
until both the signal indicator light and switch indicator light flicker quickly, then, release the
switch.
Step 3: Re-start the skateboard and remote control to complete the connection.
Step 4: Remote control 10 minutes does not use will automatically shut down.
2. Colors of the remote control indicator lights
2.1 Charge lamp: red light is on
2.2 Signal indicator light: blue or red light will be on when the signal is connected.
2.3 Remote control battery indicator light: blue light means high battery level while red light
means low battery level.
2.4 Direction switch indicator light: red light is on.
3. Use Method
3.1 Operating steps:
Step 1: Mount the battery correctly. Connect the battery base with skateboard base firmly by
thumb screw.
Step 2: Start it up to check if the remote control is well connected with the skateboard by
signal. The middle signal indicator light will flicker if successfully connected. If the signal
does not flicker fast, please reconnect the remote control with the skateboard according to
 Loading...