d. The system will return to the Create label screen.
12. To calculate the ink consumption per print:
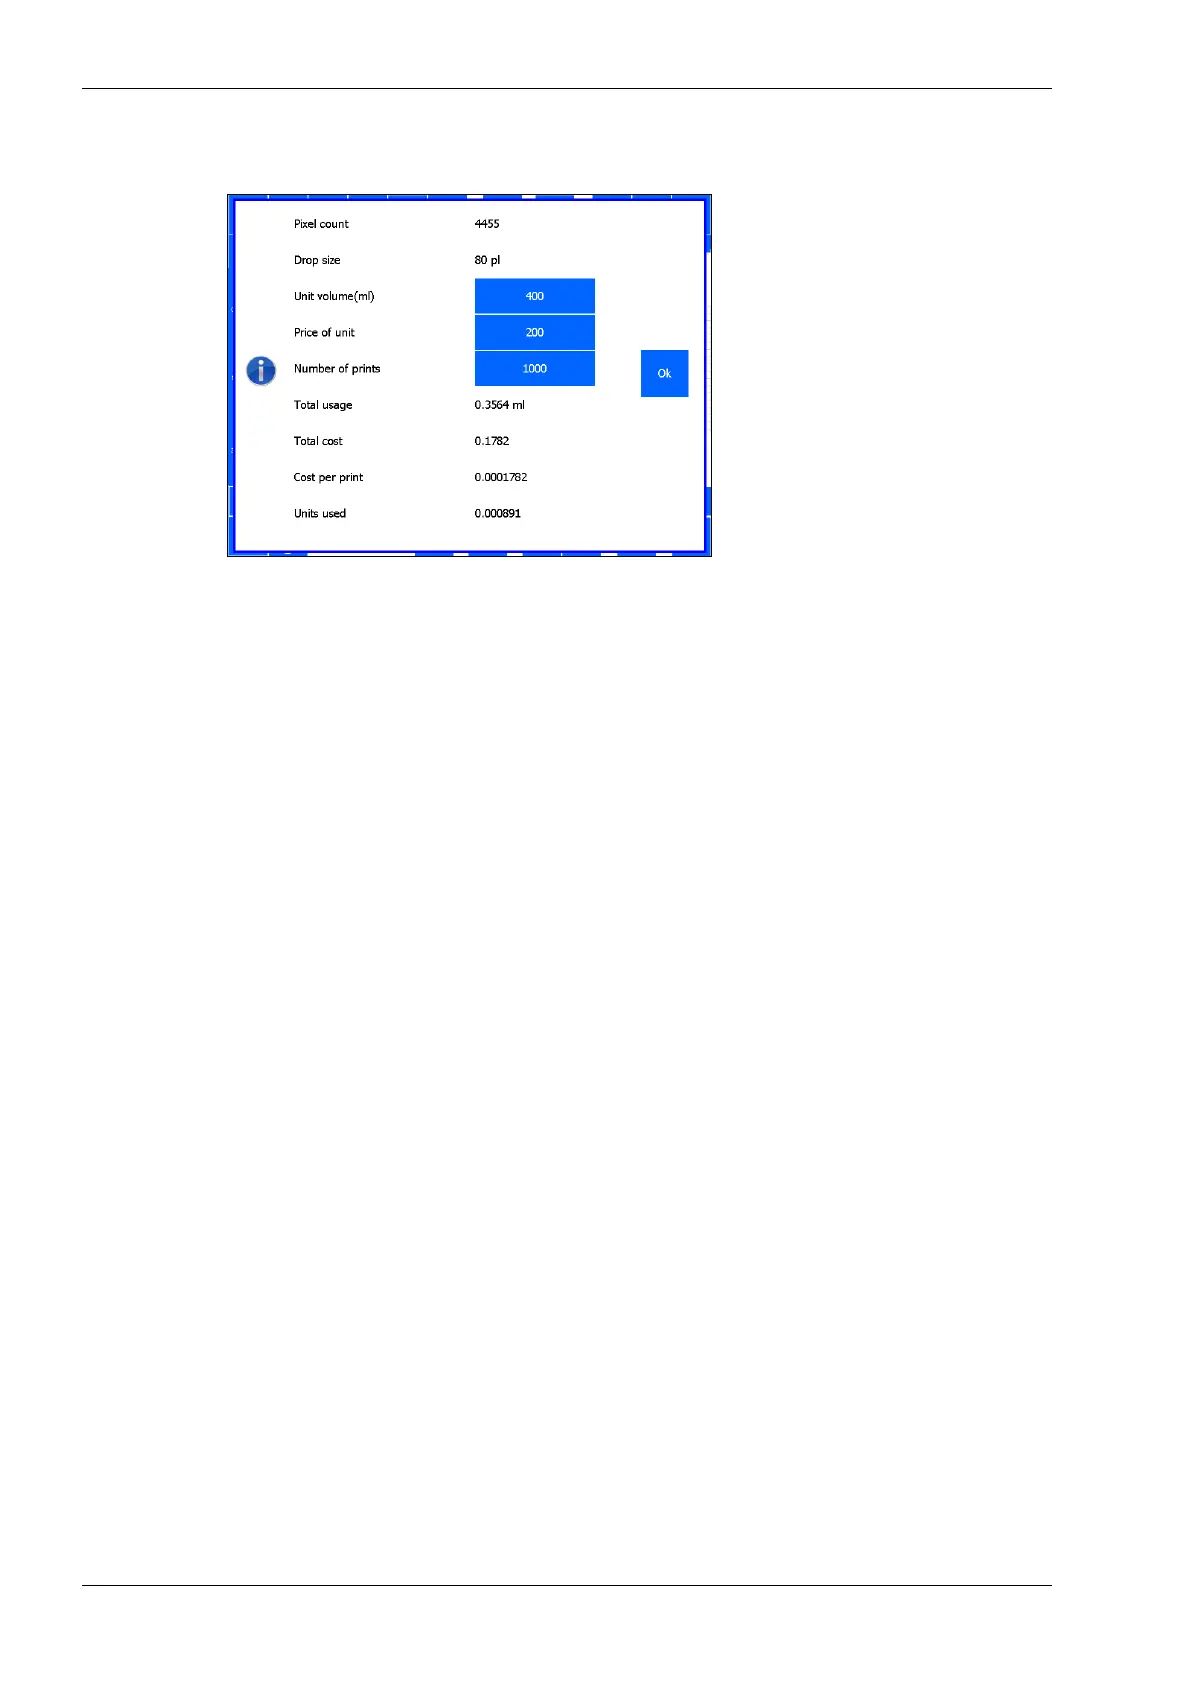
a. Touch the Ink calculator icon.
Fig. 8.17 Ink calculator screen
b. The system will mention the Pixel count of the current label design and the drop size of a
single ink droplet of the coding unit that is connected to the control unit.
c. Enter the Unit volume (ml) – normally the volume of one set of ink of 400ml.
d. Enter the Price per unit – normally the price of one set of ink.
e. Enter the number of prints to be made.
f. After entering each value the system will automatically calculate:
▪ Total usage: the total ink consumption for printing the set amount of prints.
▪ Total cost: the total cost for printing the set amount of prints.
▪ Cost per print: the cost for printing a single print.
▪ Units used: the amount of ink units needed for printing the set amount of prints –
normally the amount of ink sets of 400ml needed.
▪ Touch Ok to return to the Create label screen.
PS: The calculation of the ink consumption and therefore of the price (per print and total) is an
approximation of reality. The number of pixels used to print a label is exact, however, the droplet
size is an approximation based on the data from the manufacturer of the printhead used. The
calculation does not take into account the tolerances in droplet size. Also the "stretch" function is
not included in the calculation. By default, this is set to 1. If it is set to a different value, then
multiply the result of the calculation by the Stretch value.
With the X72 it is also possible to change the offset voltage. If it is made larger than "0", the droplet
size will increase. If it is made smaller than "0", the droplet size will become smaller.
13. To move a label item, select it by tapping it. Then press and hold it and drag the item to the desired
location. One can also use the arrow keys for more precision. It is also possible to select a group of
items to be moved. Place the finger in an empty area and drag the purple selection box over the
items to be moved. The item selection box will appear purple when it is selected. After selecting the
items, press and release on an item which is the reference point for moving. Next, place the finger
on the item which selection box is blue now and drag the group to the new location.
14. To view extra label information:
a. Press icon Show hidden properties. All the items in the label will show a rectangle around it
and some extra information in regards to the item. At the left bottom of the design area, 5
alignment functions and goto next label item button also appear and will be explained below:
b. The grey rectangle indicates the area that could be updated if the item is an autocode (time,
date, number or a variable). If items overlap, it’s possible that the contents are partially
overwritten by other items. The grey rectangles give a good indication of how far the items
can actually overlap each other.
 Loading...