DSP-62-AEC Quick Start Guide
This guide helps you install and use your DSP-62-AEC for the first time.
Go to www.kramerav.com/downloads/DSP-62-AEC to download the latest user manual and check if
firmware upgrades are available.
Step 1: Check what’s in the box
DSP-62-AEC Digital Sound Processor
1 Kramer C-USB/AB-6 cable
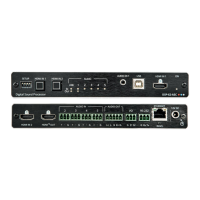
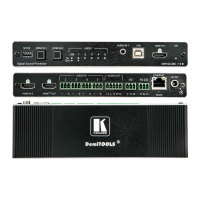
Step 2: Get to know your DSP-62-AEC
Set DIP-switch 4 to ON to upgrade the firmware, OFF (default) for normal
operation (other DIP-switches are reserved for future use).
Press to select HDMI IN 1 input (on the front panel).
Press to select HDMI IN 2 input (on the rear panel).
Lights green when an audio source is received from the USB host port.
Lights green when an audio signal is sent to the USB host port.
Lights green when a signal is present, lights red when clipping is detected.
For IN 2 to IN 5, when connecting a microphone and setting to Mic mode via
the embedded Web pages, lights blue.
Lights green when a signal is present, lights red when clipping is detected.
Connect to an unbalanced audio source.
USB Type B Bi-Directional Host Port
Connect to an audio source or acceptor.
Connect to an HDMI source.
Lights green when the device is powered.
Connect to an HDMI source.
Connect to an HDMI acceptor.
AUDIO IN 3-pin Terminal Block Connectors
(2 to 5)
Connect to up to 4 mono balanced audio sources (mono or mic level with
selectable 48V).
AUDIO OUT 5-pin Terminal Block Connector
Connect to a stereo balanced audio acceptor.
I/O Terminal Block Connectors (1 to 2)
Connect to up to two sensors, switches, LEDs, or relays.
RS-232 (G, Rx, Tx) Terminal Block Connector
Connect to a PC/serial controller
Connect to a PC via a LAN.
Press and hold while powering the device to reset to factory default values,
including IP settings.
Connect to the power supply and to the mains electricity.
The terms HDMI, HDMI High-Definition Multimedia Interface, and the HDMI Logo are trademarks or registered trademarks of HDMI Licensing Administrator, Inc.