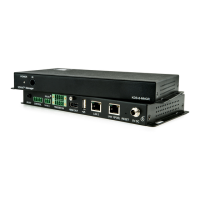
Step 5: Connect power
Connect the power adapter and cord to KDS-8-MNGR and plug it into the mains electricity. If the connected network switch
supports the PoE, KDS-8-MNGR can optionally be powered directly via the LAN 1 (POE) port.
Safety Instructions (See www.kramerav.com for updated safety information)
Caution:
• For products with relay terminals and GPI\O ports, please refer to the permitted rating for an external connection, located next to the terminal or in the User Manual.
• There are no operator serviceable parts inside the unit.
Warning:
• Use only the power cord that is supplied with the unit.
• Disconnect the power and unplug the unit from the wall before installing.
• Do not open the unit. High voltages can cause electrical shock! Servicing by qualified personnel only.
• To ensure continuous risk protection, replace fuses only according to the rating specified on the product label which located on the bottom of the unit.
Step 6: Operate KDS-8-MNGR
Device Discovery
To discover a device:
1. Connect the unit and your PC/Laptop to the same active network via LAN 1 or LAN 2 port.
2. Connect to a standard HDMI™ display to view the unit’s IP information in System Setting tab.
The current IP address can be verified using the HDMI output or RS-232.
Once the IP settings are known, you can use it to connect to the device via Telnet or Web GUI.
Web GUI Operation
After connecting to the Web GUI using device IP address in a web browser, the Web GUI loads and displays the System tab.
To use the Web GUI:
1. Click Login to open the authentication window.
2. Enter the appropriate user name and password.
The default user name / password is “admin / admin”.
3. Click Enter to log in.
If a keyboard is not available, (for example, when using a touch screen) an on-screen keyboard can be activated by
clicking on the keyboard icon ( ).
4. After logging in, use the menu tabs to operate the device.
In the System tab, click Logout to disconnect the currently connected user from the Web GUI, and return to the login page.
When not logged in, only the “Monitor & Control” and “System” tabs are available.
 Loading...