For connecting to the on-wall mount unit.
For connecting to the tabletop mount or the panel mount plate.
To prevent potential damage to the Touch Panel, use only Kramer supplied screws
and mounts.
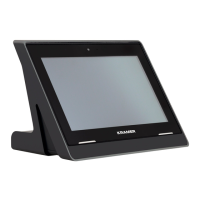
Step 3: Mounting the KT-107
Mounting on a table using one of the following options:
Portable Mount: place the tabletop mount on the table. Connected cables remain visible and the table remains intact.
Secure Mount: secure the tabletop mount to the table as follows:
1. Measure the exact location on the surface of the table where you want to install the KT-107.
2. Drill a hole in the table and optionally cut the cable pass-through opening according to the cut-out dimensions defined in
the user manual.
3. Secure the tabletop mount to the table using the M5x60 secure screw.
4. Connect the Ethernet port to a PoE-enabled source. Optionally, you can connect the power adapter too (as backup).
5. Replace the appropriate cover and place the KT-107 over the tabletop mount (the Touch Panel is magnetically held in
place), by first inserting the lower part of the Touch Panel then carefully laying the KT-107 in place.
6. Wait for the Home-page to load and then secure the KT-107 to the tabletop mount from the rear side (using 2 M2x4
screws, supplied with the unit).
7. Optionally, lock the tabletop mount with a Kensington locker (not supplied).
Mounting on the wall:
Before mounting KT-107 on a wall, install an in-wall junction box (recommended boxes are listed in the user manual)
1. Attach the on-wall mount unit to the installed junction box (top side up see indication arrows on unit).
Connect Ethernet and/or power cables and optionally, insert the right-angle USB cable (supplied) for connecting to an
adjacent external USB device.
2. Screw the 4 wall-mounting screws (supplied) through the screw openings.
The various screw openings fit various types of wall junction boxes.
3. On the rear side of the KT-107, remove the screw cover and the cover (by slightly pressing downwards and then pulling
out) and set aside.
4. Attach the panel mount plate to the rear side of the KT-107 (using 4 M2x4 screws, supplied).
5. Connect the flat cable from the on-wall mount
(attached to the in-wall junction box) to the connector
on the rear of KT-107.
6. Hang the KT-107 on the wall by sliding the tabs on the
attached panel mount plate over the grooves on the
on-wall mount unit.
Safety Instructions
There are no operator serviceable parts inside the unit.
Use only the Kramer Electronics power supply that is provided with the unit.
Disconnect the power and unplug the unit from the wall before installing.
See www.KramerAV.com for updated safety information.

 Loading...