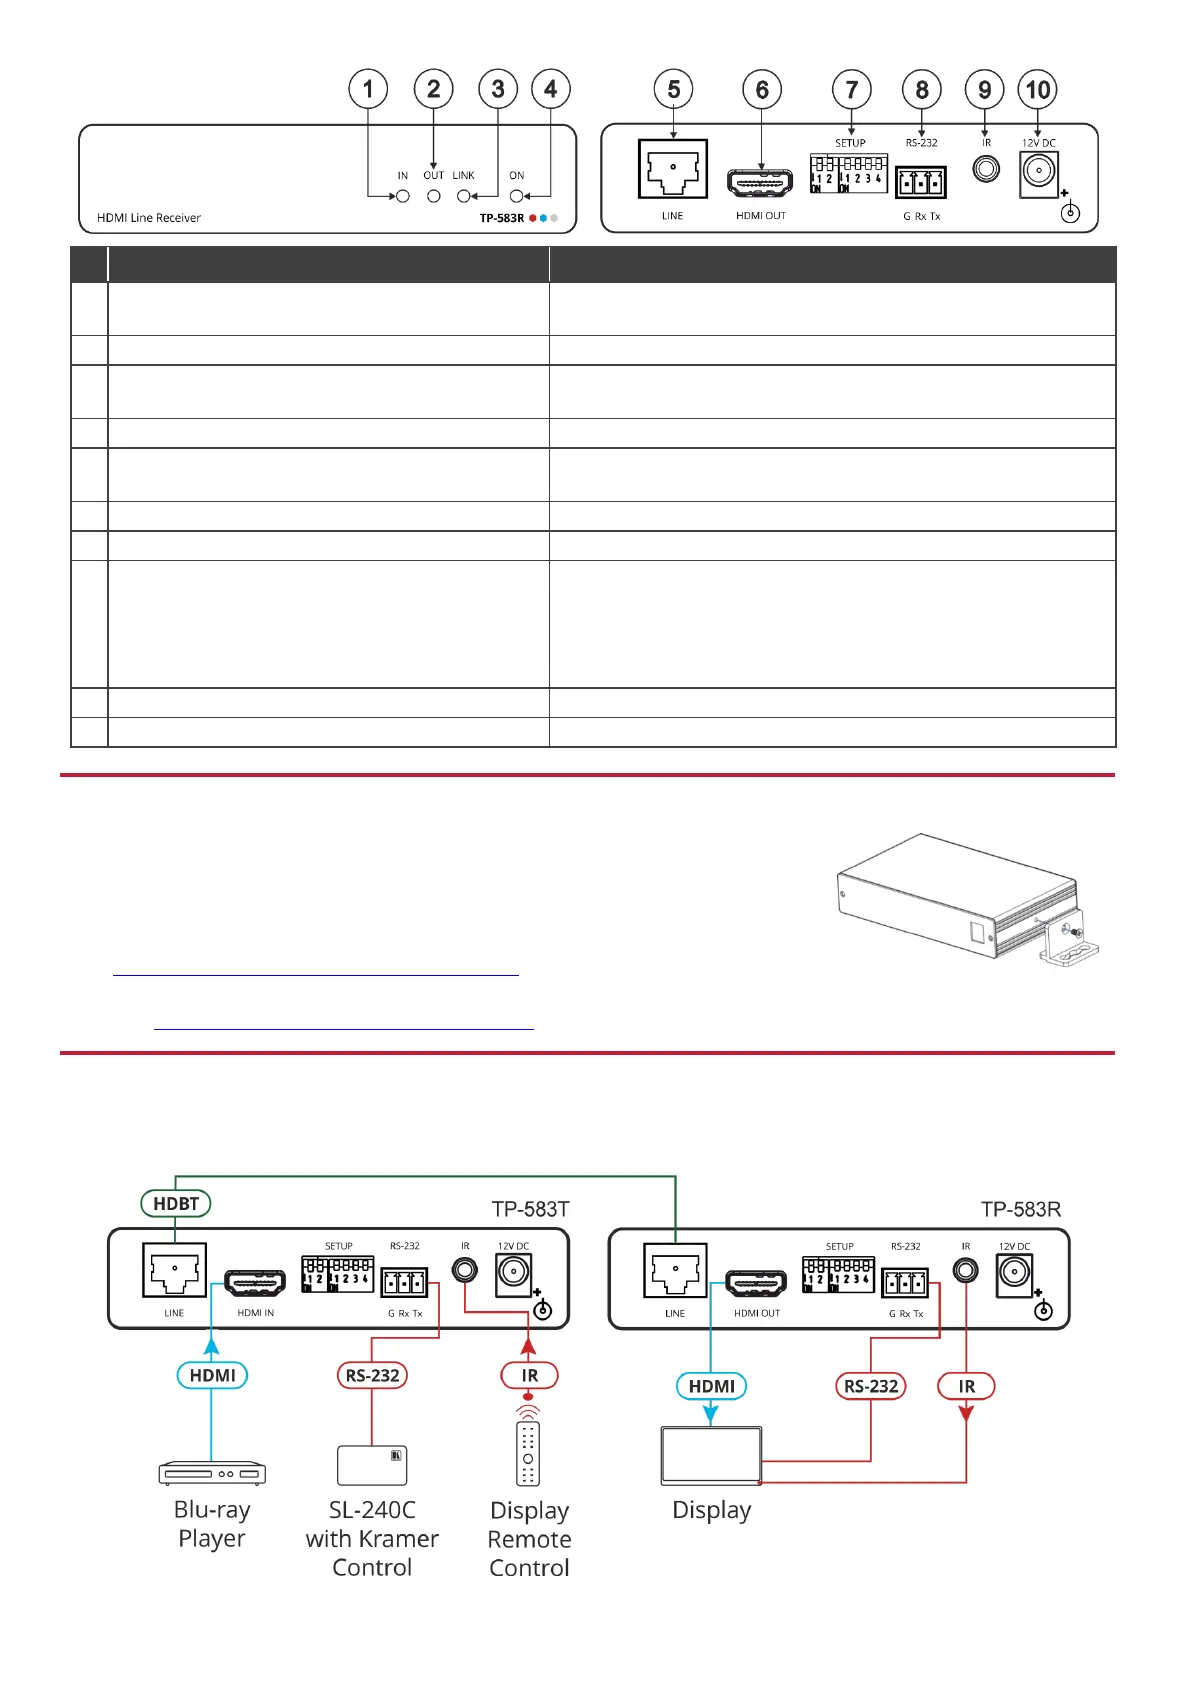
Lights green when an active, far-end source device input signal is
detected via the HDBT link.
Lights green when an active sink (acceptor) connection is detected.
Lights green when an HDBT link is established with the HDBaseT
transmitter.
Lights green when the device receives power.
Connect to the RJ-45 HDBT LINE connector on a transmitter (for
example, TP-583T, TP-780T and so on).
Connect to an HDMI acceptor.
Set the operation DIP-switches.
RS-232 (G, Rx, Tx) 3-pin Terminal Block Connector
Connect to a laptop to control the receiver or perform firmware
upgrade.
Connect to a serially controlled device (for example, the HDMI OUT
acceptor) to enable its control by a remote controller device (for
example, SL-240C) that is connected to TP-583T.
IR 3.5mm Mini Jack Connector
Connect to an external infrared emitter / sensor.
12V DC connector for powering the unit.
Step 3: Install TP-583T/TP-583R
Install TP-583T/TP-583R using one of the following methods:
• Attach the rubber feet and place the unit on a flat surface.
• Fasten a bracket (included) on each side of the unit and attach it to a flat surface.
For more information go to
www.kramerav.com/downloads/TP-583T, TP-583R.
• Mount the unit in a rack using the recommended rack adapter
(see www.kramerav.com/product/TP-583T, TP-583R).
Step 4: Connect the inputs and outputs
Always switch OFF the power on each device before connecting it to your TP-583T/TP-583R. For best results, we recommend that
you always use Kramer high-performance cables to connect AV equipment to TP-583T/TP-583R.
 Loading...