VM-1021N Quick Start Guide
This guide helps you install and use your VM-1021N for the first time.
Go to www.kramerav.com/downloads/VM-1021N to download the latest user manual and check if firmware
upgrades are available.
Step 1: Check what’s in the box
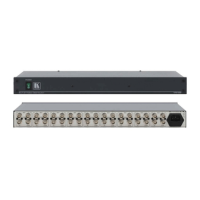
VM-1021N 1:20 Video Distributor
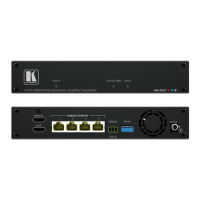
Step 2: Get to know your VM-1021N
Front Panel
Illuminates when the device is turned on
Controls cable equalization of SET 4 video outputs 16-20
SET 4 ADJUST LEVEL Trimmer
Controls level of SET 4 video outputs 16-20
Controls cable equalization of SET 3 video outputs 11-15
SET 3 ADJUST LEVEL Trimmer
Controls level of SET 3 video outputs 11-15
Controls cable equalization of the SET 2 video outputs 6-10
SET 2 ADJUST LEVEL Trimmer
Controls level of SET 2 video outputs 6-10
Controls cable equalization of the SET 1 video outputs 1-5
SET 1 ADJUST LEVEL Trimmer
Controls level of the SET 1 video outputs 1-5
Connects to a composite/component/ analog sync video source
Selects “75Ω“ or “HI-z” impedance when pressed (for looping select "Hi-z")
Provides video looping capability to increase number of outputs
OUT SET 1 BNC Connectors (1-5)
SET 1 of 5 amplified buffered and clamped video outputs 1-5
OUT SET 2 BNC Connectors (6-10)
SET 2 of 5 amplified buffered and clamped video outputs 6-10
OUT SET 3 BNC Connectors (11-15)
SET 3 of 5 amplified buffered and clamped video outputs 11-15
OUT SET 4 BNC Connectors (16-20)
SET 4 of 5 amplified buffered and clamped video outputs 16-20
AC connector, fuse and power switch enabling power supply to the unit