VP-475UX Quick Start Guide
This guide helps you install and use your VP-475UX for the first time.
Go to www.kramerav.com/downloads/VP-475UX to download the latest user manual and check if firmware
upgrades are available.
Step 1: Check what’s in the box
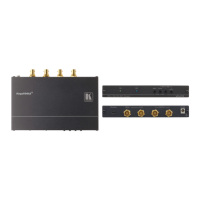
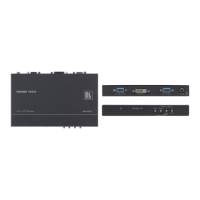
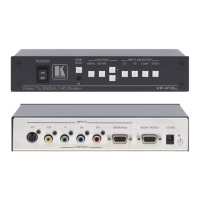
VP-475UX Dual Channel 12G SDI to HDMI Scaler
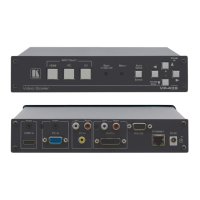
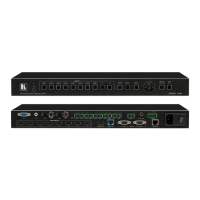
Step 2: Get to know your VP-475UX
Illuminate to indicate the input resolutions (1 and 2):
Red – SDI input signal is SD:
NTSC – 480i or 480p Interlaced or progressive video
formats.
PAL – 576i or 576p Interlaced or progressive video
formats.
Yellow – SDI input signal is HD:
1.5G – 720p progressive or 1080i interlaced video
format.
3G – 1080p progressive video format.
Blue – SDI input signal is UHD:
6G – 2160p30 progressive video format.
12G – 2160p60 progressive video format
Connect to SDI sources (1 and 2).
Connect to the IN connector of the next unit in the daisy chain or connect to a local display
(1 and 2).
For best results, when an input is connected and it’s corresponding LOOP is
not used, connect a 75Ω terminator (supplied) to the unused LOOP connector.
For example, if IN 1 is connected and LOOP 1 is not in use, connect a
terminator plug to LOOP 1.
Connect to HDMI acceptors (1 and 2).
ANALOG OR AES/EBU XLR
(L, R) Connectors
Connect to a balanced stereo audio acceptor or to a digital AES/EBU receiver (OUT 1 and
OUT 2).
Connect to a browser device via LAN and also use for firmware upgrade.