Press briefly to restart the system.
Press for ≥10 seconds to reset IP settings to factory default values.
The device powers up and loads the factory default values.
Device control and firmware upgrade.
AC connector enabling power supply to the VP-475UX.
Switch for turning the unit ON and OFF.
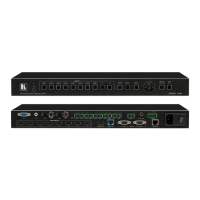
Install VP-475UX using one of the following methods:
Remove the three screws from each side of the unit, reinsert those screws through the rack ears
and mount on a 19" rack.
Attach the rubber feet and place the unit on a flat surface.
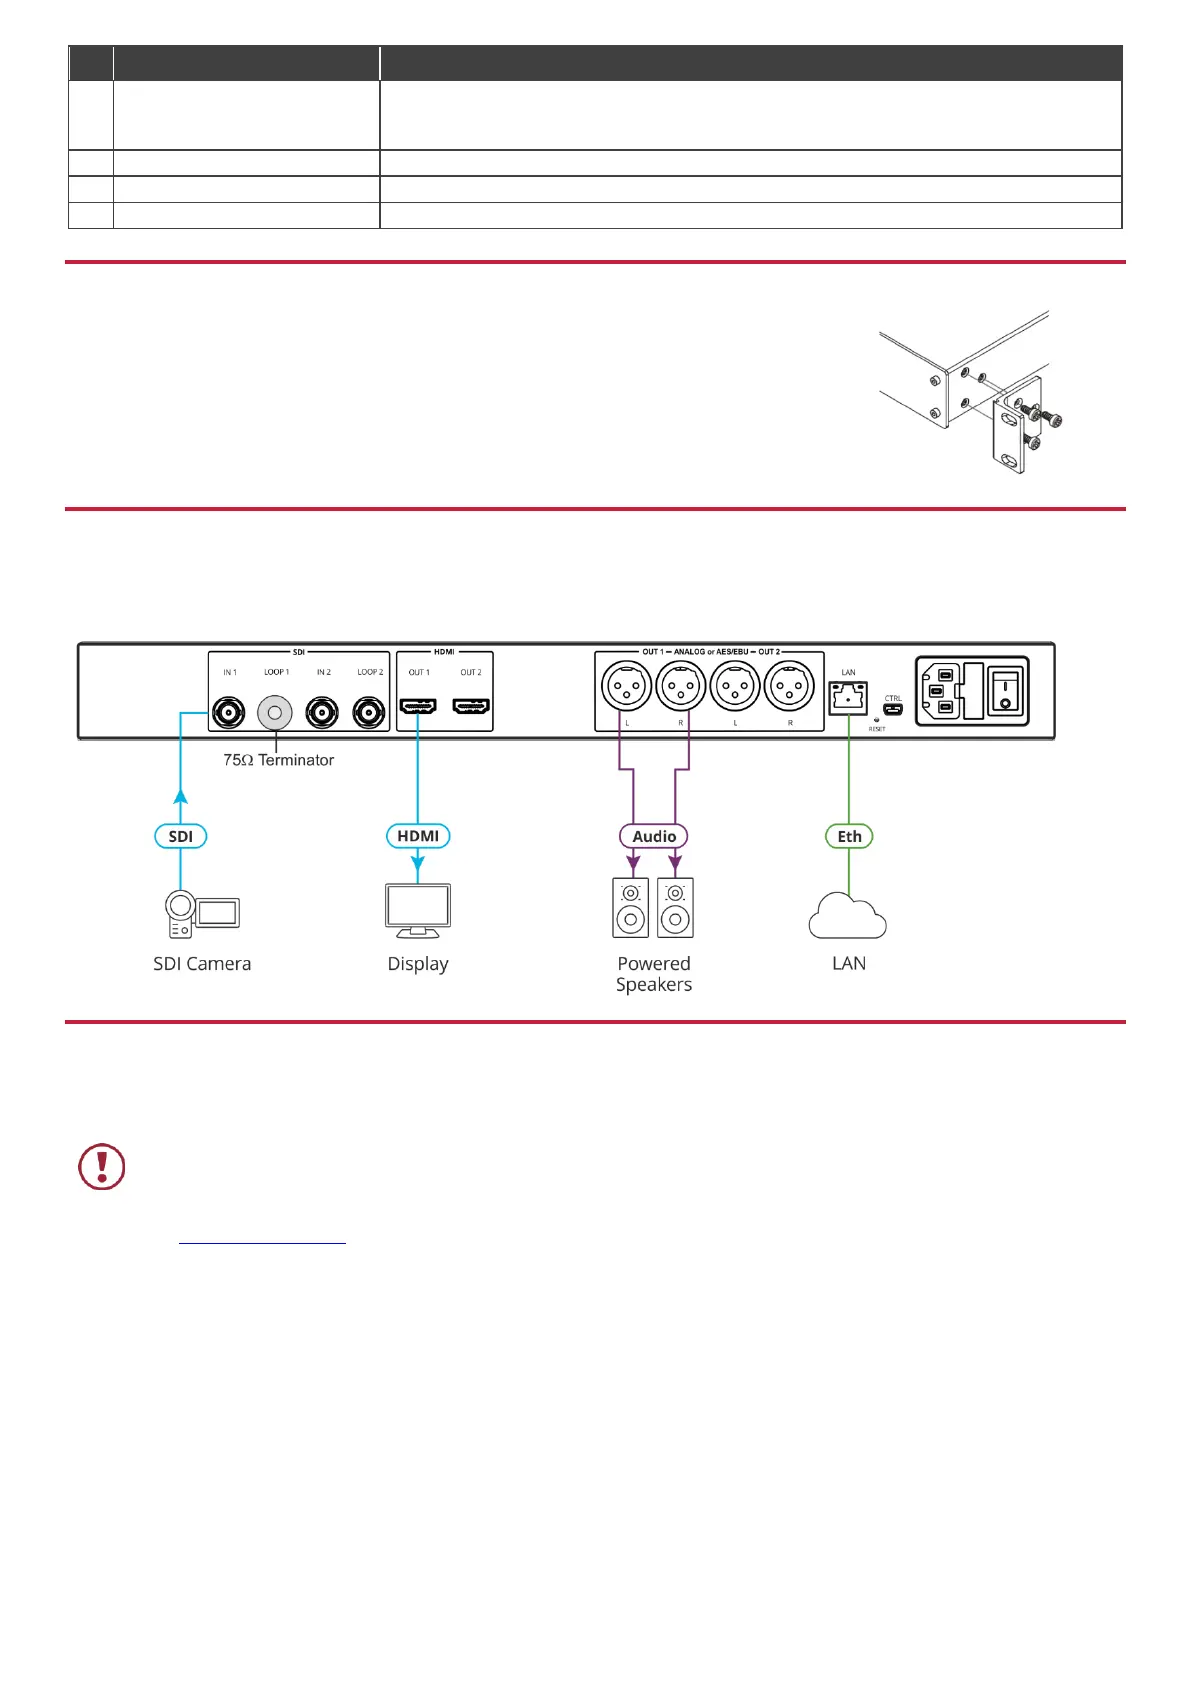
Step 4: Connect the inputs and outputs
Always switch OFF the power on each device before connecting it to your VP-475UX. For best results, we recommend that
you always use Kramer high-performance cables to connect AV equipment to the VP-475UX.
You can daisy-chain the VP-475UX by looping the LOOP source to the next machine.
Step 5: Connect the power
Connect AC power to the rear of the VP-475UX, switch on its power and then switch on the power on each device.
Safety Instructions
There are no operator serviceable parts inside the unit.
Use only the power cord that is supplied with the unit.
Do not open the unit. High voltages can cause electrical shock! Servicing by qualified personnel only.
Disconnect the power and unplug the unit from the wall before installing.
See www.KramerAV.com for updated safety information.
 Loading...