5
Installing Your Monitors
The close-field monitor, by definition, reduces room interaction. This can be compared to the conventional stereo
configuration or the large monitor arrangement in a recording studio where sounds emanating from the monitor or
reflecting off ceilings, walls, and floors greatly affect the sound quality. By shortening the path to the ear, the
close-field monitor offers a tremendous amount of flexibility, allowing the sound to become less susceptible to
differing room conditions. The ability to adjust the high and low frequency characteristics is equally important to
help compensate for room irregularities and achieve the highest sound accuracy. (See HF Adjustments and LF
Adjustments sections on page 2.)
A room that is heavily dampened would typically require a high frequency boost. Likewise, reducing the high
frequencies can alter a reverberant room. The low frequency can be adjusted to compensate for the first reflection
(bounce) off the woofer, whether it comes from the floor, as in the typical stereo setup, or from the surface of the
mixing board (when the monitor is placed atop the meter bridge).
Placing the monitor close to a rear wall, sidewall, or a corner will reinforce the low frequencies. Generally speaking,
if you move them two to three feet away from walls and corners, you'll hear less low frequency interaction
(excluding any interaction with the mixing console). But when ideal positioning isn't practical, low frequency control
is the solution. Lets say you have two different studios in your facility; in one room the V8’s are close to the wall,
in the other they're further away from the wall. Simply adjust the low frequency on each monitor and you'll have the
same sound in each room. This comes in handy if you're tracking in room A and mixing down in room B.
Positioning Your Monitors
Positioning your monitors correctly in the studio is critical to their performance. Typically, they should be placed so
that that the listening position is fully "covered" with all monitors resting on the same horizontal plane. A great
way to test a monitor for its imaging capability is to play back a CD or DVD recorded acoustically in stereo (or one
recorded in surround sound if you have a surround sound set-up). We recommend acoustic music because it
represents the spectrum of sound.) You can adjust the angle of each monitor by listening for dead spots. Keep in
mind, changing the angle or position of a monitor will change the sound.
2-CHANNEL SET-UP
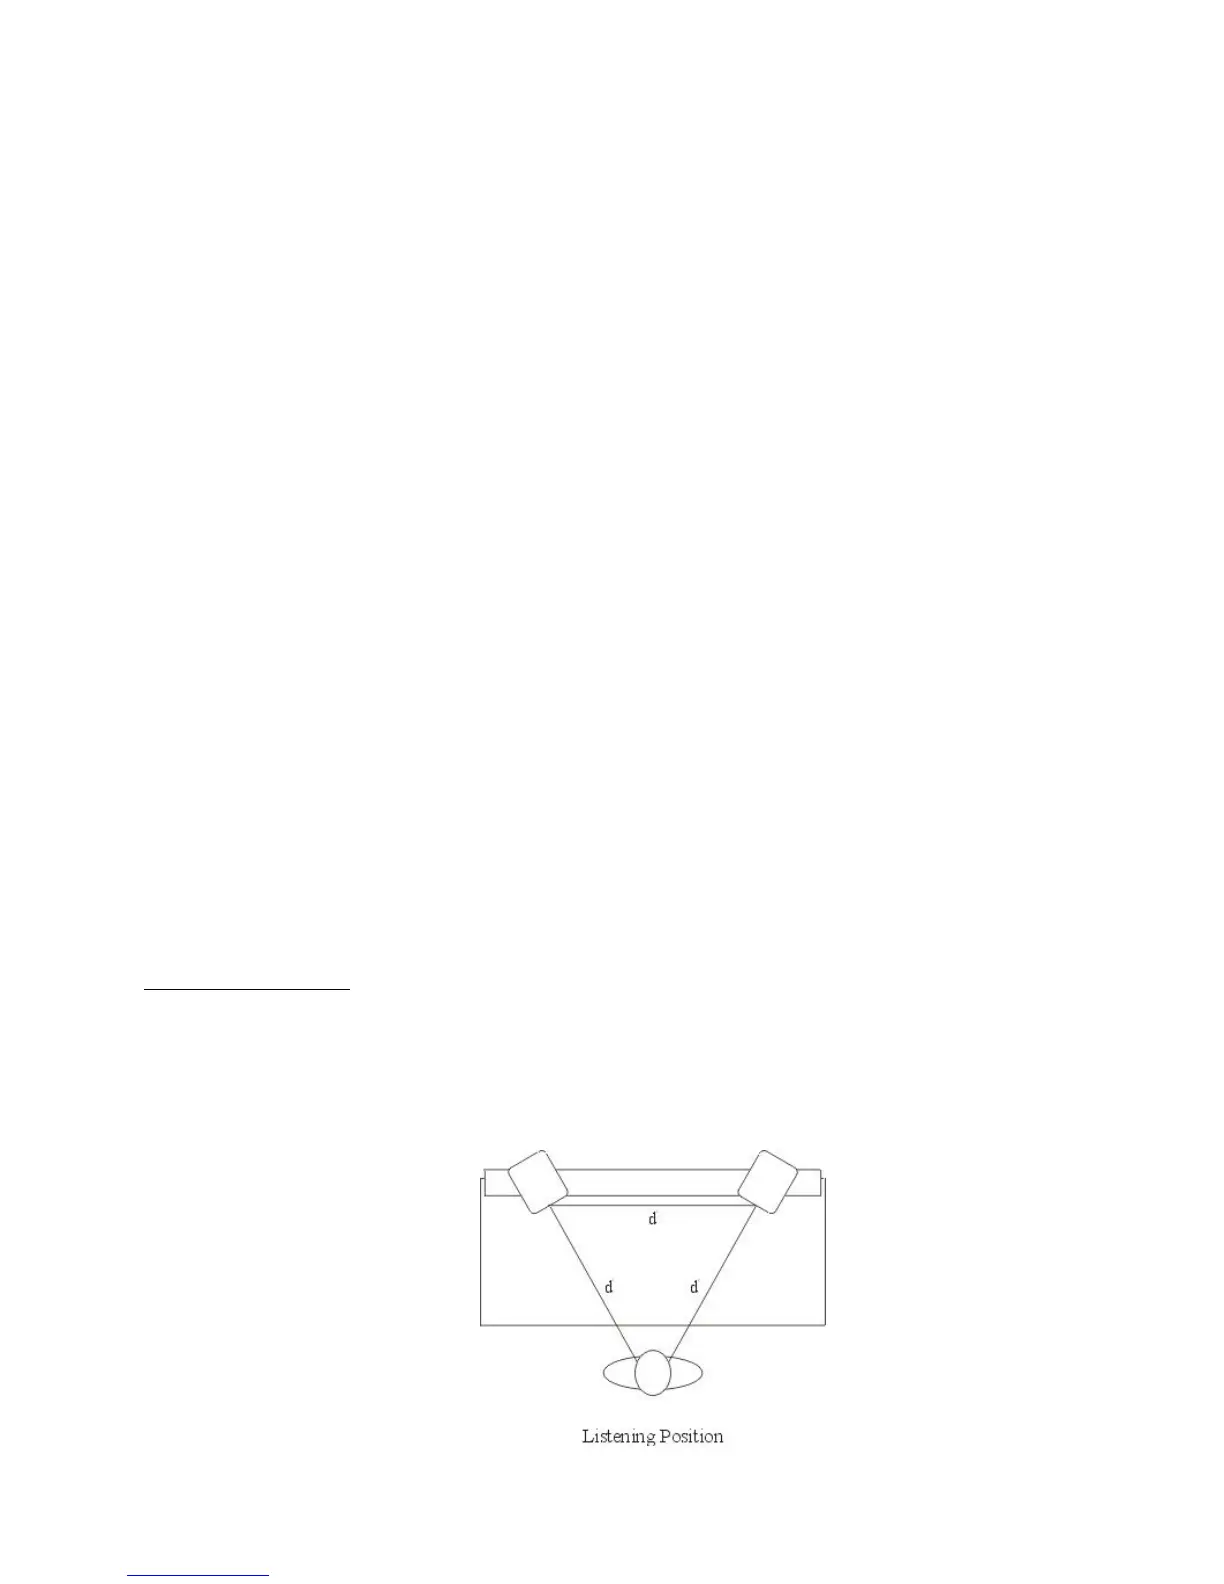
Close-Field Configuration - In a control room situation, the monitors are often times placed on the meter bridge
or in a close-field listening position. Initial placement starts by measuring out a simple equilateral triangle (all
three sides equal in length) with the apex at the center of the listening position (as shown in Figure 1) as an
"overlay" for the stereo installation. In this configuration, the Left and Right monitors are each placed at a 60º
angle equidistant from the listening position.
Figure 1