Do you have a question about the KROKWOOD Julia and is the answer not in the manual?
Provides crucial notices regarding safe assembly and bed usage, including warnings against using electric screwdrivers.
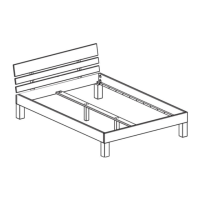
Outlines the available bed sizes for Version A (with centre spar) and Version B (without centre spar).
Details the specific screws and quantities for assembling Version A of the bed, connecting side sections and centre rail.
Details the specific screws and quantities for assembling Version B of the bed, connecting side sections.
Attaching side panels to the central spar and head/foot sections using specific hardware (x12 A, x8 B).
Connecting the head and foot sections to the side panels using specified screws (x10 A, x8 B).
Connecting the foot section to the side panels, likely using specific fittings and screws.
Securing the headboard to the side panels as part of the main bed frame construction.
Continuing the assembly process, likely involving further connections or reinforcement of the bed frame.
Positioning and securing the central spar within the assembled bed frame.
Attaching the first set of bed slats to the frame at specified intervals (e.g., 4 cm).
Completing the slat installation by attaching the remaining slats at specified intervals (e.g., 2 cm, 3 cm, 6 cm).
| Brand | KROKWOOD |
|---|---|
| Model | Julia |
| Category | Indoor Furnishing |
| Language | English |