I.Product Introduction
It is a kind of high-performance intelligent multiple frequency scanning display, which adopts active matrix
thin film transistor LED-bocklit LCD. The display is controlled through the microcomputer MCIJ digital
technology. It is compact and lightweight, which is suitable for narrow working spaces.
Before installation, please check whether the following articles are complete in the packing box:
- LCDx1
HDMI Signal Cablexl
Basexl
Power Adopterxl
- Warranty Cardxl
Screwdriverxl
If any of above product is missing, please contact with product distributor immediately.
Notice: Specific accessories in order to prevail in kind. Please keep packing materials for future movement.
2. Display Installation
Install on the woll
50cm
Install on the base
50cm
I OcmIOcm
Ventilation is affected
wall
IOcm
Ventilation
7cm
Please leave the space around the display with
the size at least shown in the figure.
Do not cover the ventilation holes or insert
anything into the shell.
Ventilation is affected
wall
-The display should be installed near on AC power socl<et thot can be
easily pluggable.
-It is recommended to use suitable wall mount brackets or a base for
safety purpose.
-To prevent injury, the display should be placed on o smooth horizontal
plane, or fixed on a firm wall.
-If you need to install it on a wall, it should be done by professional
technicians. The improper display installation may cause instability.
-Do not place the display where it may be suffered from mechanical
vibration.
-Do not place the display where insects may enter.
-Do not place the display directly facing on air conditioner, or the
internal panel may condense, leading to faults.
-Do not place the display where there is a strong electromagnetic field,
or it will be interfered with and damaged by the electromagnetic waves.
Unless there ore proper ventilation conditions and
adequate ventilation space around the display, do
not place the display within a limited space, such
as o book cabinet or a built-in closet.
3.Disploy Operation
Power indicator
Initial Shortcut Keys
t
Joystick
Signal Source Input
Shortcut Key for
Brightness
Shortcut Key for
Gaming Assistance
ShortcutKeys
Turn on the display by
Enter the Function Menu
Move IJp
Move Down
Exit and
Return Previous Menu
Open Sub-menu
and Select an Option
Turn off the display
The blue indicator represents the proper functioning of the display; the red flush indicator represents no signal
state, Under the energy conservation state, the display will normally work if the signal is provided again, The display
is still powered on in the standby state. hus, unplug the power cord when you do not use the display for safety.
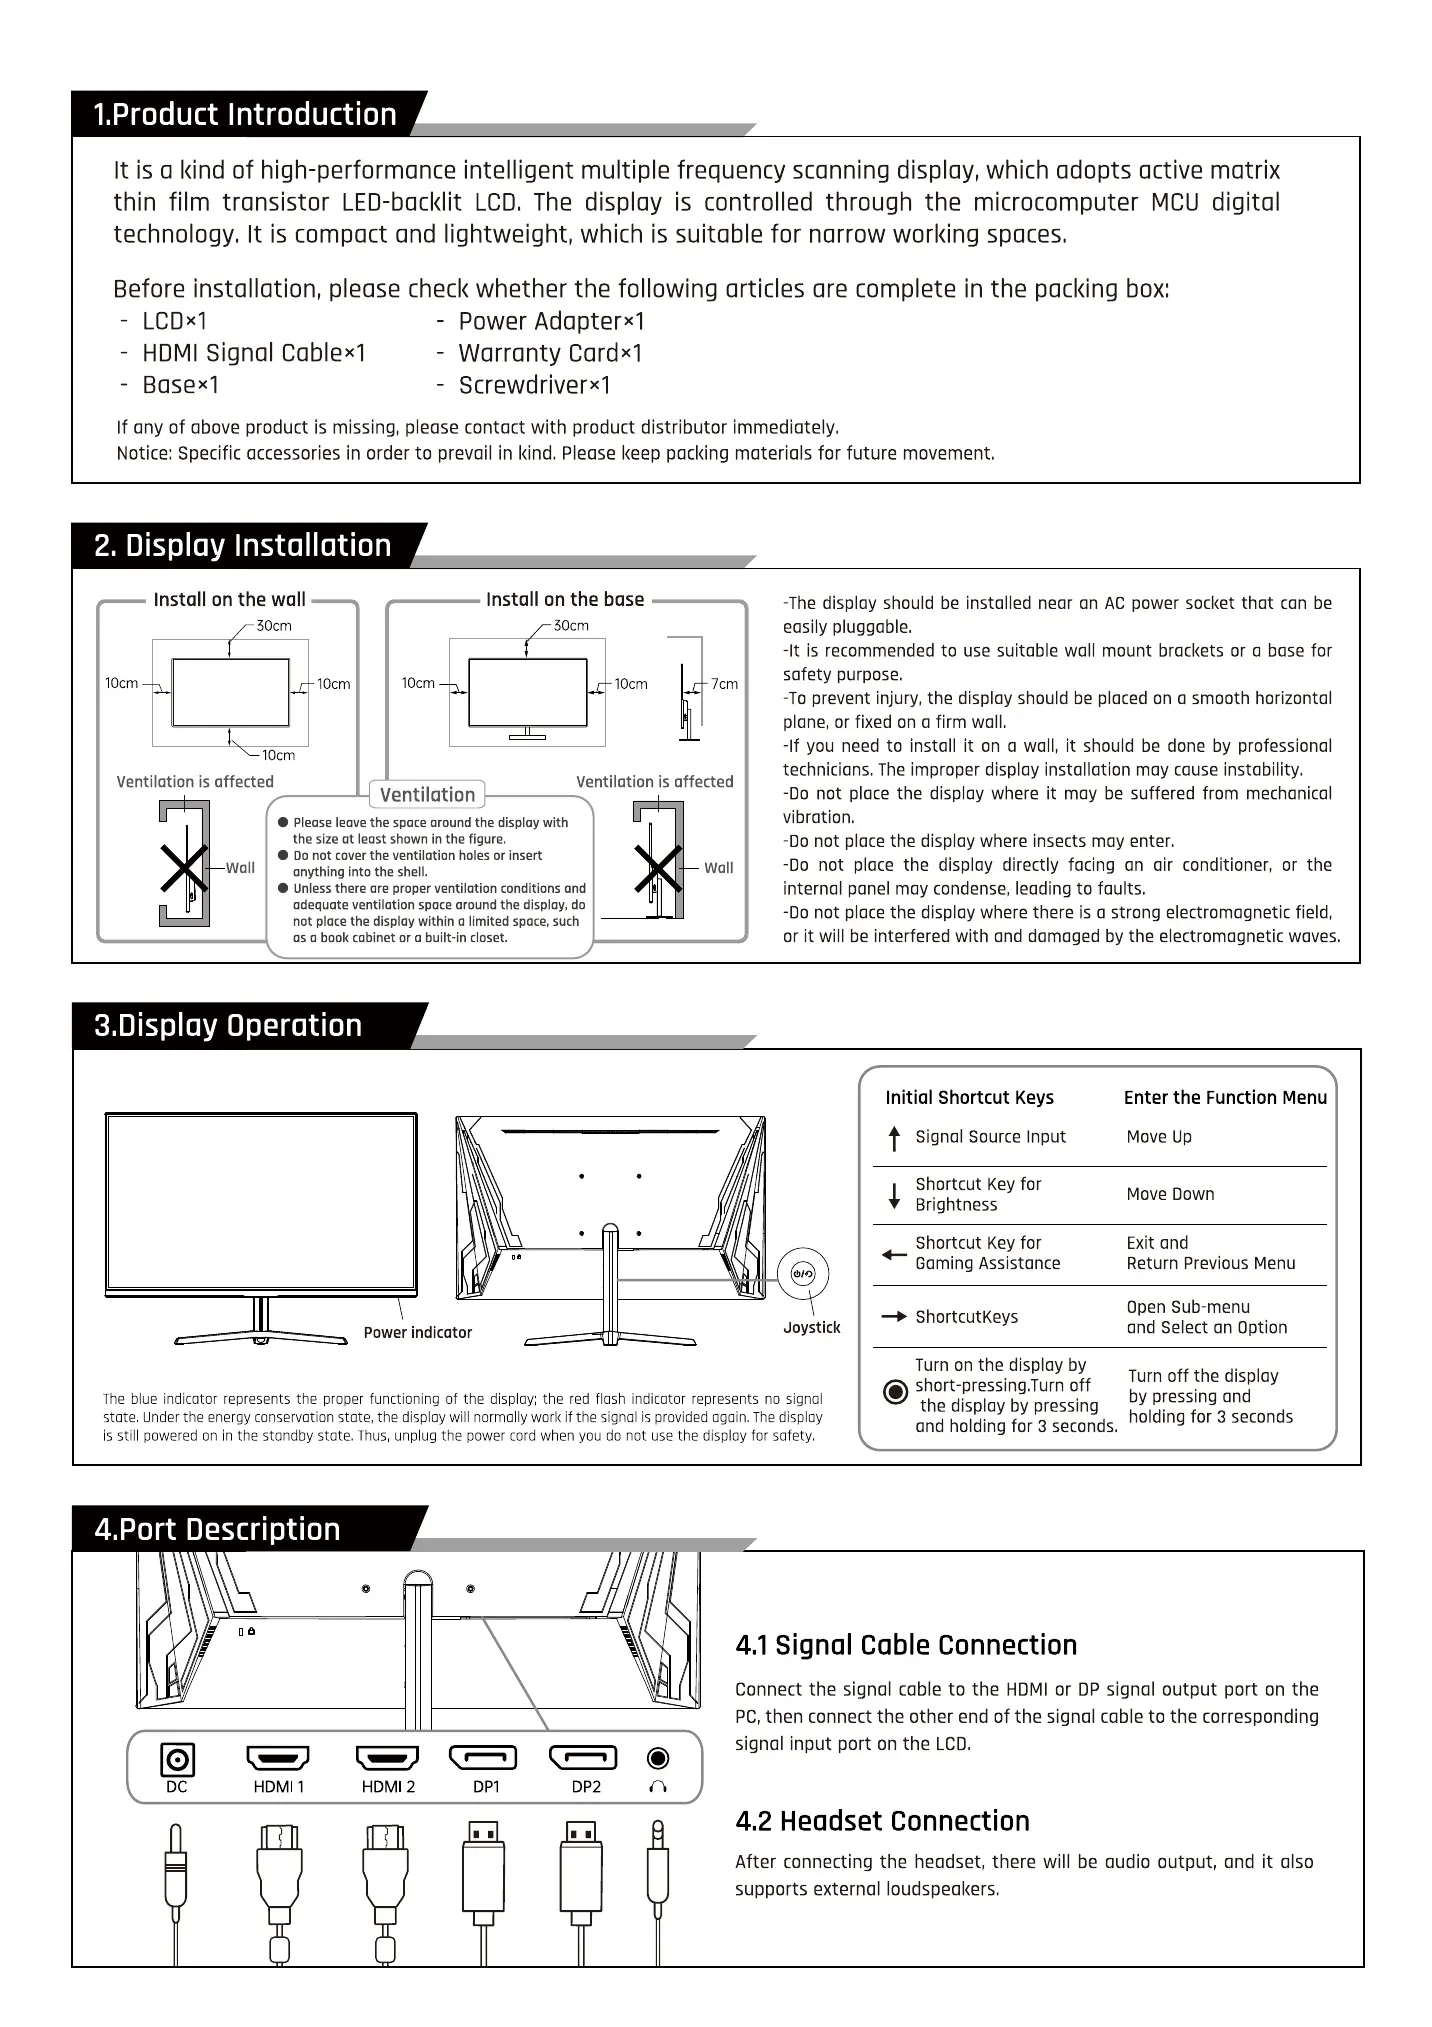
4.Port Description
short-pressing.Turn off
by pressing and
the display by pressing
holding for 3 seconds
ond holding for 3 seconds.
DC
HDMI 1
HDMI 2
DPI
DP2
4.1 Signal Cable Connection
Connect the signal cable to the HDMI or DP signal output port on the
PC, then connect the other end of the signal coble to the corresponding
signal input port on the LCD.
4.2 Headset Connection
After connecting the headset, there will be audio output, and it also
supports external loudspeakers.
 Loading...