10
37. Presser foot
38. Button hole presser foot
39. Zipper presser foot
40. Button sewing plate
41. Sewing needle [2 pieces]
42. Double stitch needle
43. Thread stand
44. Bobbin [2 pieces]
45. Threader
46. Stitches remover
47. Screw driver
2.2. Product usage
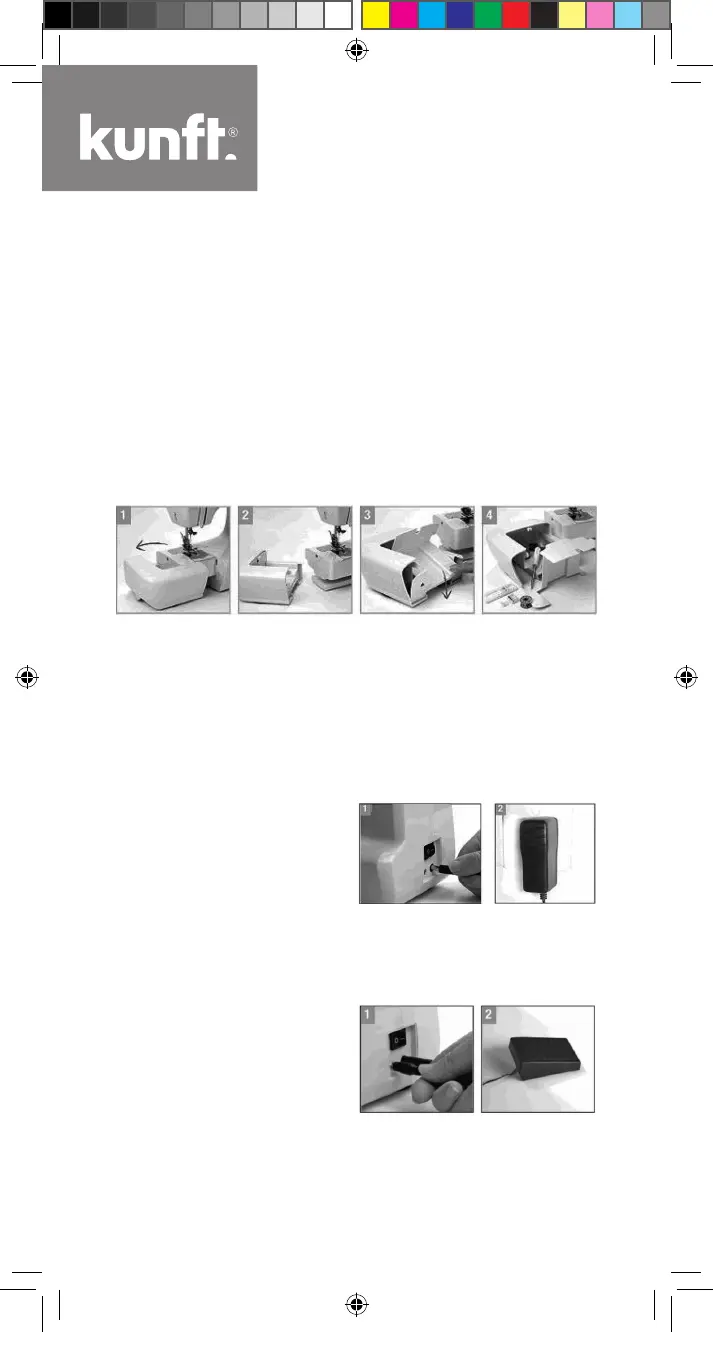
2.2.1. Extracting and installing the
accessories box [25]:
1. Extract the accessories box [25] in the direction shown in Fig. 1.
2. Extracted accessories box is shown in Fig. 2.
3. Gently push the accessories box cover according to Fig. 3 and
follow the marking on the box to open it.
4. Pick out the corresponding accessory according to your sewing
need.
2.2.2. Power connection:
1. The power jack of the sewing
machine is located at the bot-
tom right side, as shown in
Fig. 1. Plug the power adapter
[36] into the corresponding jack
[30].
2. Connect the power plug of the power adapter [36] to an AC socket,
as shown in Fig. 2.
2.2.3. Foot switch connection:
1. The foot switch jack lies at the
bottom right side of the sewing
machine, as shown in Fig. 1.
Plug the foot switch [35] into
the corresponding jack [29].
2. The foot switch [35] shall be put on the ground for stamping and
control convenience.
Maq-Costura-KSM2612-Manual-2.indd 10 18/02/19 18:34
 Loading...