PAGE
2
A FACTORY SERVICE MANUAL WILL BE HELPFUL IN
PERFORMING THIS INSTALLATION. DO NOT ATTEMPT TO
PERFORM THIS INSTALLATION IF YOU ARE NOT CONFIDENT
IN YOUR ABILITY TO COMPLETE ALL OF THE STEPS IN THE
PROCEDURE; CONSULT A TRAINED TECHNICIAN. IMPROPER
INSTALLATION COULD RESULT IN SERIOUS INJURY OR
DEATH.
The installation of any high performance air cleaner system can
cause a “lean” fuel/air mixture. A “lean” fuel/air mixture can cause
engine overheating resulting in severe engine damage. Küryakyn
recommends having carbureted bikes rejetted or tuned by an
experienced tuner, on a dyno, with an exhaust gas analyzer.
STEP 2
Remove the stock air cleaner assembly.
STEP 3
Turn off the fuel petcock. Remove the following from the carburetor: fuel line,
cables, enrichener valve (choke), and V.O.E.S. vacuum line. Remove the carb
from the intake manifold. Best performance will be obtained by re-jetting the
carburetor.
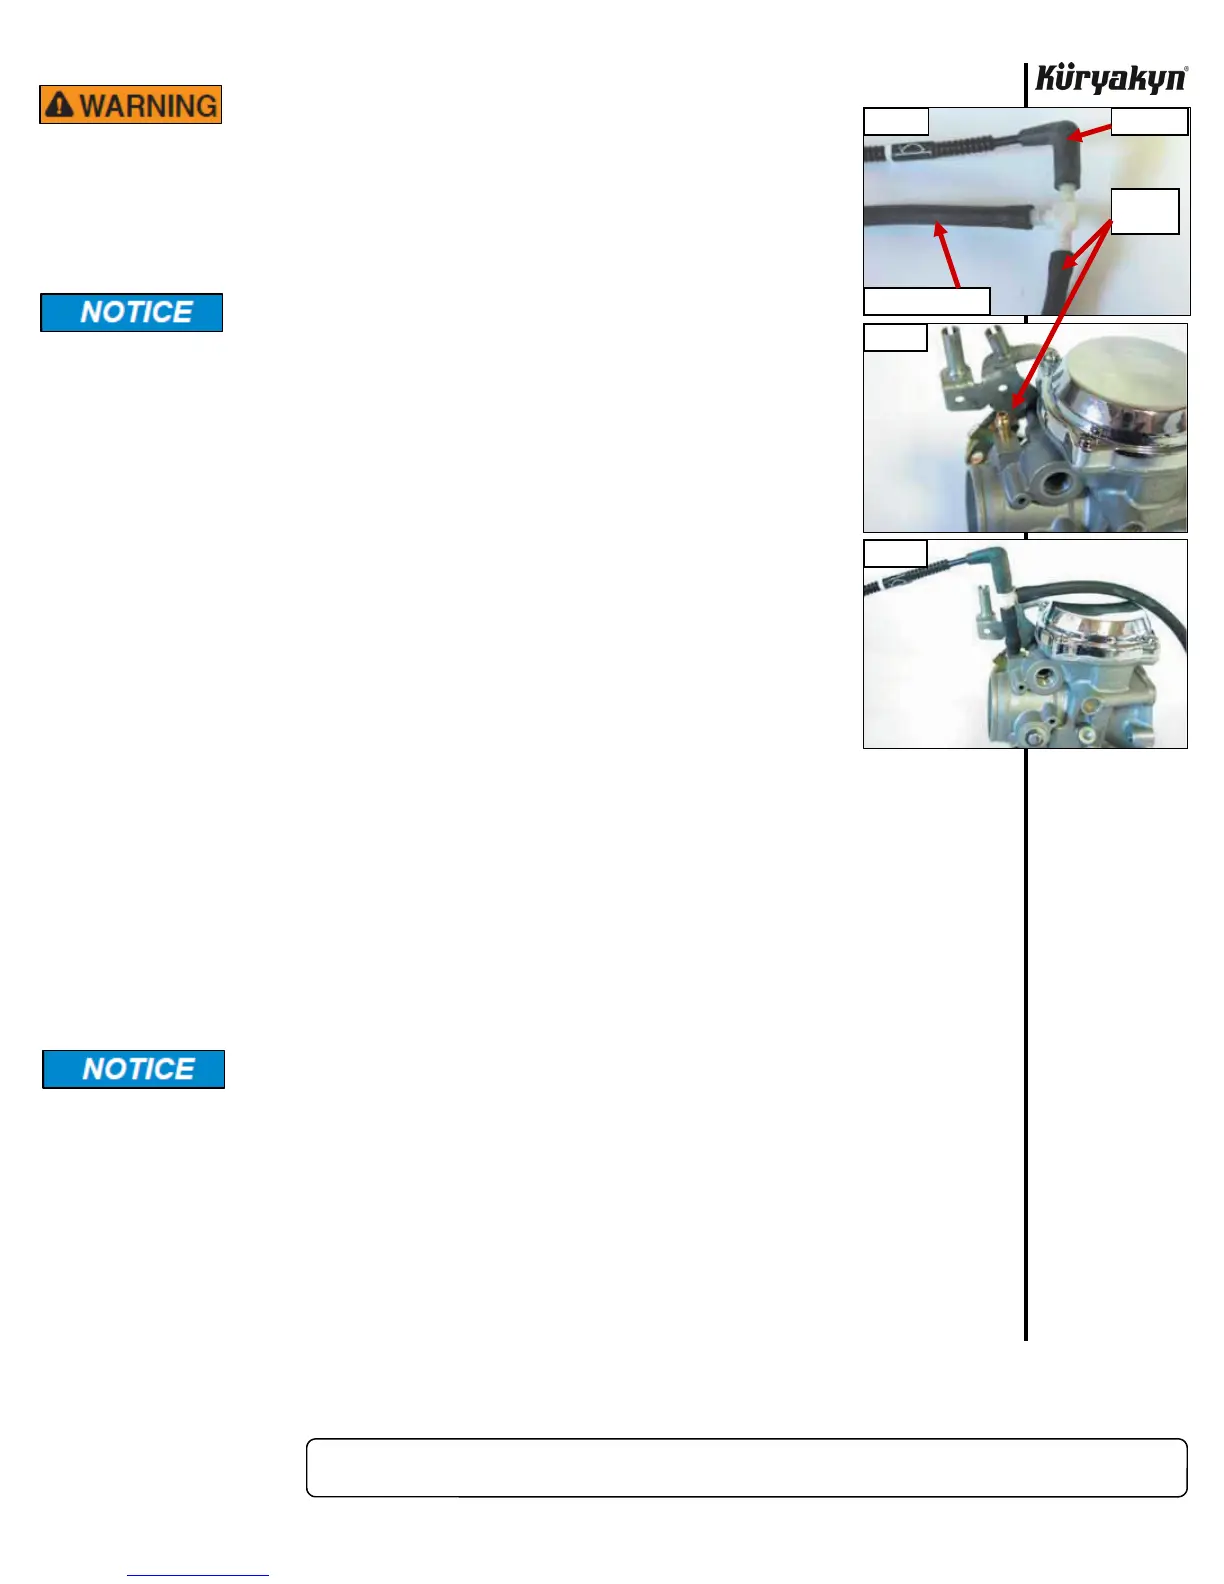
STEP 4 Cut a 1-1/2” section of vacuum hose from the length included. Assemble the
vacuum “T” as shown in PIC 1.
STEP 5 Install this vacuum line assembly to the back of the carburetor that the hose was
removed from in Step 3. The short piece of hose from the “T” will attach to the
vacuum port on the carb. The long hose will attach to the vacuum pod on the
Hypercharger. PIC 1, PIC 2 and PIC 3
STEP 6
Re-install the carb on to the intake manifold, a little dish soap or light oil will assist in the spigot
going into the rubber boot on the manifold. Be sure the carb is pushed all the way back into the
manifold. Reconnect and adjust the cables, reconnect the fuel line, and replace the enrichener
valve (choke).
STEP 7 Consult the instructions that came with the H-D breather for the proper orientation and placement
of components. Remove the backing from the included adhesive backed gasket and attach it to
the mouth of the carb lining up the holes. Place the carb support bracket across the mouth of the
carb. Place the H-D breather assembly over the outside of the carb support bracket, and start the
breather bolts through the support bracket and into each head. Maneuver the carb so all three
mounting holes and the float bowl vent hole (10-O’Clock position) are centered in the
corresponding slots in the support bracket. Tighten the breather bolts.
Be sure the support bracket contacts each head when it is in place across the front
of the carb. If there is a gap between the heads and the support bracket, push the
carb inward to eliminate this gap. Tightening the breather bolts when a gap is
present here will likely result in a broken bracket within a short period of time.
STEP 8
With a hex wrench, remove the round trap door in the Hypercharger. Insert the three
1/4”–20 X 1-1/2” socket head cap screws through the mounting holes
in the Hypercharger from
the inside. DO NOT place a bolt through the float bowl vent hole - this hole is the one in the
10-o’clock position. Place one of the included gaskets over the three mounting screws now
protruding from the back of the Hypercharger. Place the 7/8” aluminum spacer over the screws,
then a second gasket over the aluminum spacer.
HYPERCHARGER AIR FILTER KIT INSTALLATION
PIC 1
PIC 2
PIC 3
TO BACK
OF CARB
TO VACUUM POD
TO VOES
-cont.-
 Loading...