PAGE
3
STEP 9
At this time you should have three gaskets installed, one directly behind
the Hypercharger back plate, one between the aluminum spacer/support
bracket and one between the support bracket/carb-secure the assembly to
the carburetor. DO NOT over tighten the fasteners; the aluminum will strip easily.
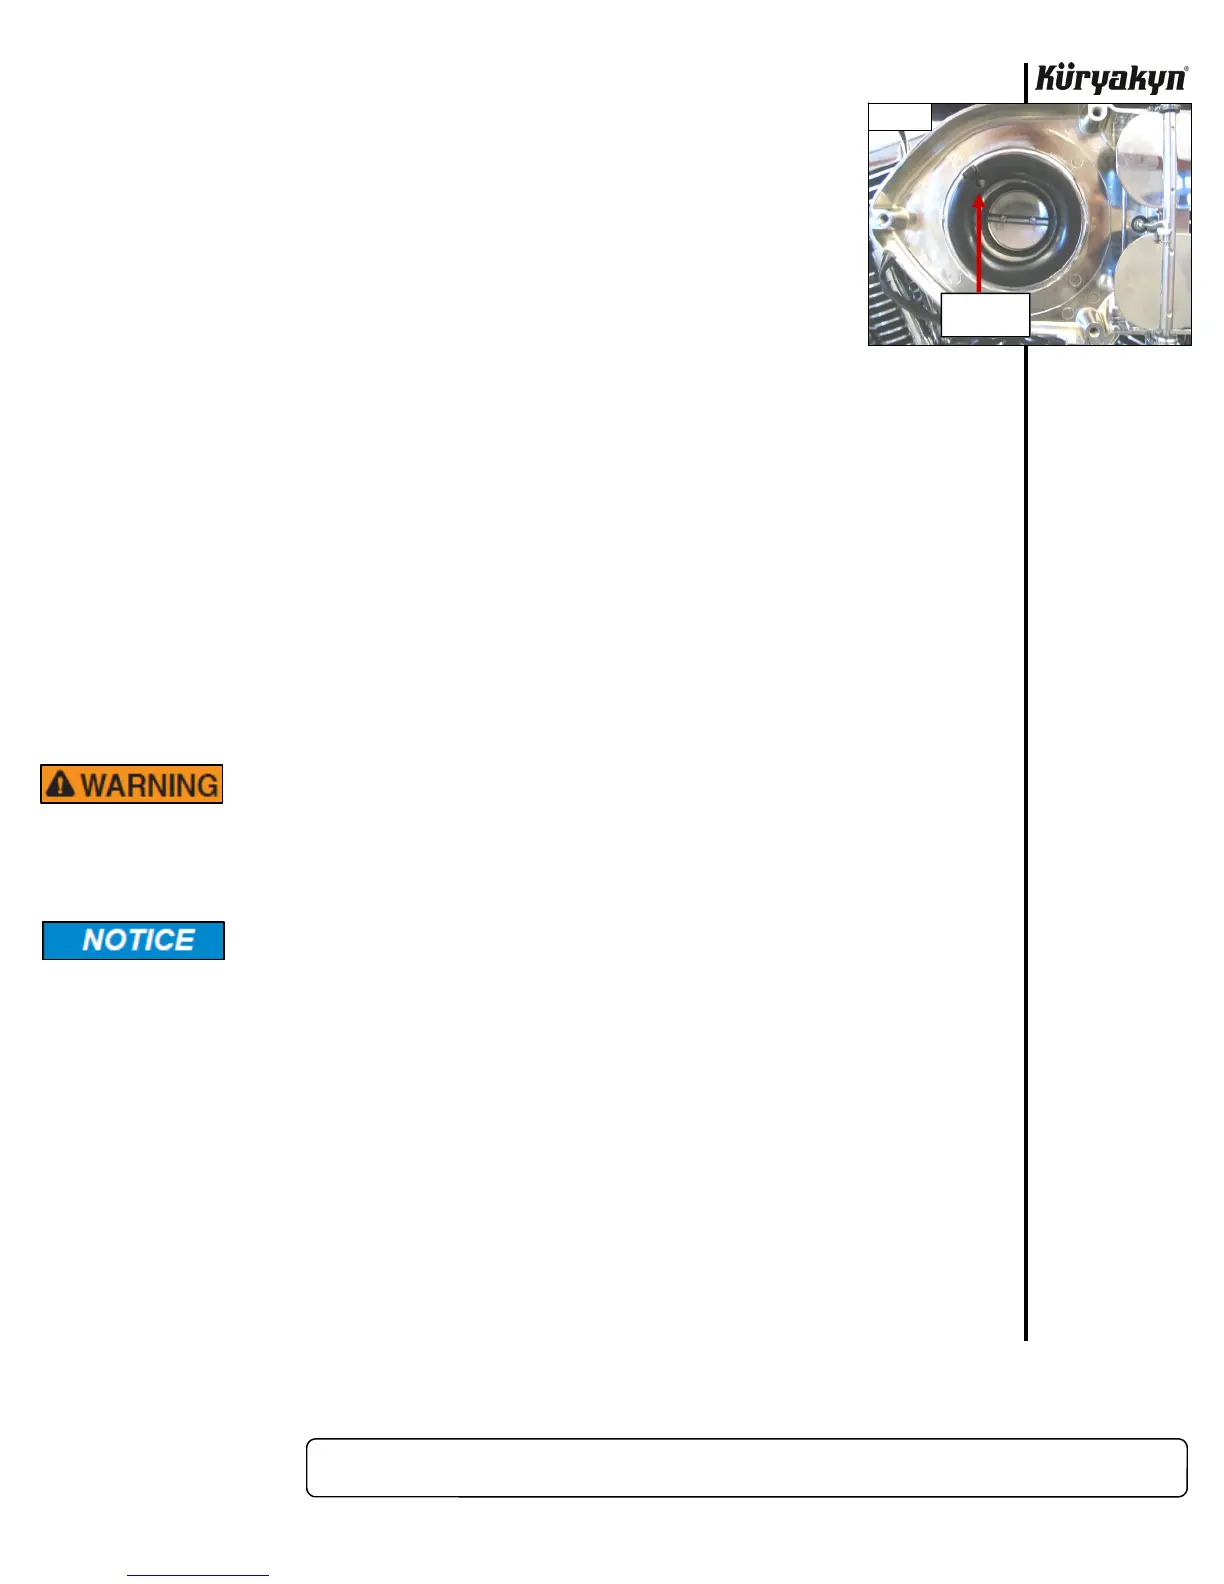
STEP 10
Position the black plastic Dual Velocity ring into position over the bolts attaching
the Hypercharger to the carb so that the hole lines up with the empty float bowl
vent hole located at the 10 o’clock position. PIC 4 This will snap into place. (Front
half of Hypercharger removed for clarity)
STEP 11
Replace the trap door and gasket.
STEP 12
Plug the rubber vacuum hose (installed in Step 5) into the air jet on the bottom of the vacuum
pod on the back of the Hypercharger
.
STEP 13
Double check the tightness of all related fasteners, check for hose clearance and check
throttle for correct operation, making sure it returns properly, before starting bike.
ROTATE THROTTLE AND CHECK THAT IT MOVES FREELY AND RETURNS
TO CLOSED BEFORE STARTING BIKE. FAILURE TO PROPERLY ADJUST THE
THROTTLE CABLES COULD RESULT IN LOSS OF CONTROL CAUSING
SERIOUS INJURY OR DEATH.
It is the installer’s responsibility to ensure that all of the fasteners (including
pre-assembled) are tightened before operation of the motorcycle. Küryakyn will
not provide warranty coverage on products or components lost due to improper
installation or lack of maintenance. Periodic inspection and maintenance are
required on all fasteners.
Ride On!
HYPERCHARGER AIR FILTER KIT INSTALLATION
PIC 4
HOLE AT 10
O’CLOCK
 Loading...