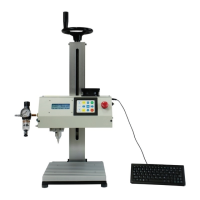
Section 10.0 - Troubleshooting
Work Safely. Always wear safety glasses near the machine.
Unplug the power supply and air hoses before beginning any maintenance or cleaning.
Description
Diagnosis
Solution(s)
1. Mark is Not Legible
A. Air pressure incorrectly set.
B. Distance from marking tip to
surface incorrectly set.
C. Machine speed set too high.
D. Worn or Damaged Pin
E. Worn Marking Cone
F. Worn or Damaged Bushing &
Slide Mechanism
G. Certain surfaces may not show a quality
mark
A. Too much air pressure.
B. Too low of air pressure.
C. Dirty and/or damaged marking pin,
cone,spring or orange gasket seal.
A. Gap between marking pin and
material too great.
B. Dwell time setting too short.
C. Dirty and/or damaged marking pin,
cone,spring or orange gasket seal.
2. Marking Image Appears too Deep
or Shallow
3. Noticeable Gap at Character
Intersections
Example: Letter O does not close
A. Turn the regulator until the mark
appears at the desire depth. Observe the
gauge setting and record. See “Setting Air
Pressure” in Section 2.
B. Adjust the height of the column for
optimum setting of the gap between the pin
and material. See “Setting Air Pressure” in
Section 2.
C. Be sure the speeds are not set too high
as this may cause missing steps resulting
in distorted images. From the machine
keypad:
Scroll to: “Setup” press Enter
Scroll to: “Set Speeds” press Enter
Scroll to: “Feed” (machine speed) or
“Move” (rapid speed)
Note: Factory Speed Settings are:
Feed = 1.0
Move Speed = 2.0
D. Sharpen or Replace marking pin.
E. Replace cone and/or bushing.
F. Return machine to Factory for service.
G. Exp: Rough Castings or Forgings
A. Decrease the air pressure by turning the
regulator knob CCW and watching the
gage.
B. Increase the air pressure by turning the
regulator knob CW and watching the gage.
See “Setting Air Pressure” in Section 2.0.
C. See “Marking Head Assembly” Mainte-
nance in Section 7.0.
A. Move pin closer to material by turning
the top handwheel CCW.
B. Increase the dwell time (milliseconds)
in the setup menu.
C. See “Marking Head Assembly”
Maintenance inSection 7.0.