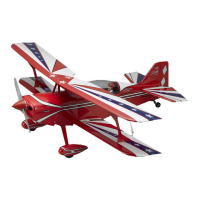
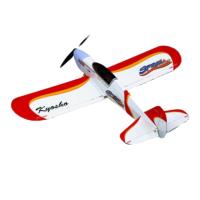
Do you have a question about the Kyosho Spitfire 50 GP/EP and is the answer not in the manual?
Emphasizes the model is not a toy and requires careful handling.
Provides essential safety guidelines for assembly and operation.
Required propellers, adhesives, and fasteners for assembly.
Recommended items to improve airplane performance.
Details about engine, muffler, and starting requirements.
Specifications for motor, battery, and electronic speed controller.
Detailed requirements for LiPo batteries and chargers.
Lists various tools needed for construction, including cutting, gripping, and soldering.
Advise to read the manual thoroughly before starting assembly.
Instruction to verify all parts are present and in good condition.
Explanation of symbols used throughout the instruction manual.
Method for smoothing wrinkles on the film covering.
Instructions for securely gluing hinges and aligning wing parts.
Critical warning about the importance of securely glued hinges.
Steps for neutralizing and mounting servos.
Preparing the horn hole by cutting away film.
Guide for routing the servo cord using a string.
Guidance on using heat-shrink tubing and flame safety.
Critical warning about secure wing gluing to prevent flight accidents.
Steps for pulling servo cords and filling gaps with epoxy.
Emphasizes paying attention to the correct orientation during assembly.
Instruction to cut part if the 3mm nut interferes with the wheel cup.
Ensures landing gear linkages are properly locked for safety.
Guide to bending and trimming linkage rods for smooth movement.
Instructions for mounting the flap servo.
Instructions for installing the flap rod and using heat-shrink tubing.
Instructions to cut covering film for wing parts.
Drilling holes in the elevator for the joint.
Securing the elevator on a flat surface for proper alignment.
Attaching the elevator joint.
Instructions for securely gluing hinges to the tail wing.
Aligning the center lines of the horizontal tail and elevator.
Warning about the importance of accurate alignment for safe flight.
Cutting covering film from the bonding surface.
Drilling holes in the rudder for tail gear assembly.
Aligning the center lines of the vertical tail and rudder.
Instructions for securely gluing hinges to the vertical tail.
Smoothing linkage holes to ensure smooth rod movement.
Adjusting the angle of linkage holes for smooth operation.
Procedure for aligning and tightening screws for rods.
Using heat-shrink tubing for rod connections.
Initial step of loosely tightening screws.
Marking the engine mount based on engine dimensions.
Explains engine shaft alignment for side thrust.
Instructions for connecting silicone tubes to the fuel tank.
Aligning and tightening the fuel tank's internal parts.
Advises following engine manual for pump-equipped engines.
Using a support to hold the fuel tank.
Drilling 3.2mm holes for engine mounting.
Filling gaps with silicon sealant.
Creating throttle rod holes based on lever position.
Guidance on setting up engine piping according to the manual.
Instructions to assemble servos following the specified order.
Visual guide for installing various servos.
Ensuring parts move smoothly without binding.
Finalizing rod position by tightening screws.
Setting servos to neutral before working with rods.
Cutting the cowling to fit the specific engine.
Performing the same modification on the opposite side.
Assembling components symmetrically on both sides.
Adjusting battery position to achieve the correct center of gravity.
Warning about the critical need for secure attachment to prevent accidents.
Spinner compatibility and modification for different propeller types.
Performing the same modification on the opposite side of the canopy.
Cleaning, drying, and masking surfaces before painting.
Painting the inside of the duct with gray and white colors.
Cutting covering film on the main wing.
Applying instant and epoxy glue for assembly.
Adjusting control surface movements to specified angles for normal flight.
Critical warning about the importance of correct CG for safe flight.
Adjusting CG by repositioning components or adding weight.
Instruction to cut motor mount if motor size requires it.
Preparing 3mm and 4mm holes for mounting.
Instructions for attaching the propeller adapter.
Adjusting the motor mount to accommodate motor size.
Adjusting the motor mount to specific dimensions.
Indicates that servos are supplied with mounting hardware.
Applying threadlocker to screws for secure fastening.
Visual guide for installing various servos.
Finalizing rod position by tightening screws.
Setting servos to neutral before working with rods.
Connecting the receiver and setting up the antenna.
Using Velcro to secure the receiver and battery.
Adjusting battery position for proper CG.
Using Velcro to secure the power battery.
Adjusting battery position for proper CG.
Warning about the critical need for secure attachment to prevent accidents.
Instructions to assemble components in the specified order.
Connecting the battery to the ESC with the throttle stick down.
Verifying the motor rotates in the correct direction when throttle is applied.
Correcting motor rotation direction by swapping wires.
Performing the same modification on the opposite side of the cowling.
Reference to a specific sequence of assembly steps.
General warning about assembly and usage precautions.
Disclaimer regarding the use of non-Kyosho parts.
Caution for beginners regarding assembly and seeking expert advice.
Warnings about airframe stress, linkage integrity, and component failure.
Warnings about exceeding specified engine and motor power limits.
List of optional parts available for purchase.
| Brand | Kyosho |
|---|---|
| Model | Spitfire 50 GP/EP |
| Category | Toy |
| Skill Level | Intermediate |
| Power Source | Electric or Glow Engine |
| Radio System | 4-Channel |
| Material | Balsa |