PICKUP INSTALLATION
Notes: For optimum performance of the Element pickup, the bridge slot must have a
perfectly at surface, free from high spots and loose debris. The slot depth should be
3/16” (.187”) or deeper. The commonly known 50/50 rule applies: “The amount of saddle
visible above the bridge surface (with pickup installed) should be no greater than the
amount of saddle in the slot beneath the bridge surface”.
The bottom surface of the saddle must also be perfectly at to establish even contact
along the pickup between the saddle and the slot! This can be accomplished by sanding
against a machined surface using ne grit sandpaper.
Installation: Remove the strings from the guitar. For guitars having a pickup installed for
the rst time you will need to compensate for the thickness of the pickup by removing
.030” from the overall saddle height. One simple method of accomplishing this is as
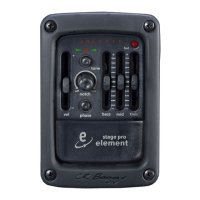
follows: Using a freshly sharpened pencil, scribe a line along the front edge of the saddle
where it extends above the bridge, see Fig 1.
This line will be used later as a guide when removing material from the bottom of the
saddle. (Details to follow)
Now remove the saddle to drill a hole for the pickup. Use a drill bit that is the same size as
the width of the saddle slot, generally between 3/32” and 1/8”.
Just before you drill, inspect the underside of the bridge inside the guitar and note the
position of the braces in relation to the saddle slot. It’s helpful to use the bridge pin holes
for visual reference. You may drill the hole at either end of the slot but be sure to position
the hole at the extreme end of the slot and drill at an angle if possible, as seen in Fig 3A.
Last, choose the side of the slot which allows you to drill without damaging a brace as you
penetrate the top, then proceed to drill. Remove any splintering left from the bit with a
small le or razor blade, then blow out the slot with compressed air and check for
remaining debris.
Feed the pickup into the slot from inside the guitar. Inserting a toothpick into the hole from
the outside of the guitar helps with nding the hole on the inside. There is a black dot on the
end of the Element pickup, which should be facing up when the pickup is laid in place.
Important: The t of the saddle is among the most crucial factors of this installation. The
saddle should t loosely enough in the slot that it can be pulled out easily (using only
your ngertips) with just the slightest amount of drag. If the saddle binds at all in the slot,
sand it down just a bit against a at surface with 220 to 320 grit sandpaper until it goes in
and out with ease. A saddle that binds on the walls of the slot won’t be able to make
thorough contact with the pickup and will cause the pickup to malfunction. A saddle
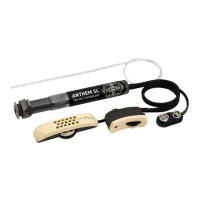
which is excessively loose will lean forward under pressure, creating uneven contact on
the pickup, Fig 2A, which will most likely result in poor performance.
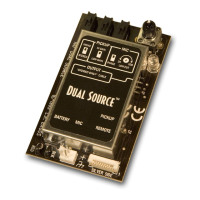
The best remedy for a very loose saddle is to make a new properly tting saddle, Fig 2B.
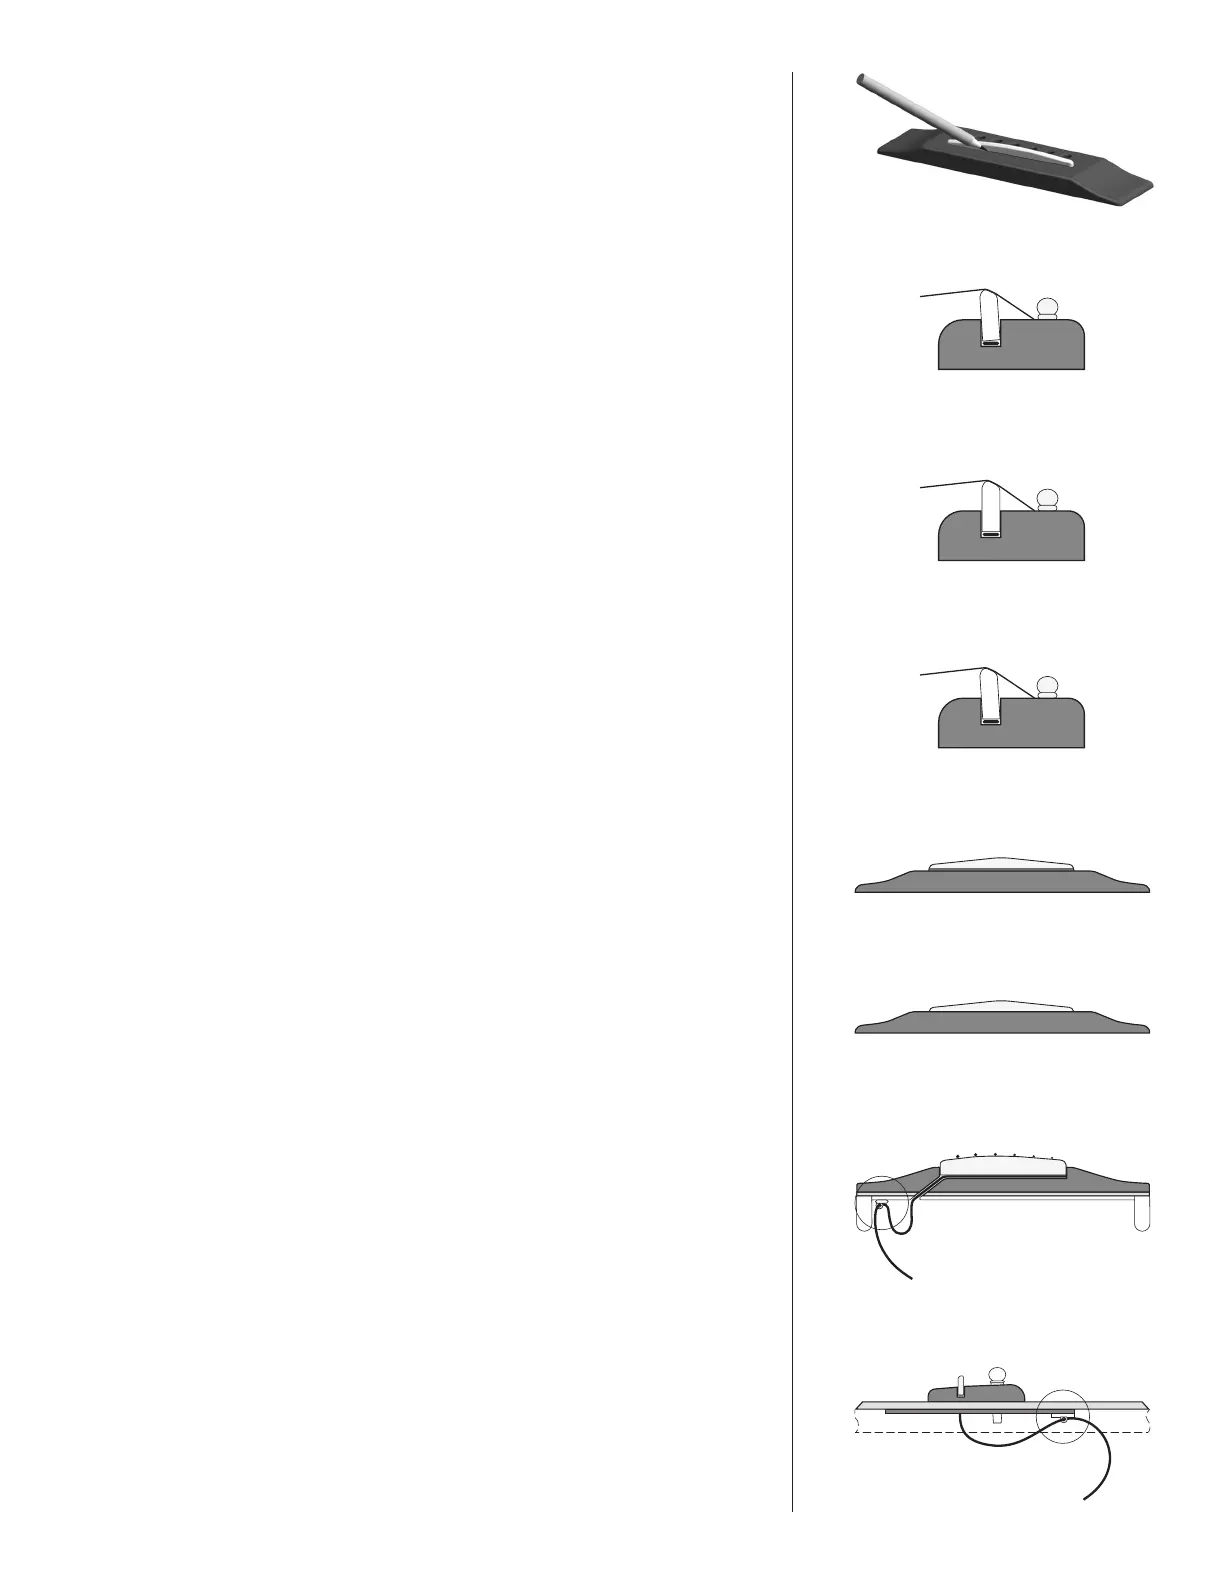
However, you can also shim the saddle thickness with tape until it ts correctly or even
sand an intentional tilt into the saddle’s bottom surface so that when it leans forward it
makes even contact on the pickup, Fig 2C.
Compensating for the thickness of the pickup: Lay the saddle over the pickup in the
slot and observe the scribed line from Fig 1. The distance between the bridge top and the
line is the amount of material you’ll need to remove from the bottom of the saddle. Sand
the bottom surface of the saddle on a belt sander until the scribed line is just above the
bridge top.
A belt sander is not capable of creating a truly at surface; therefore, it is necessary to
complete sanding the bottom of the saddle by hand. It is best to do this against a
machined at surface with ne sandpaper. Use a straight edge with a strong light source
to inspect the atness of your saddle.
When nished, make sure the pickup extends all the way to the far end of the slot, place
the saddle on top of it and temporarily secure it with a piece of tape. Secure the pickup
wire with a wire clip (provided) about 1 ½” from the exit hole on the edge of the bridge
plate, with a 1 to 2 inch service loop, Fig 3A & 3B.
Fig. 1
Fig. 2A
Fig. 2B
Fig. 2C
Before
After
Fig. 3A – Back view
Fig. 3B – Side view
 Loading...