Secure the other loose wires with the rest of the wire clips provided. Now re-string the
guitar, plug into your amp or PA, and test the pickup. Pay close attention to string balance.
String balance issues are unfortunately somewhat common among undersaddle pickups.
They are frustrating for both installer and player and can be caused by a variety of things
ranging from saddle t, saddle material, particular guitar resonances, saddle slot inconsis-
tencies, bridge problems, among others.
Concurrently, the x to string balance issues is also various and not always what you would
expect. If you have completed the installation according to these instructions and are
experiencing string balance issues, our best recommendation is for you to contact our
customer service department for assistance.
FINISHING THE INSTALLATION
Volume wheel placement: Stick the double-sided adhesive to an easily accessible spot
along the inside of the soundhole. It is most commonly positioned at the top of the
soundhole, above the strings when playing.
Battery bag placement: The battery bag can be located in a number of areas. We
recommend sticking it to the neck block if it is accessible, as it is the most able to handle
the weight of the battery, as well as oering easy access for quick battery changes. If you
choose another location, we recommend you nd an area on the side or back near a
brace for stability and ease of access.
OTHER APPLICATIONS
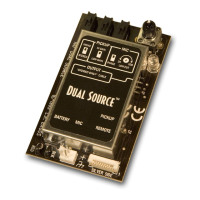
Passive auxiliary channel: The Element Active provides an option on its circuit board for
adding a second passive pickup to your signal in a stereo conguration. Magnetic pickups
work best for this scenario. We recommend you do not use high impedance pickups for
this application.
Soldering a second pickup: Solder the hot lead to positive and the ground lead to
negative of the auxiliary passive input. See diagram.
You’ll need to run your signal down a stereo cable to a stereo input or use a stereo “Y” cable
to two separate inputs. The 2nd pickup will be on the “ring” contact of the stereo plug.
Adding a mini-mic: It is possible to add a mini-mic in the same way the second pickup is
connected. Keep in mind, however, that it is a passive channel and you will need to provide
phantom power for the mic. The mic will be on the “ring” contact of the stereo plug.
Element Active input
Aux passive input