Quick Guide
14221-1510-1010
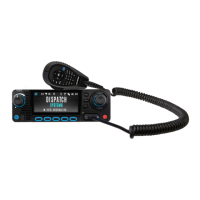
OpenSky® XG-25M
Mobile Radios
Radio Controls – User Interface
1. Scroll through the menu until “App Mode” appears in the
bottom line of the display.
2. Use the Menu Navigation Control to choose an available
mode. Press MENU and confirm (Y/N) with the Menu
Navigation Control and press MENU again.
or
Preset button C can be programmed to reboot the radio into a
particular application mode.
Power On/Off
Volume
Control
Twist clockwise to power on radio and
increase volume.
Twist counter-
clockwise to decrease
volume and power off radio.
Connect hand-held, hands-free speaker-
mic, or headset.
programmed to declare an
emergency.
Group
Selection
or
Menu
Navigation
Knob
While in the dwell display, scrolls
through available talk groups.
Scrolls through selections within the
programmed speed dial numbers,
canned alert messages, etc.).
Scrolls through top-level menu.
OPT
CLR
Scrolls through selections within the
active menu (available talk groups,
pre-programmed speed dial numbers,
canned alert messages, etc.).
Activate current selection.
CLR
Used with the Emergency button to
SCAN
Toggles the Scan Mode ON/OFF.
Pre-Set
Buttons
A/B/C
These buttons are used to store and
recall user-selectable parameters.
Preset button C can be configured via
programming to reboot the radio into a
particular application mode.
Radio Display and Status Icons
Steady – Radio is data registered.
Steady – Received Signal Strength Indicator
(RSSI).
Steady – Stealth mode is enabled (all tones and
display backlight disabled; voice is still heard).
Steady - Radio is transmitting or receiving a
manual or OTAR (Network) encrypted call.
Steady - Indicates Voice Scan mode is Normal or
Fixed; not displayed when Voice Scan mode is No
Scan.
Steady - Indicates Selective Call mode.
enabled, but no accessory
connected.
Steady – Radio is connected to a Bluetooth
accessory.
1 low tone/2 high tones. Call queued for
processing.
3 short tones. Radio is out of coverage area or
requested voice group is active.
Single short beep. Resources have become
available for a call request placed in the queue (if
enabled) upon channel access.
Single long low-pitched tone. Notifies the user
that access to the channel has been lost.
4 short tones. Played once to indicate a selective
alert has been received.
3 long beeps. Sounds when an emergency alert
is declared.
pitched tone. Sounds when an
emergency is cleared.
Ringing tone. Repeated every 4 seconds until the
call is accepted or rejected by the radio being
called, or until the network drops the call if
unanswered after one minute.
Configurable. Typical: 3 brief tones that repeat
every 15 seconds when the radio does not have
consistent sync.
2 short tones: 1 high–pitched and 1 low-pitched.
Sounds when the radio transitions from one radio
nother while transmitting
Single medium tone. Current received call
preempted by higher priority call.
3 short high pitched tones. Sounds when selected
Site is found or using Site Lock menu.
3 short high pitched tones. Sounds when selected
Site is not found using Site Lock menu.
Quick Guide
14221-1510-1010
OpenSky® XG-25M
Mobile Radios
Radio Controls – User Interface
1. Scroll through the menu until “App Mode” appears in the
bottom line of the display.
2. Use the Menu Navigation Control to choose an available
mode. Press MENU and confirm (Y/N) with the Menu
Navigation Control and press MENU again.
or
Preset button C can be programmed to reboot the radio into a
particular application mod
Power On/Off
Volume
Control
Twist clockwise to power on radio and
increase volume.
Twist counter-
clockwise to decrease
volume and power off radio.
Connect hand-held, hands-free speaker-
mic, or headset.
Pre-programmed to declare an
emergency.
Group
Selection
or
Menu
Navigation
Knob
While in the dwell display, scrolls
through available talk groups.
Scrolls through selections within the
active menu (available talk groups,
programmed speed dial numbers,
canned alert messages, etc.).
Scrolls through top-level menu.
OPT
CLR
Scrolls through selections within the
active menu (available talk groups,
pre-programmed speed dial numbers,
canned alert messages, etc.).
Activate current selection.
Used with the Emergency button to
clear an emergency.
SCAN
Toggles the Scan Mode ON/OFF.
Pre-Set
Buttons
A/B/C
These buttons are used to store and
recall user-selectable parameters.
Preset button C can be configured via
programming to reboot the radio into a
particular application mode.
Radio Display and Status Icons
Steady – Radio is data registered.
Steady – Received Signal Strength Indicator
(RSSI).
Steady – Stealth mode is enabled (all tones and
display backlight disabled; voice is still heard).
Steady - Radio is transmitting or receiving a
manual or OTAR (Network) encrypted call.
Steady - Indicates Voice Scan mode is Normal or
Fixed; not displayed when Voice Scan mode is No
Scan.
Steady - Indicates Selective Call mode.
Flashing – Bluetooth
®
enabled, but no accessory
connected.
Steady – Radio is connected to a Bluetooth
1 low tone/2 high tones. Call queued for
3 short tones. Radio is out of coverage area or
requested voice group is active.
Single short beep. Resources have become
available for a call request placed in the queue (if
enabled) upon channel access.
Single long low-pitched tone. Notifies the user
that access to the channel has been lost.
4 short tones. Played once to indicate a selective
alert has been received.
3 long beeps. Sounds when an emergency alert
is declared.
Single long low-pitched tone. Sounds when an
emergency is cleared.
Ringing tone. Repeated every 4 seconds until the
call is accepted or rejected by the radio b
eing
called, or until the network drops the call if
unanswered after one minute.
Configurable. Typical: 3 brief tones that repeat
every 15 seconds when the radio does not have
2 short tones: 1 high–pitched and 1 low-pitched.
Sounds when the radio transitions from one radio
base station site to another while transmitting
voice.
Single medium tone. Current received call
preempted by higher priority call.
3 short high pitched tones. Sounds when selected
Site is found or using Site Lock menu.
3 short high pitched tones. Sounds when selected
Site is not found using Site Lock menu.
Copyright ©
2015, 2016, 2020, L3Harris Technologies.
Copyright ©
2015, 2016, 2020, L3Harris Technologies.