La Crosse Technology, Ltd. Page 3
A/C Power
The design of this Weather Station is to use a/c power (5-volt) as primary power source.
When operating with the a/c power cord the backlight can be on continually.
When operating on a/c power, batteries are optional and not required in the Weather
Station.
The backlight will turn off or operate at high or low intensity at your discretion.
IMPORTANT: When operating on a/c power, to avoid interference, the backlight and USB
charging port will turn off while the Weather Station searches for the WWVB signal. The
backlight will return after the 2-10 minute search (which occurs during the late night or early
morning hours). Then the USB charging port will resume working.
Weather Station Factory Restart
FACTORY RESTART:
DISTANCE: Bring the transmitter and Weather Station together inside and place both 5-10
feet apart with nothing between them.
REMOVE POWER: Remove batteries and a/c cord from transmitter and Weather Station.
DISCHARGE ELECTRICITY: Press one of the buttons on the Weather Station at least 20
times to clear all memory. Verify that the Weather Station is blank before proceeding.
UNPOWERED 10 MINUTES: Let the Weather Station and transmitter sit with power
removed for at least 10 minutes.
WEATHER STATION: Insert 5-volt A/C power cord or install fresh alkaline batteries in the
Weather Station.
TRANSMITTER: Insert fresh batteries into the transmitter, observing the correct polarity.
PRESS TX BUTTON: Press the TX button on the back of remote Transmitter to transmit RF
(radio frequency) signal. Keep the transmitter 5-10 feet from the Weather Station.
WAIT: Wait for 5 minutes for the outdoor temperature/humidity to appear.
CONNECTION: When RF (radio frequency) connection is established, the respective
temperature & humidity will appear on the main unit. Allow the transmitter and Weather
Station to sit together for 15 minutes to establish a strong connection.
PLACE TRANSMITTER OUTSIDE: For optimum 433MHz transmission, place the outdoor
transmitter a distance of no more than 200 feet (60 meters, open air) from the Weather
Station.
See the section on mounting and distance/resistance/interference for details on mounting
the outdoor transmitter.
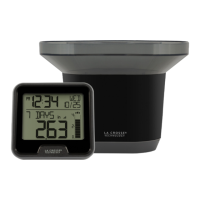
Outdoor Temperature/Humidity Transmitter
Compatible Outdoor Transmitters
A TX14TH-LCD-B outdoor transmitter comes packaged with this Weather Station.
The TX14TH, TX14TH-LCD-G and TX14TH-LCD-B (433MHz) transmitters are compatible
with this Weather Station.
Quick Connect
DISTANCE: Bring the transmitter and Weather Station together inside and have both units
5-10 feet apart with nothing between them.
WEATHER STATION: Hold the CH button on the Weather Station for 5 seconds until the
temperature/humidity area starts to flash.
TRANSMITTER: Remove battery cover and press and release the TX button to send the
signal.
WAIT: Wait for 2 minutes for the outdoor temperature/humidity to appear.
Factory Restart: If the above procedure does not work, please try the factory reset below.