EasyManua.ls Logo

Lamello Zeta User Manual

Lamello Zeta
2 pages
To Next Page IconTo Next Page
Page #1 background imageLoading...
Page #1 background image
= 0.7 mm
1 x
= 0.7 mm
1 x
10 Clamex P Medius (10 mm)
12
14
15 Clamex P-15
Clamex P Medius (15 mm)
Bisco P-15
OFF
7.2
15
9.8
9.8
Ø 100.4
15
10
7.2
15
9.8
9.8
Ø 100.4
10
7.2
15
9.8
9.8
Ø 100.4
0.5 mm
Art.Nr. 9881202 VS
Zeta
Zeta P2
DE
Bedienungsanleitung
Grundplatten-Wechsel
1. Netzstecker ziehen.
2. Grundplatte aufschieben und
3. Verriegelung festschrauben.
Frästiefe nach Grundplatten-Wechsel
justieren
4. Standard-Tiefensteller auf «max» stellen
Für den Einsatz als Standardmaschine
auf «OFF» stellen
5. P-System Tiefensteller ziehen und drehen
und auf 15 einstellen
6. Muster einfräsen und Clamex P-15 ein-
schieben, der Verbinder muss ca. 0.5 mm
zurückstehen
7. Zum Justieren P-System Tiefensteller auf
«OFF» drehen
8. Justierschraube im P-System Tiefensteller
in die gewünschte Richtung drehen
9. Erneute Testfräsung ausführen
EN
Instructions for
changing baseplate
1. Disconnect power cable.
2. Slide on the baseplate and
3. tighten lock.
Adjusting the cutting depth after
changing the baseplate
4. Set the standard depth adjuster to «max»
For the use as a standard biscuit machine set
the depth adjuster to «OFF»
5. Pull the P-System depth adjuster and turn
to the desired depth: 15
6. Make a sample cut and insert a Clamex P-15
element. The connector should be approx.
0.5 mm below the surface
7. To adjust the depth set the P-System depth
adjuster to «OFF»
8. Turn the adjustment screw in the P-System
depth adjuster in the desired direction
9. Cut another sample to check
1. 2.
3.4.
5. + 7.
6. + 9.
8.
Clamex P–15 Clamex P–Medius (10 / 15)
Question and Answer IconNeed help?

Do you have a question about the Lamello Zeta and is the answer not in the manual?

Lamello Zeta Specifications

General IconGeneral
Power1050 W
Voltage230 V
Speed9000 RPM
Weight3.7 kg
BrandLamello
Tool TypeBiscuit Joiner
Power SourceCorded Electric
Blade Diameter100 mm
Frequency50/60 Hz
No-Load Speed9000 RPM

Summary

Instructions for Changing Baseplate

Baseplate Securing

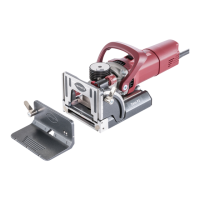
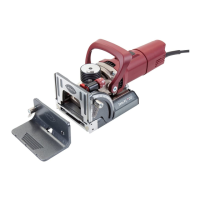
Slide on the baseplate and tighten the lock to secure it properly.

Adjusting Cutting Depth

Adjust the cutting depth after baseplate change using standard and P-System adjusters.

Set Standard Depth Adjuster

Set the standard depth adjuster to 'max' or 'OFF' for specific machine uses.

Set P-System Depth Adjuster

Pull and turn the P-System depth adjuster to the desired depth, typically 15.

Sample Cut and Verification

Make a sample cut, insert Clamex P-15, and verify depth by checking connector position.

Fine-Tune P-System Depth

Turn the adjustment screw in the P-System depth adjuster for precise depth settings.

Related product manuals