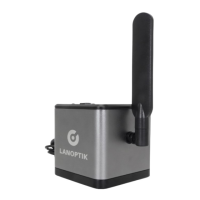
The LANOPTIK HD1210 Series Camera is a versatile microscope camera designed for use with biological microscopes, offering both USB and WiFi connectivity for image streaming and data transmission. It is suitable for various applications requiring high-quality image capture and live preview from a microscope.
Function Description:
The HD1210 Series Camera serves as a digital imaging solution for microscopes. It captures images and provides a live stream to connected devices such as PCs, smartphones, or tablets. The camera supports two primary working modes: USB and WiFi. In USB mode, it connects directly to a PC for data transmission and live-stream imaging via dedicated software. In WiFi mode, it allows wireless connection to smart devices, enabling live-stream imaging and control. Additionally, it features an HDMI interface for direct display on an HDMI monitor. The camera is designed for easy assembly with trinocular microscopes, fitting into a standard dovetail slot. It includes a focusing screw for parfocalizing, ensuring clear live previews.
Important Technical Specifications:
- Connectivity: USB 2.0 high-speed interface, 802.11ac WiFi protocol (5G WiFi mode), HDMI output, Network interface.
- System Requirements (USB Work Mode):
- Operating System: Windows 7 (64bit), Windows 8 (64bit), Windows 8.1 (64bit), Windows 10 (64bit), Windows 11 (64bit).
- CPU: Dual core 3GHz or higher.
- Interface: USB 2.0 high-speed or USB2.0 compatible interface.
- Hard Disk Space: At least 10 GB available.
- Memory: 8GB or more.
- Optical Drive: DVD-ROM driver (only for software installation).
- System Requirements (WiFi Work Mode):
- Android System: 5.0 or above.
- iOS System: 8.0 or above.
- Wireless Network Hardware: Must support 802.11ac protocol (5G WiFi mode).
- Operating Environment:
- Operating Temperature: 0°C to 40°C.
- Storage Temperature: -20°C to 60°C.
- Operating Humidity: 30% to 60%RH.
- Storage Humidity: 10% to 80%RH.
- Power Supply: USB power adaptor.
Usage Features:
- Dual Work Modes: Seamlessly switch between USB and WiFi modes to suit different operational needs.
- USB Mode: Connects to a PC via a USB cable for data transmission and live-stream imaging using KoPa Capture Pro software.
- WiFi Mode: Connects wirelessly to smartphones or tablets (Android/iOS) via the Camera's WiFi signal, enabling live-stream imaging through the "KoPa WiFi Lab" app. It can also connect to the internet simultaneously through its network interface.
- HDMI Mode: Connects directly to an HDMI display for live output, powered via the USB power plug.
- Easy Assembly: Designed for quick and secure installation on trinocular microscopes using a dovetail slot and fastening screw.
- Parfocalizing: Features a focusing screw for fine-tuning the focus length, allowing users to achieve a clear live preview from the software, ensuring the camera is parfocalized with the microscope eyepieces. This involves adjusting the eyepiece diopter to minimum, focusing on a specimen with a 10X objective, and then finely turning the camera's focusing screw until the live preview is clear.
- Indicator Lights:
- Power Indicator: Shows the power status of the device.
- ACT Indicator Light: Provides feedback on camera activity.
- Software Support: Utilizes "Pixit Pro" (for Windows) and "KoPa WiFi Lab" (for Android/iOS) for image capture, live preview, and control.
- Power On/Off Switch: Simple control for device operation.
Maintenance Features:
- Lens and Sensor Care:
- Avoid direct contact with fingers to prevent damage or dirt.
- Use dry, non-linen fabric or professional lens tissue to wipe the lens or sensor lightly if dirty or damp.
- Do not use alcohol or other organic solvents for cleaning.
- Regularly clean the lens with professional lens tissue or detergent to ensure clarity and prevent spots or circles on the screen.
- Environmental Protection:
- Do not expose the product to outdoor environments without protection.
- Avoid high temperature, high humidity, direct sunlight, dirt, vibration, and proximity to heat sources to prevent damage.
- Ensure the operating and storage environments adhere to specified temperature and humidity ranges.
- Electrical Safety:
- Do not plug in or unplug the power connection port with wet hands.
- Do not disassemble or modify the internal structure of the device to avoid failure or electric shock.
- Use a regular brand power socket with proper grounding to prevent electric shock.
- Perform regular safety checks on sockets and plugs to prevent electrical hazards.
- Loosen bundled power cords before use to prevent electromagnetic induction and heating.
- Power off the microscope before moving the computer or laptop to avoid electric shock.
- Ensure the product is not placed in high or easily fallable locations to prevent damage.
- Turn off the load power switch of the product equipment before opening the socket power supply.
- General Handling:
- Disconnect the power line immediately if any foreign matter, water, or liquid enters the device. Do not use a hair dryer; send it to a maintenance center.
- Arrange the device's connection cable neatly to prevent the microscope from being tripped over or dropped.
Safety Instructions and Disclaimer:
Users are advised to read the instructions, disclaimers, and safety guidelines carefully. The company reserves the right to update documentation and product specifications without prior notice. Users are responsible for their actions and consequences, and must use the product for legitimate purposes, adhering to all instructions and safety guidelines. The company disclaims responsibility for personal injuries, accidents, property losses, legal disputes, or other adverse events resulting from non-compliance with safety instructions or irresistible factors.