This document is a user manual and quick start guide for Larson Electronics' Network IP Cameras, specifically the EXPCMR-IP-POE series. It provides instructions for setting up, configuring, and maintaining these IP cameras, which are designed for network video surveillance.
Function Description
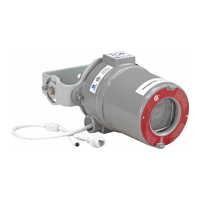
The Larson Electronics EXPCMR-IP-POE series cameras are network video recorders (NVRs) that connect to an existing network infrastructure. They allow users to monitor and record video surveillance remotely via a computer or other network-connected device. The cameras support Power over Ethernet (PoE), simplifying installation by allowing both power and data to be transmitted over a single Ethernet cable. The manual details how to connect the cameras to a network switch and an NVR, and how to access them through a web browser.
Important Technical Specifications
The manual highlights several critical technical specifications and requirements for the EXPCMR-IP-POE cameras:
- Network Connectivity: The cameras are designed to integrate into an existing network, supporting both direct connection to an NVR and connection via a PoE network switch. The manual illustrates a typical setup with multiple cameras (IP Camera A, B, and C) connected to a network switch, which then connects to an NVR and a computer for management.
- IP Addressing: The cameras utilize IP addresses for network communication. The SADP Tool (Search Active Device Protocol) is a utility provided to discover cameras on the network, view their IP addresses, and modify network parameters. The default IP address for new cameras is often 192.168.3.xxx, where "xxx" is a unique identifier. Users can assign static IP addresses or use DHCP.
- Power over Ethernet (PoE): The "POE" in the series name indicates that these cameras can receive power directly through the Ethernet cable, eliminating the need for separate power adapters and simplifying wiring.
- Temperature Range: The cameras are designed to operate in extreme hot and cold temperatures, typically between -30°C and 60°C, without experiencing damage or affecting electromagnetic radiation.
- IR Illumination: The cameras feature IR (infrared) illumination for night vision. The manual provides specific instructions on how to prevent IR reflection issues, such as ensuring the dome cover is clean and free of dust or grease, and positioning the camera to avoid reflective surfaces.
- Software Requirements: The setup process requires the SADP Tool, which is a Windows-based application. Accessing the camera's web interface typically requires Internet Explorer (IE) with specific ActiveX controls installed.
Usage Features
The manual outlines several key usage features:
- SADP Tool for Device Management: The SADP Tool is central to managing the cameras. It allows users to:
- Discover all active devices (cameras and NVRs) on the local area network (LAN).
- View device details such as IP address, port, and software version.
- Modify network parameters, including IP address, subnet mask, and gateway.
- Activate inactive cameras by setting a strong password.
- Enable DHCP or assign static IP addresses.
- Web Interface Access: After initial setup with the SADP Tool, cameras can be accessed via a web browser (Internet Explorer is recommended). Users log in with an administrator username and password to view live footage, configure settings, and manage recordings.
- Plug-in Installation: When accessing the camera's web interface for the first time, users may need to install a web components plug-in to enable video streaming and full functionality.
- Password Management: The manual emphasizes the importance of setting strong passwords for security and provides steps for activating inactive cameras by creating a password. It also details how to modify existing passwords.
- Network Configuration: Users can configure network settings like IP address, subnet mask, and gateway to ensure proper communication within their network. The manual provides an example of changing the IP address to avoid conflicts and integrate the camera into a specific network segment.
- Administrator Access: The camera's web interface is accessed with administrator credentials, allowing full control over camera settings, viewing live feeds, and managing recorded data.
Maintenance Features
The manual includes important maintenance and safety guidelines:
- Safety Instructions: It highlights general safety warnings regarding serious injury or equipment damage. Users are advised to follow all precautions and avoid actions that could lead to property loss.
- Installation Precautions:
- Installation should be performed by qualified service personnel.
- Blackout equipment must be installed to prevent power supply circuit interruption.
- Contact a dealer or the nearest service center if the product does not work properly; do not attempt to disassemble the camera yourself.
- Environmental Considerations:
- Avoid placing the camera in extremely hot or cold temperatures.
- Ensure good ventilation to prevent heat accumulation.
- Keep the camera away from water and any liquid during installation.
- Ship the camera in its original packing.
- Cleaning and Care:
- Make sure the power supply voltage is correct.
- Do not drop the camera or subject it to physical shock.
- Do not touch sensor modules with fingers. If cleaning is necessary, use a clean cloth with a bit of ethanol and wipe it gently.
- Do not aim the camera lens at strong light sources (sun or incandescent lamp) to prevent damage to the camera.
- Avoid using laser beams near the sensor, as they can damage the surface.
- IR Reflection Prevention: To ensure clear night vision, users are instructed to:
- Clean the dome cover regularly to remove dust or grease.
- Ensure the installation location does not have reflective surfaces too close to the camera, as IR light can reflect back into the lens, causing blurring.
- If foam rings are present, ensure they are seated flush against the inner surface of the bubble to isolate the lens from the IR LEDs.
- Resetting Camera Configuration: In case of factory settings restoration, the manual advises pressing the reset button down and holding it for an additional 30-45 seconds. This will revert the camera configuration to its factory settings.