28 • LMH Series Rotary Lasers
4. OPERATION
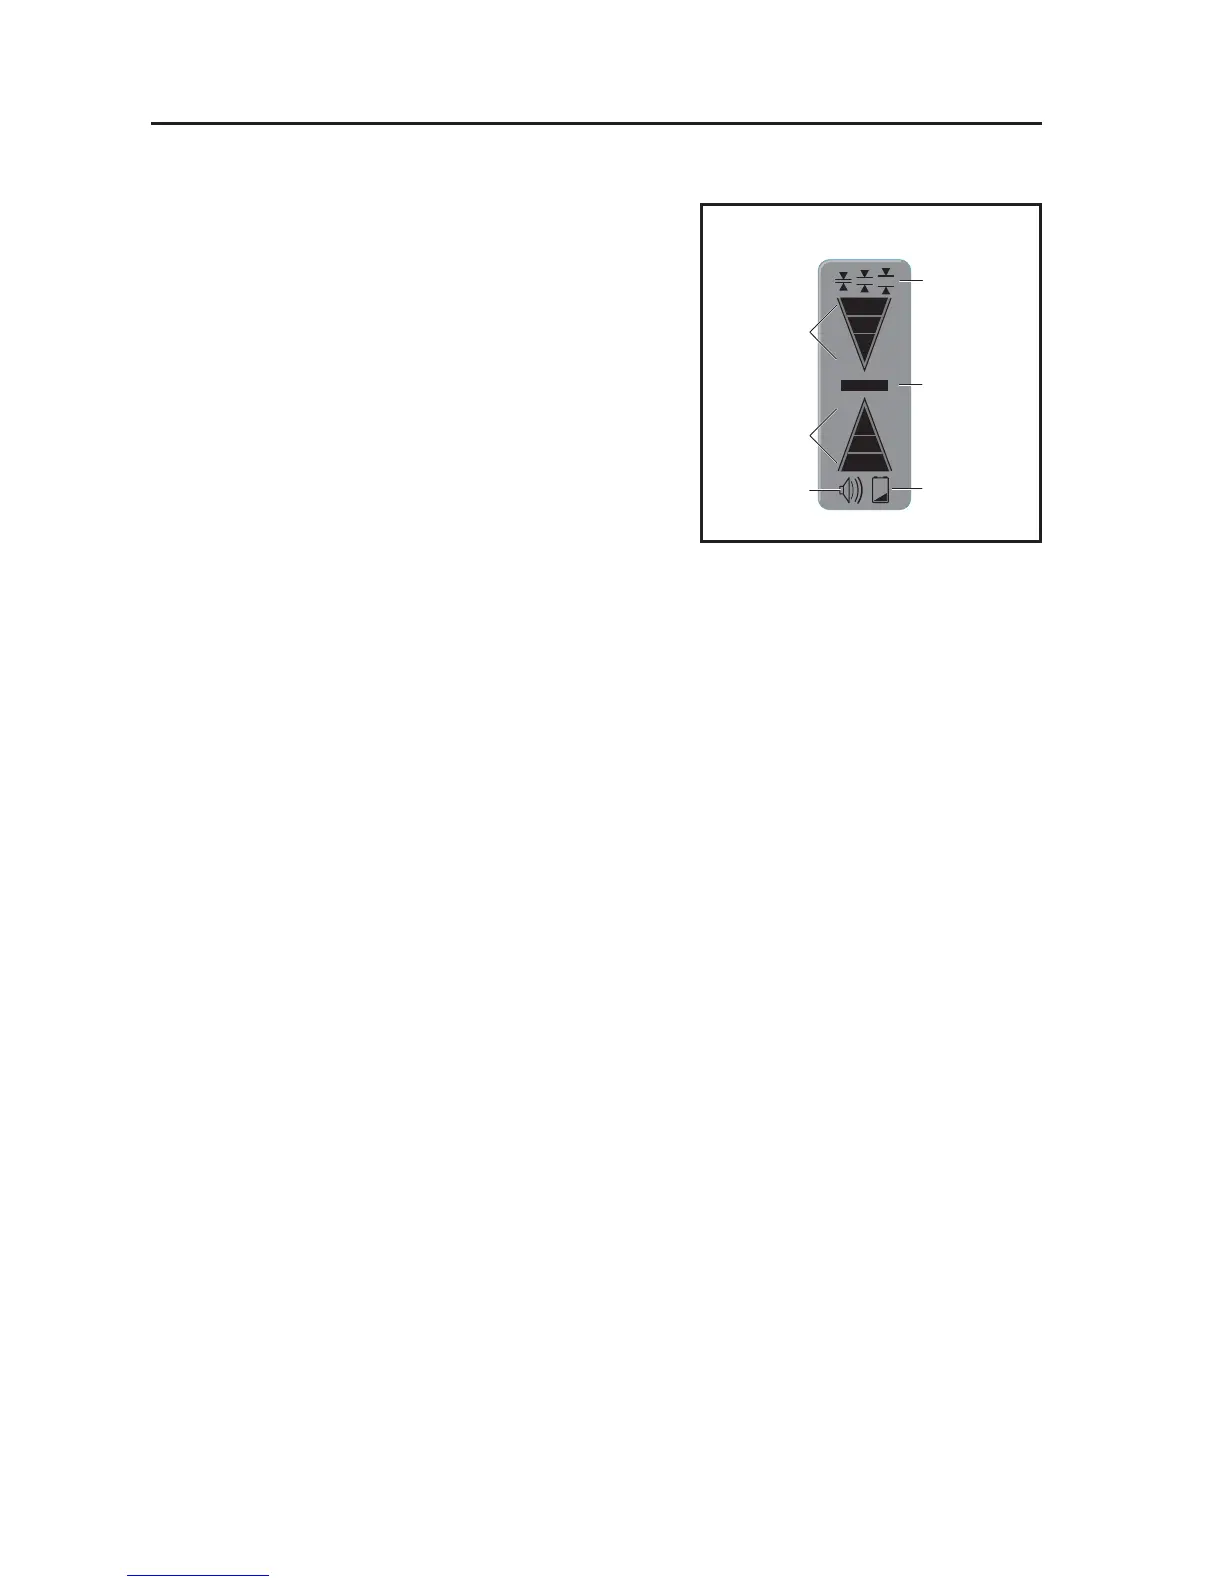
1: Mount the unit onto a sighting rod if
you are using one. Turn on the unit by
pressing the ON/OFF pad. The LCD
symbols will momentarily fl ash (Fig. 1)
and the “coarse” beam indicator symbol
will remain lit and the audio signal will
be on.
2: Expose the beam capture window of
the laser detector towards the direction
of the rotating laser.
3: Slowly move the laser detector in an
upward and downward direction until the
LCD beam indicator arrows appear and/or a pulsing audio signal is
heard. Use the Beam Resolution feature to choose between the
coarse/low setting, used for approximating level or for initial locating
of the center level point, the medium setting, used for greater
accuracy, and the fi ne/high setting, used for the most accurate
pinpointing of level.
4: Move the detector upward when the low beam indicator light is lit
(with volume on, a short pulsing audio tone is heard). Move the
detector downward when the high beam indicator arrow is lit (with
volume on, a long pulsing audio tone is heard). When the beam is
level, the level beam indicator line will be lit and a solid audio tone will
be heard.
If the detector is not struck by a laser beam after 5-8 minutes, the
detector will automatically shut itself off to preserve battery life. Turn
the unit back on using the power button.
Fig. 1
High Beam
Low Beam
Beam
Resolution
Battery
Strength
Speaker
Volume
LCD Display
Level Beam
Indicator