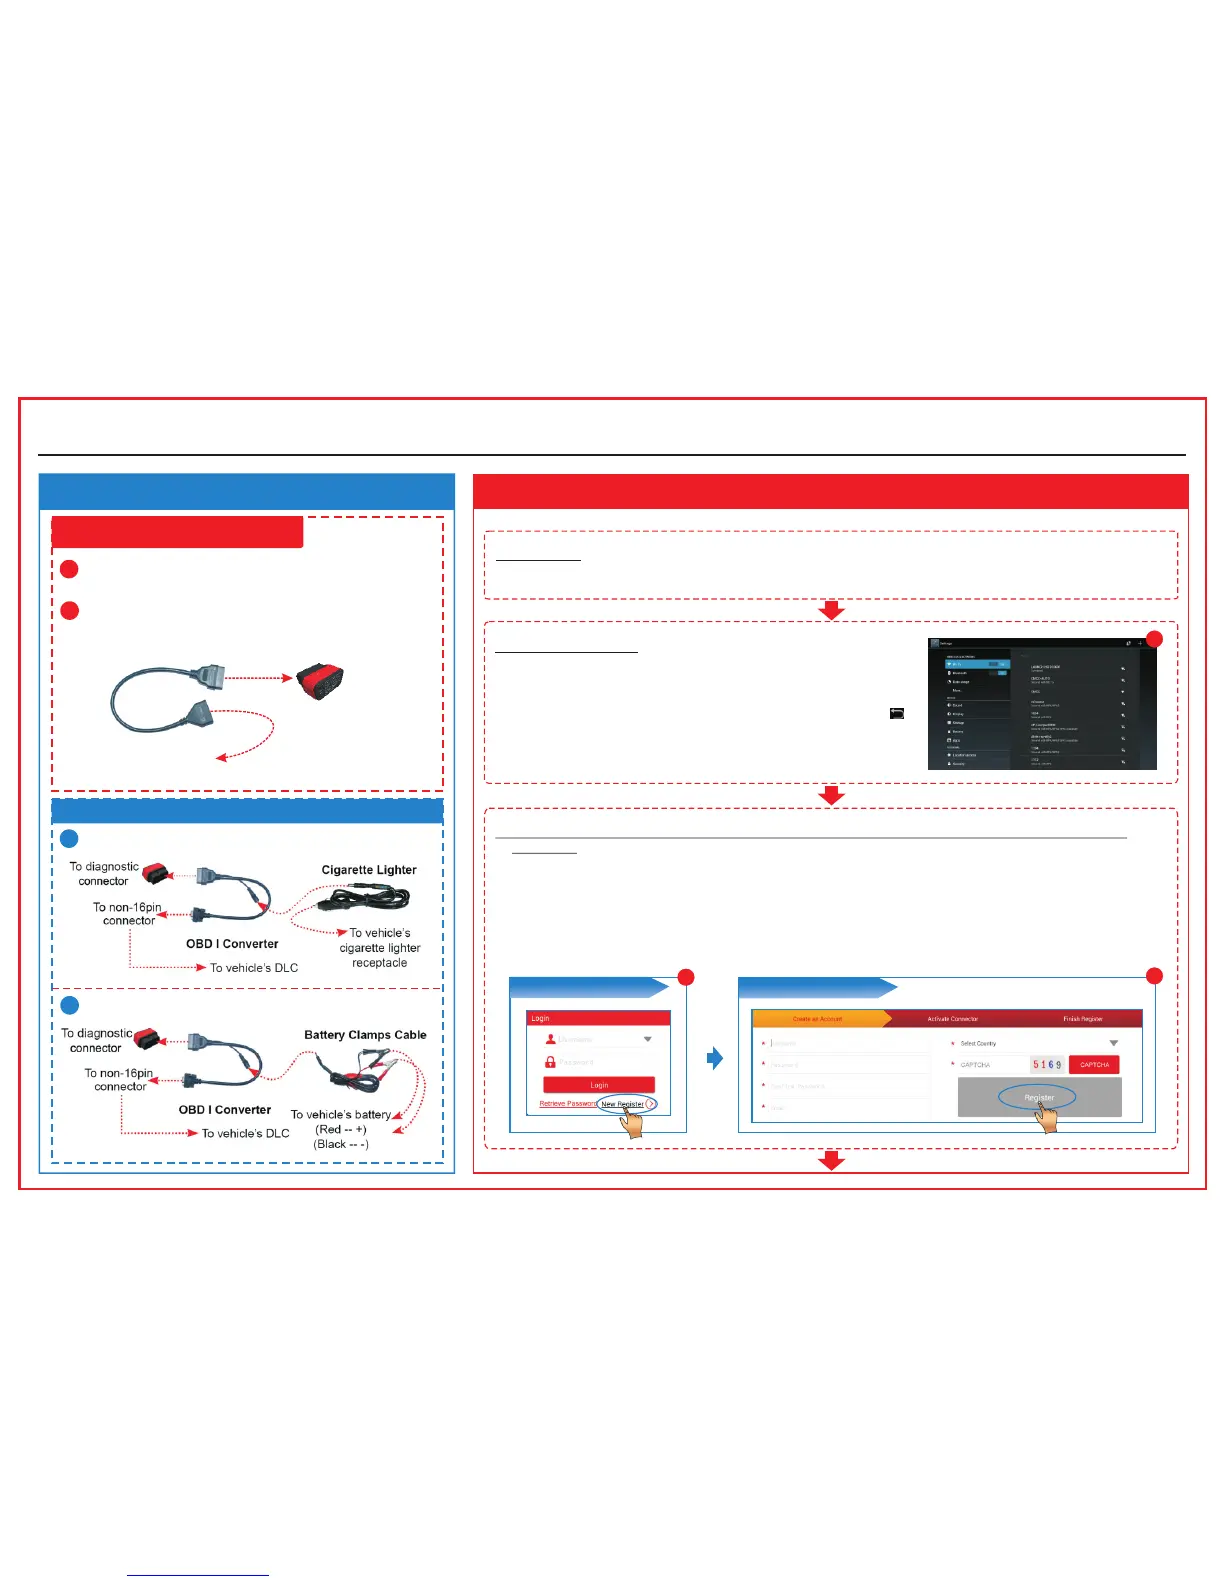
2. Connections
Non-OBD II Vehicle Connection
OBD II Vehicle Connection
3. Power on, Wi-Fi connection, Register and Download software
1. Power on
Press the [POWER] button, the system starts initializing and then enters the desktop.
2. Wi-Fi connection
Tap [Settings] on the desktop and then [Wi-Fi] to configure Wi-Fi
setting. Refer to Figure A.
Select the desired Wi-Fi connection from the list. (Password may be
required for secured networks). When “Connected” appears, tap
to return to the desktop.
(To be continued...)
3. Register (1. Tap “Login” --> 2. Register an Account --> 3. Activate Connector --> 4. Finish
Register)
1. Launch the application on the desktop to enter. Tap on “LOGIN” on the right upper corner
of the screen.
2. Tap on “New Register” in Figure B, input the information (items with * must be filled) and then tap on
“Register”. Refer to Figure C.
3. Input the Product S/N and Activation Code (can be obtained from the password envelope, see Figure
F), and then tap on “Activate”. Refer to Figure D.
4. Tap on “Go To Update Center” to enter diagnostic software download screen. Refer to Figure E.
X-431 PADII
A Via Cigarette Lighter
A Directly plug the diagnostic connector into vehicle’s
DLC
B Via Battery Clamps Cable
B Using OBD II extension cable
To Vehicle’s DLC
OBD II Extension
Cable
To diagnostic
connector
X-431 PADII
LAUNCH
Quick Start Guide (EN)
Login Interface
B
Create an Account
C
A
 Loading...