19
ASSEMBLY
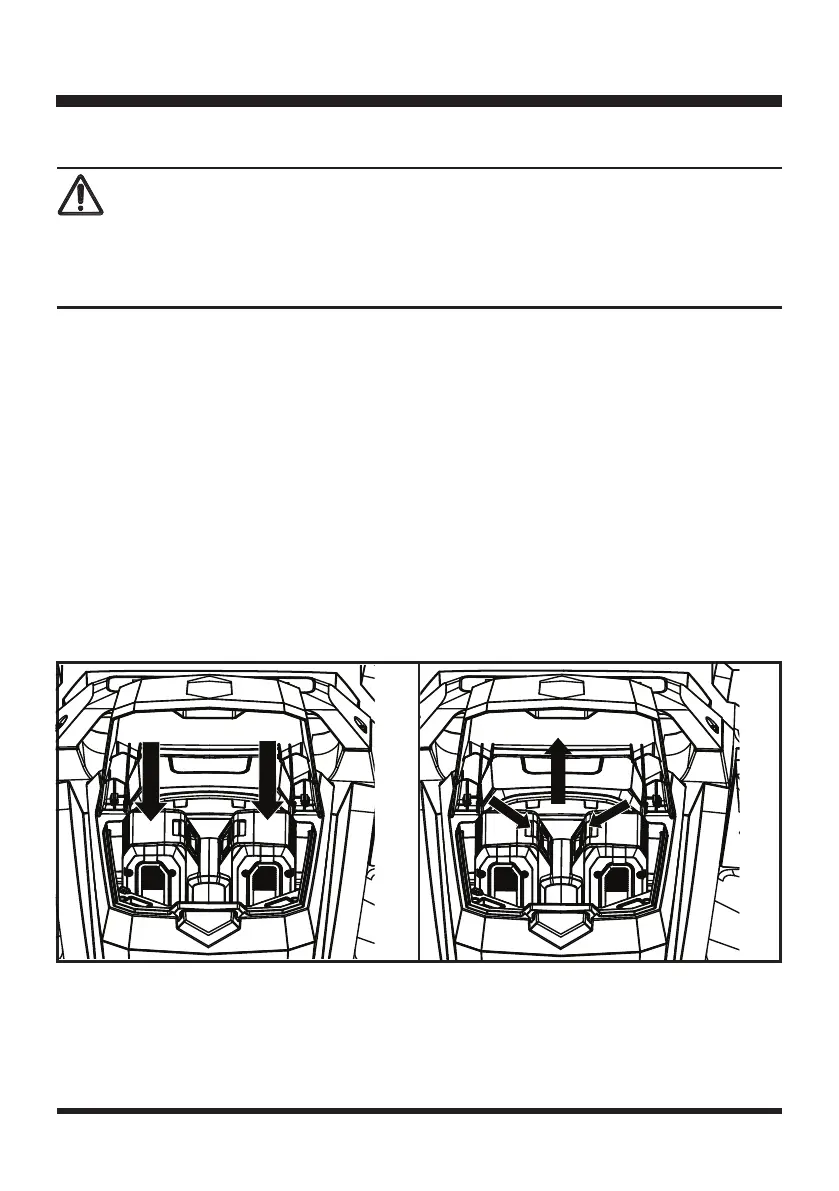
Fig. 11
INSTALLING / REMOVING THE BATTERY PACKS
If any parts are broken or missing, do not attempt to attach the battery packs to the mower or operate the
mower until the broken or missing parts are replaced. Failure to do so could result in serious injury. Do not
connect the batteries and/or the safety key before the product is completely assembled.
NOTE: Both batteries should be installed into the compartments in order to start the mower.
To install battery packs:
1. Make sure both batteries are fully charged.
2. Lift the plastic battery compartment cover on the top of the mower deck.
3. Align the raised ribs on the mower with the grooves in the battery pack, and then insert the battery packs
into the compartment (Fig. 11).
4. Push the battery packs until you hear a “click”.
5. Insert the safety key into the keyholes located within the battery compartment.
6. Close the battery compartment cover.
NOTE: Make sure that the battery packs rmly snap into place and are secured to the mower before starting
operation.
WARNING
Fig. 12
To remove battery packs:
1. Stop the lawn mower. Lift the battery compartment cover and remove the safety key.
2. Press the release button on the battery pack, grasp the battery pack rmly and pull out of the battery
compartment. Remove the second battery in the same way (Fig. 12).
3. Close the battery compartment cover.