Rev: 09.20.18
Page 3
CCD-0002197
Installing the Stop Bolt
1. Retract the awning.
2. Make sure the centerline of the roll tube is level with or slightly higher than the centerline of the
awning rail. The bottom of the roll tube MUST NOT be higher than the awning rail.
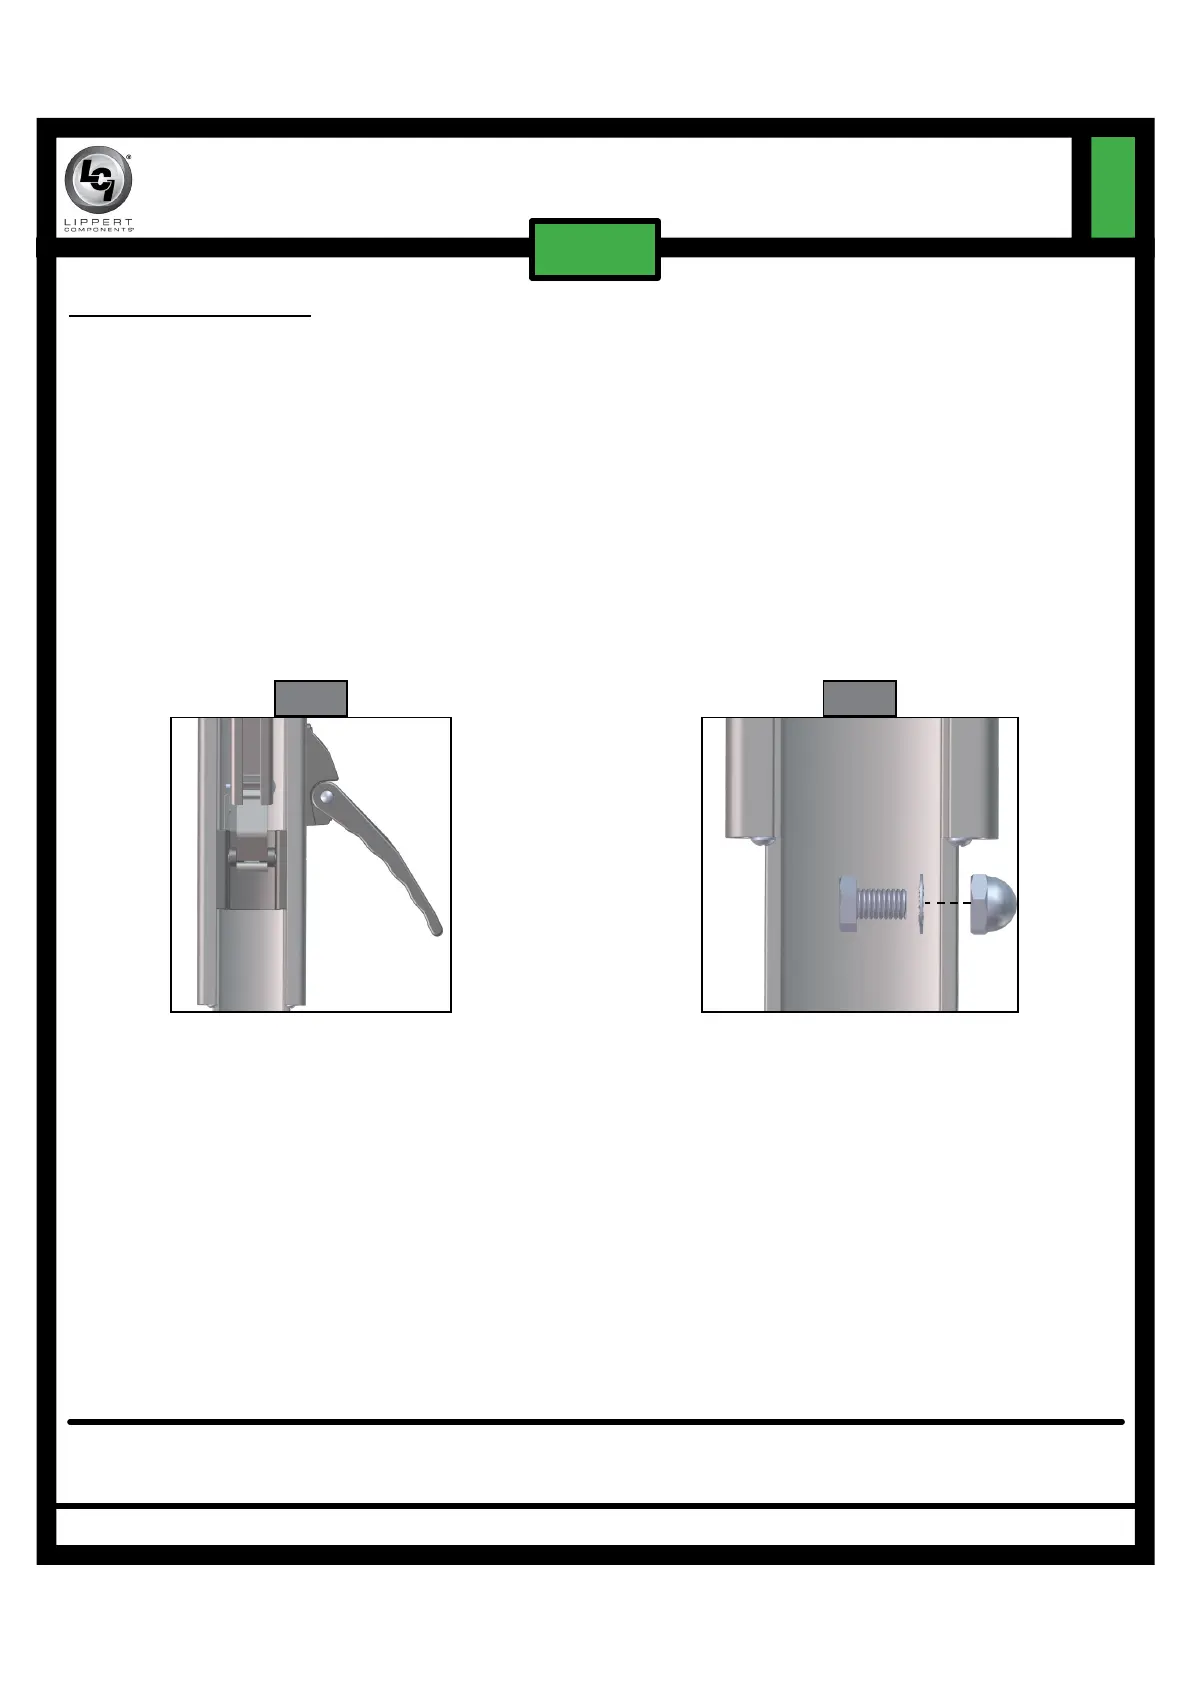
3. Adjust support arm if necessary.
A. Open the support arm handle and slide the upper arm up or down as required. Close the handle
and slide the lower channel until the locking pin clicks into the nearest positioning hole (Fig. 7).
4. Mark the position of the stop hole that is directly below the upper channel.
5. From the inside of the channel, insert a 5⁄16” bolt and star washer through the hole. Secure with a 5⁄16”
cap nut using ½” socket and wrench (Fig. 8).
NOTE: It may be necessary to lift the upper channel to tighten the cap nut.
6. Repeat steps 4 and 5 for the other support arm.
SOLERA
®
CLASSIC AWNING ARM
REPLACEMENT INSTRUCTIONS
TI-231
AWNINGS
Fig. 7 Fig. 8
As a supplier of components to the RV industry, safety, education and customer satisfaction are our primary concerns. Should you
have any questions, please do not hesitate to contact us at (574) 537-8900 or by email at customerservice@lci1.com. Self-help tips,
technical documents, product videos and a training class schedule are available at lci1.com or by downloading the MyLCI app.
 Loading...