4
lci1.com 574-537-8900 Rev: 02.07.20
Thin Shade
Installation and Owner’s Manual
(For Aftermarket Applications)
CCD-0001507
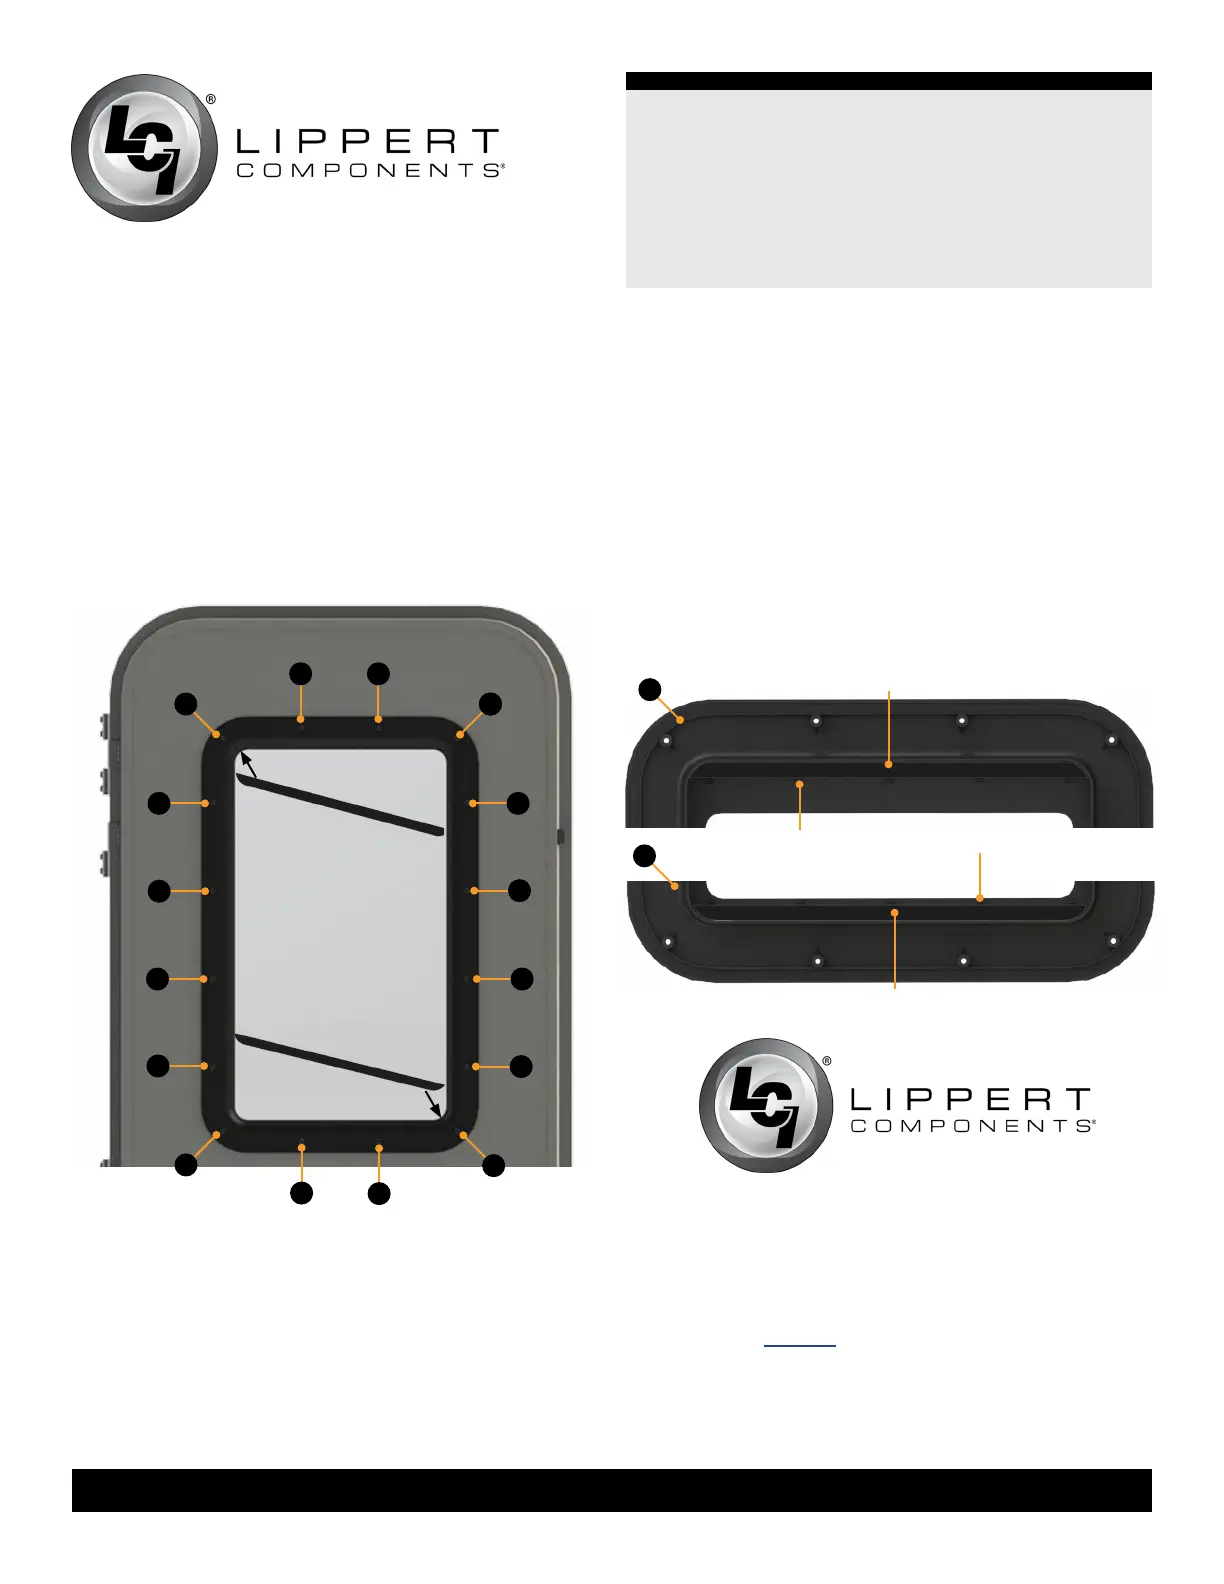
Fig.4
A A
A
A
A A
A
A
B
B
B
B
B
B
B
B
9. Remove the top 8 Phillips head screws (Fig.4A) from the
interior window frame. Do not discard screws.
10. Gently pull back the top of the frame.
11. If currently equipped, remove the existing window
shade from inside of the interior window frame.
12. Holding the top shade sill at an approximate 45 degree
angle, insert one end into the corner between the inner
frame and glass (Fig.4).
13. Repeat this action on the opposite end of the top sill.
14. Press both ends up until the part is securely in place.
15. Top sill must be seated above tabs (Fig.5A)
16. Press top of frame back into position and replace
Phillips head screws removed in step 9.
17. Remove the bottom 8 Phillips head screws (Fig.4B) from
the interior window frame. Do not discard screws.
Fig.5
A
B
tabs
tabs
top sill
bottom sill
18. Holding the bottom shade sill at an approximate 45
degree angle, insert one end into the corner between the
inner frame and glass (Fig.4).
19. Repeat this action on the opposite end of the bottom
sill.
20. Press both ends down until the part is securely in
place.
21. Bottom sill must be seated below tabs (Fig.5B)
22. Press bottom of frame back into position and replace
Phillips head screws removed in step 16.
Manual information may be distributed as a complete
document only, unless Lippert Components provides
explicit consent to distribute individual parts.
All manual information is subject to change without
notice. Revised editions will be available for free
download at lci1.com. Manual information is considered
factual until made obsolete by a revised version.
Please recycle all obsolete materials and contact
Lippert Components with concerns or questions.
 Loading...