3
lci1.com 574-537-8900 Rev: 02.07.20
Thin Shade
Installation and Owner’s Manual
(For Aftermarket Applications)
CCD-0001507
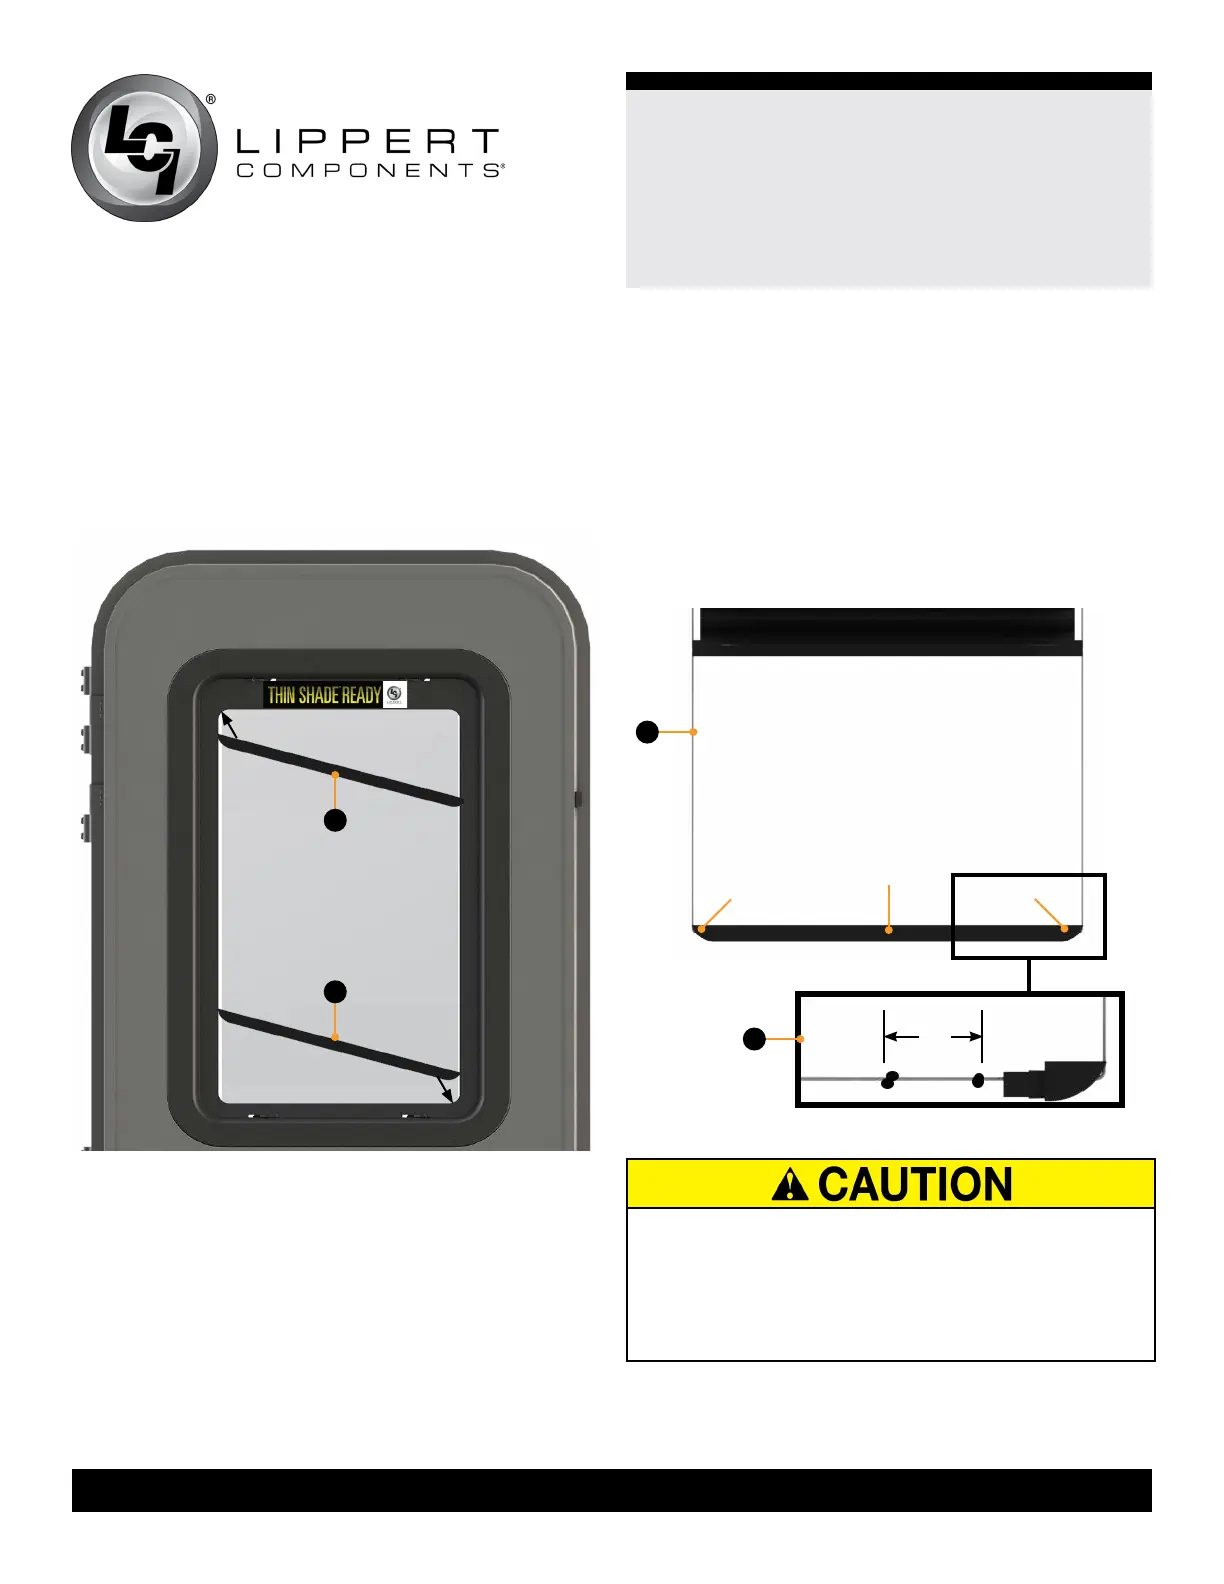
7. Holding the bottom shade sill at an approximate 45
degree angle, insert one end into the corner between the
inner and outer frame (Fig.2B).
8. Repeat this action on the opposite end of the bottom sill.
9. Press both ends down and latch in place, moving levers
in a left-to-right direction.
Fig.3
A
B
Fig.2
Installation - Screw-in Frame
NOTE: Door must be equipped with #387501 inner frame.
1. Working from the bottom of the shade, locate the bottom
sill xture (Fig.3A).
2. Remove end caps from center of xture.
3. Locate the knots tied at the end of each cord (Fig.3B).
bottom sill
end cap
end cap
½”
A
B
FAILURE TO FOLLOW THE RECOMMENDED
PROCEDURE OF REMOVAL COULD RESULT IN
PERSONAL INJURY FROM BROKEN GLASS OR
DAMAGE TO EQUIPMENT. IT IS IMPORTANT TO
REMOVE THE PHILLIPS HEAD SCREWS IN THE ORDER
STATED.
4. Measure ½” up from the existing knot and mark the
cord.
5. Repeat this action on the opposite cord.
6. Create a new knot on both cords, at the marks made in
step 4.
7. Pull bottom sill of shade down to the newly created
knots.
8. Replace end caps.
 Loading...