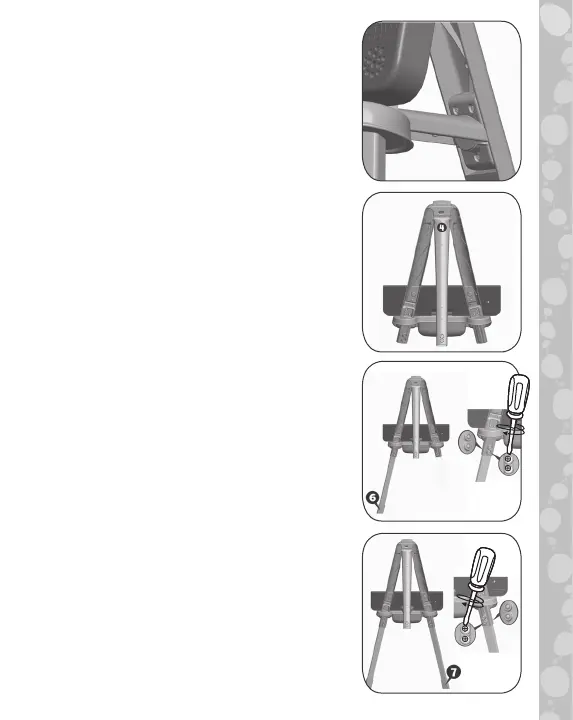
11
11. Firmly snap the other end of Brace
5 into the yellow slot in the back of
Upper Rear Leg 4 as shown. (Note:
Once inserted, this piece cannot be
removed.) You have now assembled
the upper easel.
12. Lay the assembled upper easel face
down on a flat surface.
13. Fit Lower Front Leg 6 into Connector
1 with the curved side of the leg
facing down and the number 6 facing
up. Secure with two Nuts and two
Bolts, inserting the Nuts from the
bottom.
14. Fit Lower Front Leg 7 into Connector
2 with the curved side of the leg
facing down and the number 7 facing
up. Secure with two Nuts and two
Bolts, inserting the Nuts from the
bottom.