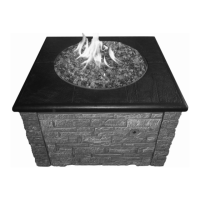
ASSEMBLY and INSTALLATION INFORMATION
I M P O R T A N T
BEFORE PROCEEDING, CAREFULLY READ ALL OF THE IMPORTANT SAFETY
INFORMATION CONTAINED IN THIS OWNER’S MANUAL.
Contents of Fire Pit Box – Check to be sure that you have all parts listed below:
Stainless Steel Burner
Orice and lock nut
Connector Hose – 24”
Complete valve assembly ready to connect to gas hoses
Gas Regulator with Hose – 24”
Lava Rock – 1 Bag
Note: Your Fire Pit may be parally or completely pre-assembled. In either case please maintain these set up instrucons for
future reference.
Lay out all parts and idenfy the corner posts [4],
connecng rails [8], nuts and washers [16 each]. Using
the supplied tools assemble the 8 rails and 4 corner
posts leaving the assembly loose at this me. The
connecng tabs will overlap at the corner posts. Each of
the connecng rail tabs will t over two studs.
The side panels are held in place magnecally. Aach the four side panels at this me to the magnets on the corner posts. One of
the side panels has a gas valve mounng hole and a clip at the top. Install the black retaining clip from the parts bag over the
connecng rail and the side panel. This is to prevent the side with the gas valve from moving. Place the chrome ange through the
hole from the outside. Place the plasc sleeve over the valve and thread the valve on to the mounng ange.
The top panels comes in two pieces. Using
the long bolts, nuts, & washers assemble
the two halves and bolt them together
ghtly. The washers t on the bolt head
side of the assembly. When completed
place the top on the base.