The cleaning cartridge is necessary to rinse the print head whenever the printer
will be idle for an extended period up to three month.
To the insertion of the cartridge, please observe the following instructions:
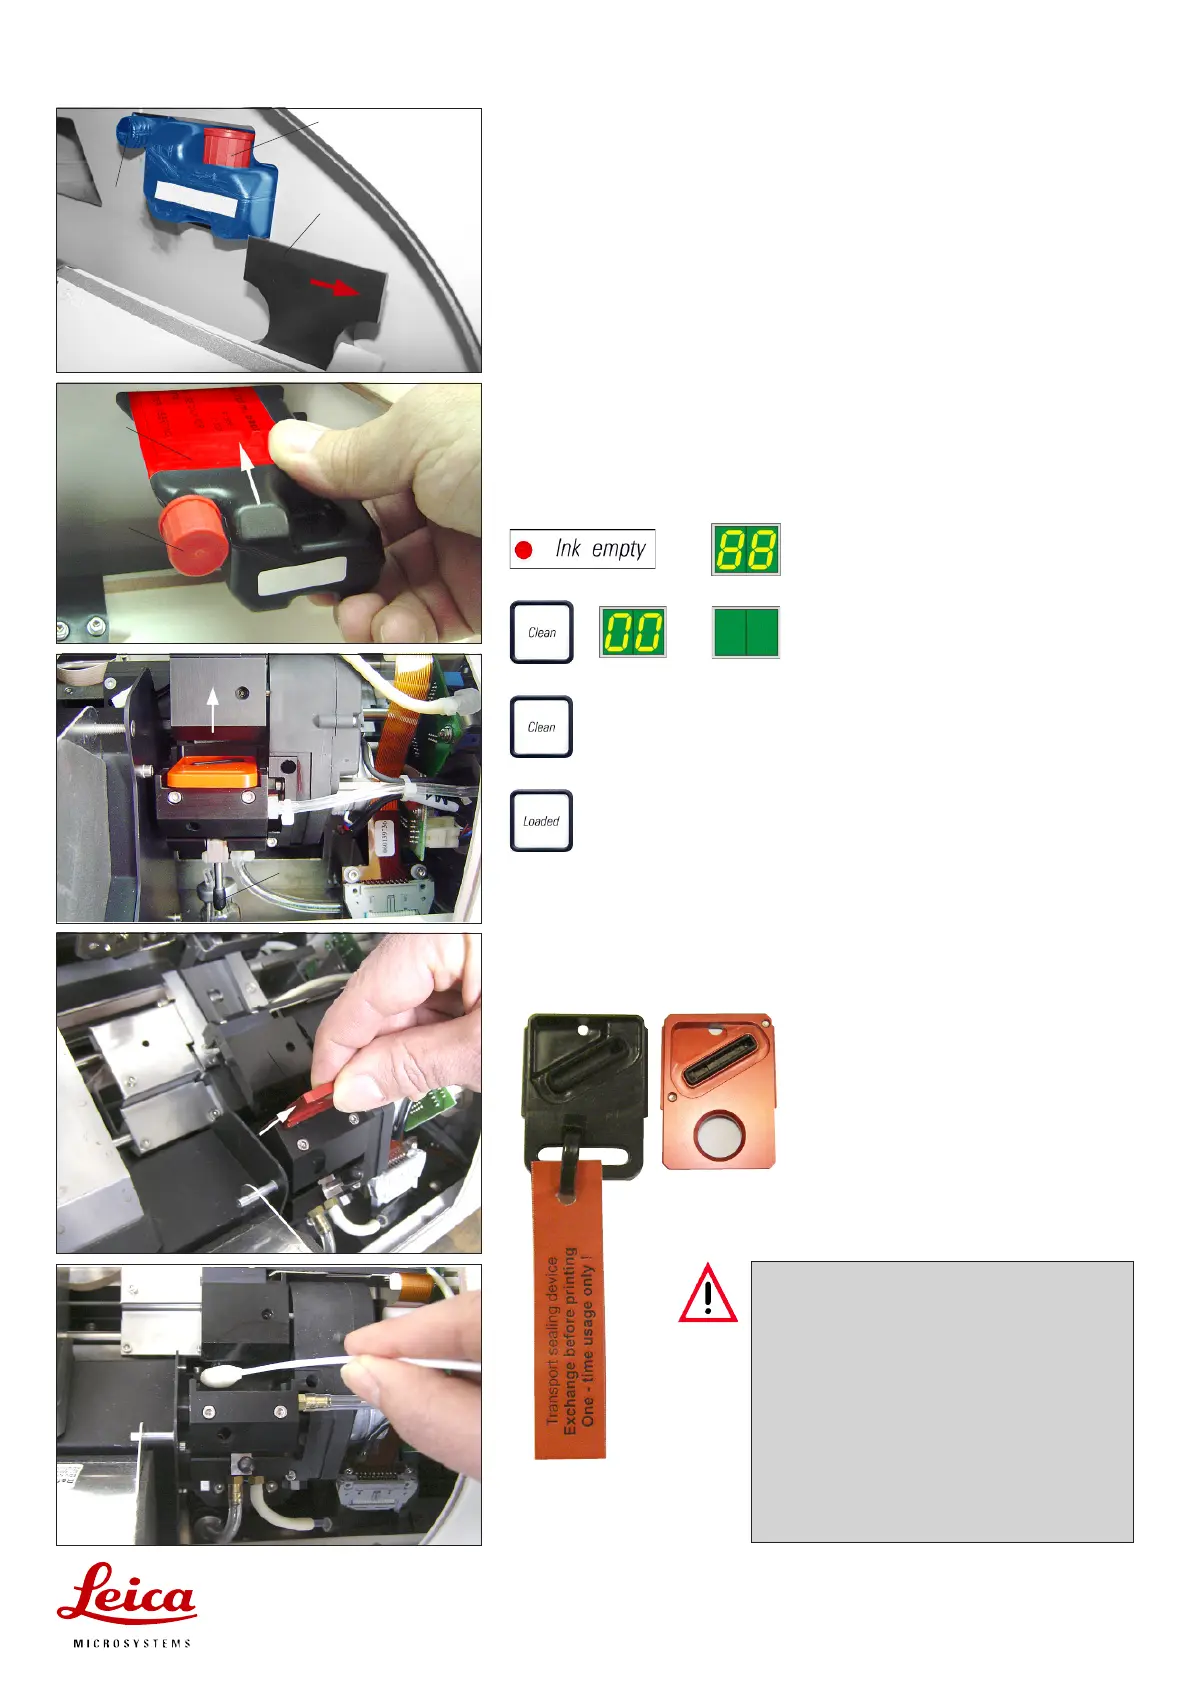
• Open the cover plate on the left side of the instrument (by pressing its top
left corner) and slide the safety catch (86) toward the front of the instru-
ment, fig.1.
• Pull the ink cartridge (87) approx. 3 cm out of the instrument so that the ”Ink
Emtpy” LED lights.
• Screw the red cap (87) onto the nozzle (88), seal it tightly and remove it com-
pletely.
• Take the cartridge out of the shipping box and remove the foil wrapping.
• Insert a (new) cleaning cartridge until it stops by smooth pressure, fig. 2.
• Unsrew the red cap (85) one turn and slide the cartridge fully home.
• Slide the safety catch (86) back in front of the cartridge.
User instructions for 120 ml cleaning cartridge – Leica IP C/S
Fig. 1
Fig. 3
Installing the cartridge
Fig. 2
Phone: +49 (06224) 143 0
Fax: +49 (06224) 143 200
Leica Microsystems Nussloch GmbH
Heidelberger Strasse 17-19
D-69226 Nussloch
Web: http://www.leica-microsystems.com
http://www.histo-solutions.com
E-Mail: histo_info@leica-microsystems.com
85
64
• The ”Ink Emtpy” LED goes out and “88“
will appear on the display.
• Press CLEAN to rinse the print head,
“00“ will appear on the display. The dis-
play will go out, when the cleaning pro-
cess is complete.
→→
→→
→
73
++
++
+
• Pull out the red replacement plate (70) fig. 4.
• Clean the print head with foam swabs and alcohol as described on pages
12/ 13 in the key instructions on the instrument (see also fig. 5).
• After cleaning the print head, insert a new transport sealing device (73),
fig. 6 and slide it down as far as will go.
• Open the printer lid and press CLEAN and LOADED simultaneously.
• The print head (72) will elevate about
½½
½½
½ inch from the red replace-
ment plate (70), fig. 3.
• Raise the small lever (69) located beneath the replacement plate
to release it, fig. 3.
→→
→→
→
72
70
Important!
Turn the printer off and disconncet it from
the mains at this point to prevent damage to
the print head.
Never use a cleaning cartridge together with
a replacement plate (70).
Do not reuse a used transport sealing device
(73), the sealing of the print head is no longer
reliable.
To reinsert an ink cartridge, see the the key
instructions on the instrument, page3-6.
69
• Press the small lever (69 in fig. 3) down
into its original position.
• Press any key to reposition the print
head and return the printer to opera-
tional status.
• Close the printer front lid.
• Screw tightly the red cap (85, fig 2) of
the cleaning cartridge and close the
cover plate on left side of the printer.
Fig. 4
Fig.5
Fig. 6
70
87
86
88
 Loading...