50 / Protecting pictures / Clearing delete protection
Protecting pictures /
Clearing delete protection
1. In normal review mode (4.1) press any of the 4 buttons 1.20,
1.21, 1.23, or 1.24.
• The image field shows - for 5s - the 4 fields 4.1.9 – MENU,
4.1.10 – INFO, 4.1.11 – PROTECT and 4.1.12 – DELETE for
the button functions valid in this situation.
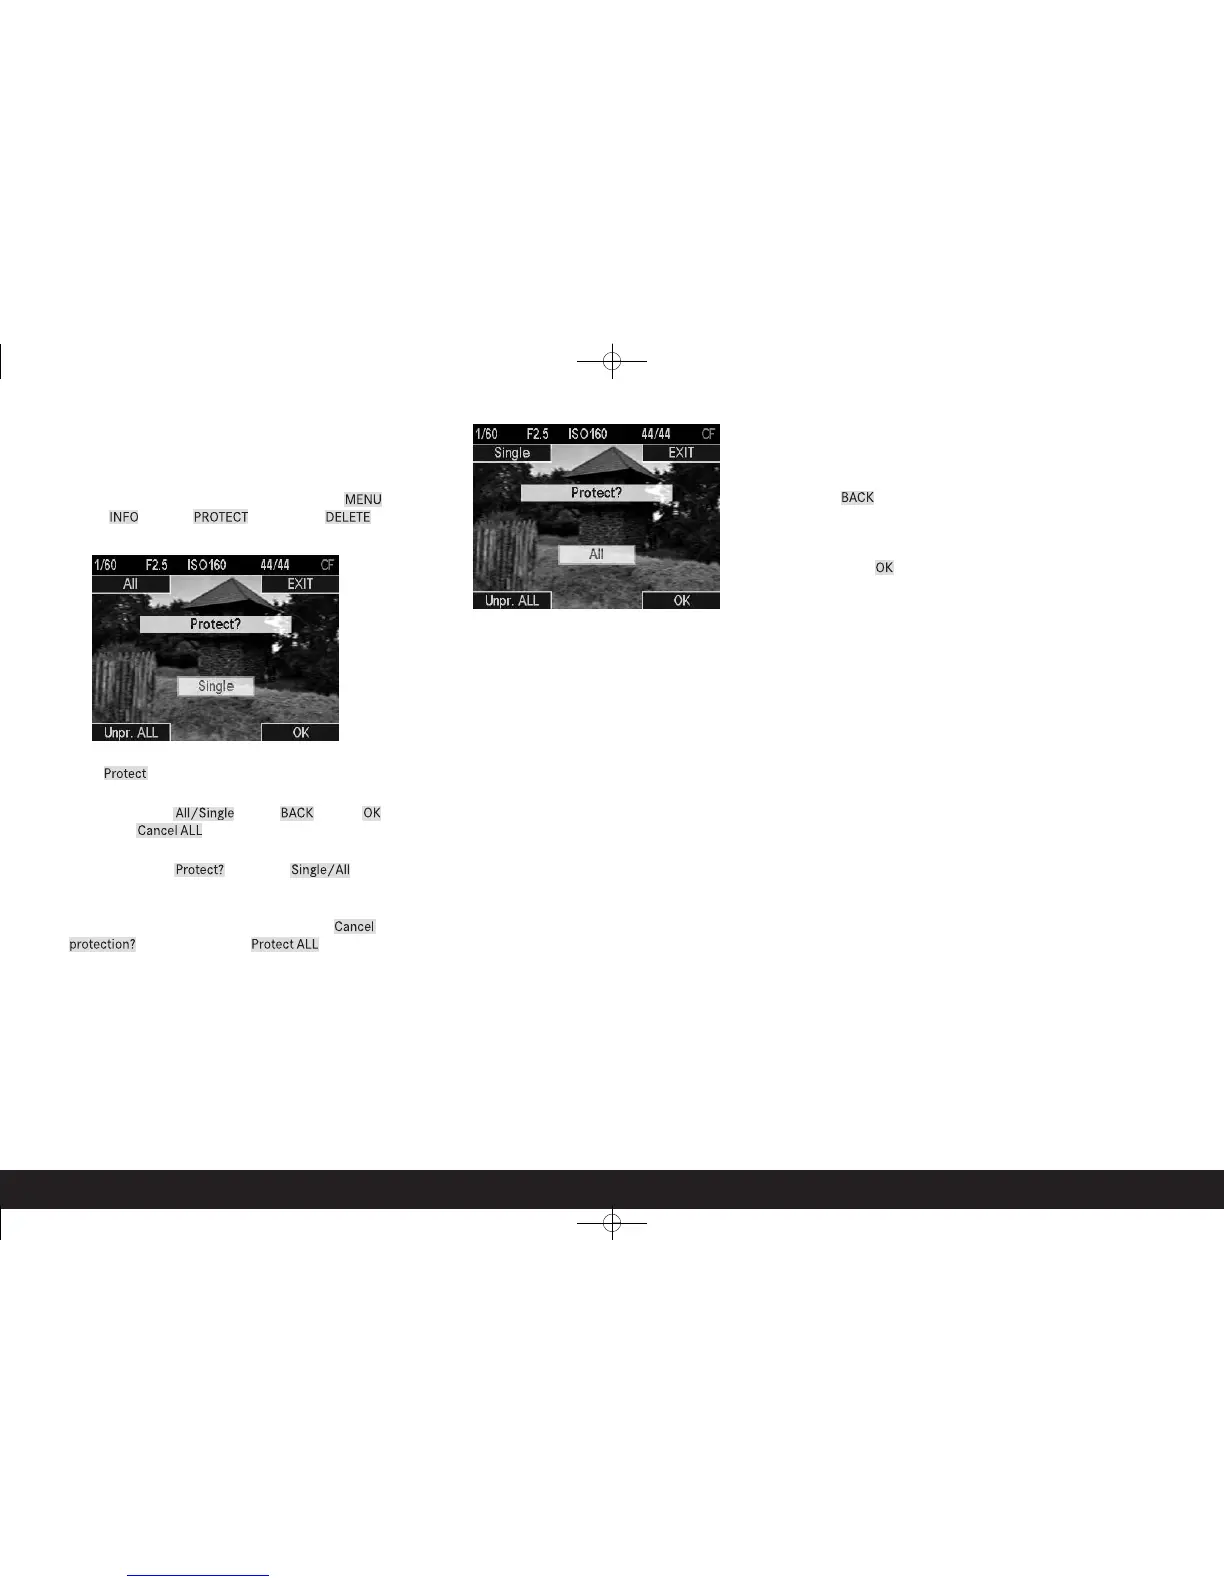
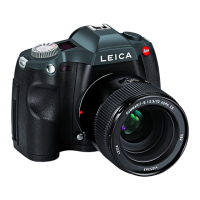
2. Press the Protect button.
• The image field shows
– the 4 fields 4.5.1 - All/Single, 4.5.2 - BACK, 4.5.3 – OK
and 4.5.4 – Cancel ALL for the button functions valid in
this situation
– the 2 fields 4.5.5 - Protect? and 4.5.6 - Single/All for the
currently active functions, and
– if applicable the symbol (4.5.7) for a protected picture. In
such cases, the entry in field 4.5.5 changes to Cancel
protection? and in field 4.5.4 to Protect ALL
3. Use button 1.24 to select whether you want to protect only
the picture shown or all pictures, or whether you want to can-
cel the existing protection for only the picture shown or for all
pictures.
• The entries in field’s 4.5.1 and 4.5.6 change.
Notes:
• If protection or canceling protection for single pictures is
active, other pictures can be called up by turning the click
wheel (1.18).
• The BACK button takes you back to step 2.
• You can use button 1.23 to switch directly to the menu for
canceling protection or to return from that menu.
4. Press the OK button to execute the protection process or to
cancel the protection.
• The symbol (4.5.7) for a protected picture appears in the
monitor or disappears.