99
ROUTER TABLE OPERATION
R9PLUS Joinery System User Guide
Making The Beam
Chapter 1
A
A
A
A
B
C
A
90
º
90
º
1-19
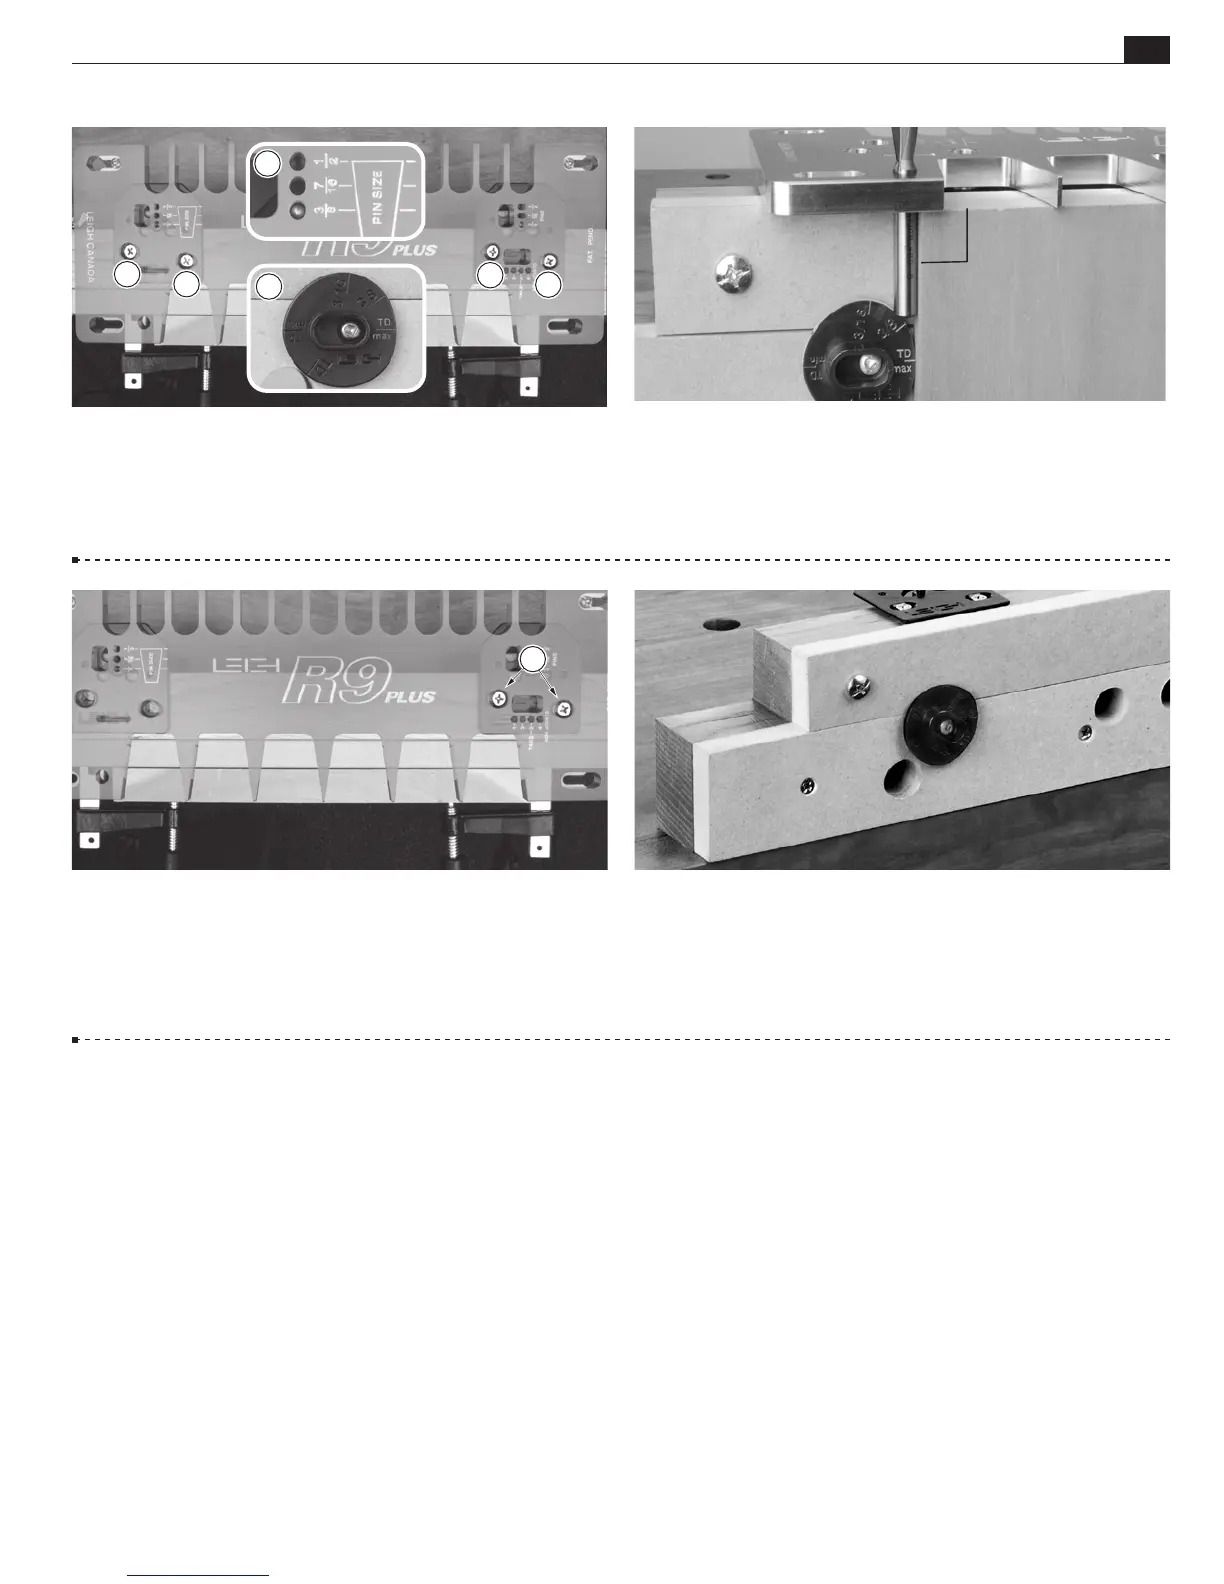
The template will now be used to precisely position the pin
plates. Slightly loosen all pin plate screws
just enough so that
the pin plates can move side to side. Position the template on the
pin plates in the
3
⁄8"[9,5mm] position
. Set the side stop to the
TD Max position
.
1-21
Gradually tighten the second pin plate screws
making
sure the template is not binding on the pins. Move the template
to the second position and repeat the procedure with the third
pin plate.
1-22
Optional Hold-down for Bench Use
Notch out the
ends of the beam in order to clamp beam assembly to a bench
and use in hand-held router mode.
■
1-20 Clamp a square board against the side stop and flush
under the template. Insert the shank of the No.80-8 bit into
the
5
⁄16"[8mm] hole in the template. Move the template and pin
plates laterally until the shank of the bit just touches the edge of
the board. Now tighten the first pin plate.
Important: The beam may expand or contract with humidity changes. Use the
3
⁄8"[9,5mm]
holes to adjust the pin plates as required.
 Loading...