FRAME ASSEMBLY
WARNING!
Set-up the trampoline in its final location! After complete set-up, DO NOT MOVE the trampoline after
assembly! Make sure the ground is level at the set up location otherwise the tension of the springs might
deform the frame.
We Recommend: That the Trampoline MUST be set up on grassed area only. Not suitable on concrete or other
hard surfaces.
WARNING: 2-3 adults in good physical condition are required for the following assembly. You MUST wear
closed in shoes and gloves. Make sure area around assembly area is clear of any hazards which may cause a fall
or loss of balance. Failure to follow all instructions and warnings exactly may result in serious injury.
Lay out all trampoline and safety net parts in groups. Check, prior to assembly, that all parts are complete
according to the parts list.
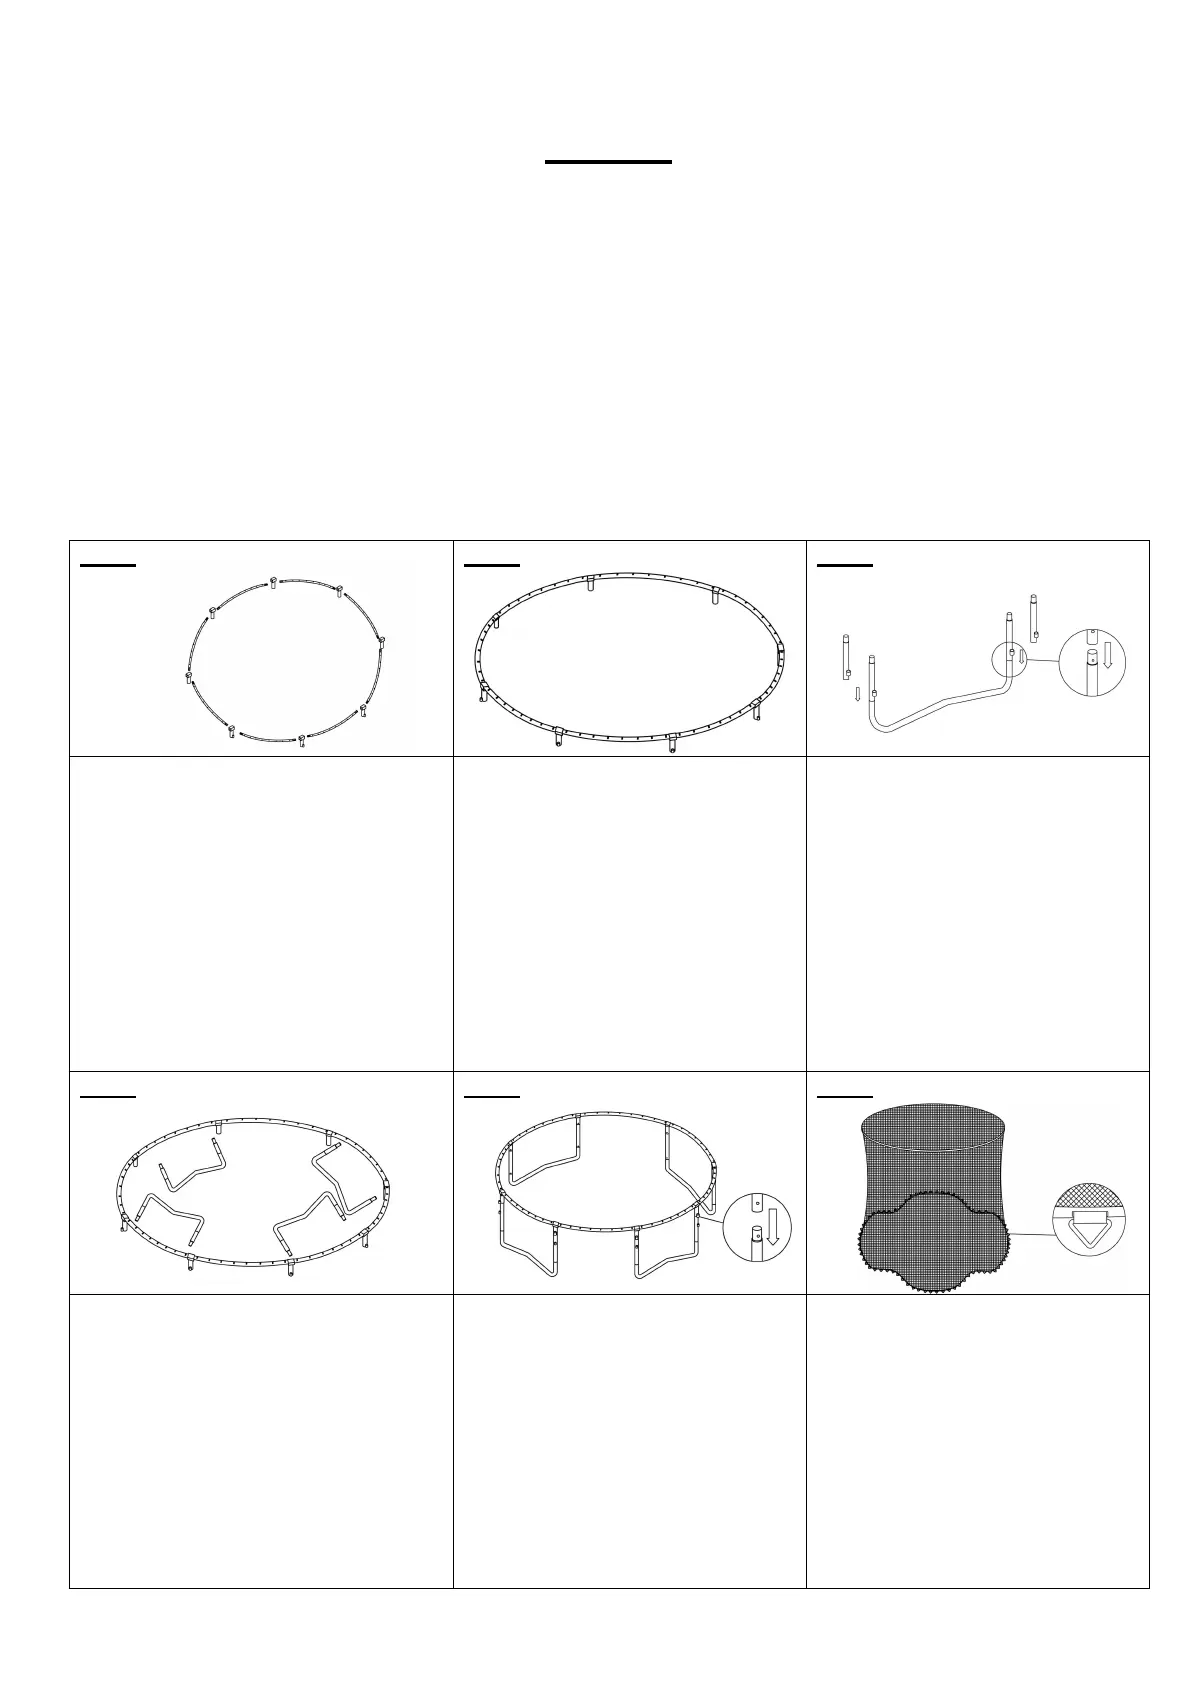
Put all frame tubes and T-tube connectors
in a circle as shown.
The two ends of frame tube are
different. One end is smaller, the other
is bigger. To make it easy to assemble,
first insert the frame tube's bigger end
into the T connector, then insert the
small end of another frame tube into
the same T connector. Repeat until all
the frame tubes and connectors are
connected.
Note: The welded tube of T tube
connector must face outside.
Connect the leg extensions tube with
the “W” shape leg tubes as shown in
the picture. Make sure the pin
locked. (Upright tube not required on
8ft trampoline range)
Place all leg tubes inside the frame circle
to line up with T-tube connectors.
Lift up the frame on one side and
insert T-Tube into W-shaped / base
leg underneath. Repeat this step to
connect rest of W-shaped legs.
Note: two or more persons are
required to lift the frame on the
opposite side.
Put the triangle rings of jumping
mat through the holes of safety net
edge one by one.
Note: Make sure the logo of jumping
mat faces the entrance of safety net.
 Loading...