©2004 LEMO USA, Inc. 6/04
If you have any
questions or
require customer
assistance, please
contact us directly
at (800) 444-5366.
LEMO USA, Inc.
635 Park Court, Rohnert Park, CA 94928
P.O. Box 2408, Rohnert Park, CA 94927-2408
(800) 444-5366 • (707) 578-8811 • fax: (707) 578-0869
www.LEMOusa.com • e-mail: info@lemousa.com
2
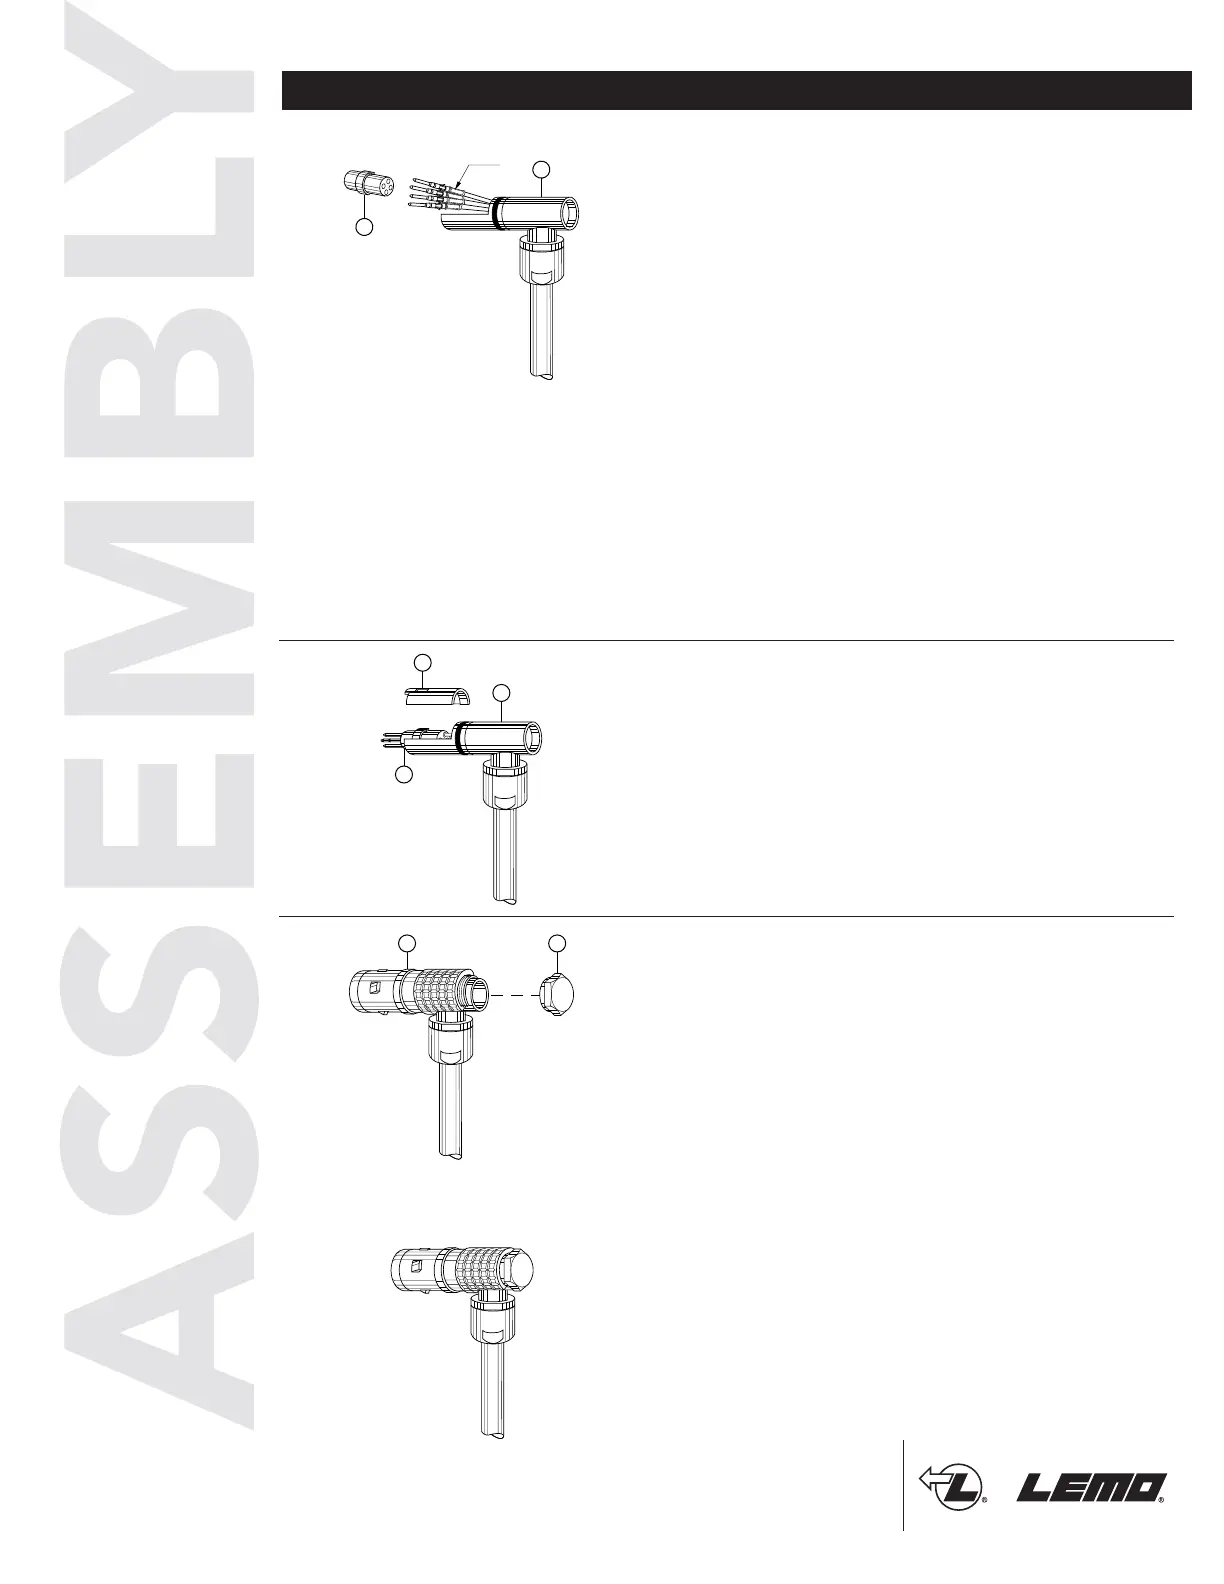
5. Fit the insulator assembly into the slot of the
elbow inner shell ➆. Position the midpiece ➅ on
the insulator ➇. The window must be positioned
exactly on the insulator’s notch. Make sure that
the insert carrier forms a cylinder with the elbow
inner shell.
6. Fit the pre-assembly into the connector housing ➉
by holding the collet nut, and giving it a slight
rotation and pressure until the midpiece’s key is
inserted into the housing’s slot situated under the
red keyway dot.
Using the appropriate tooling (see catalog), to
ensure that internal components do not turn in
housing, screw on the hex cap with appropriate
torque (see page 3). For plugs F●●, hold the front
nose of the plug with plier DPF to ensure that the
internal components do not turn in the housing.
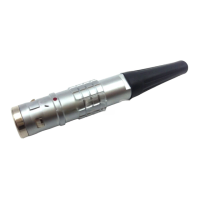
4. For crimp contacts, Fix the appropriate positioner
onto the crimping tool (see catalog) and set the
selector to the number corresponding to the AWG
of the conductor used.
Fit the conductor into the contact; make sure that
conductor is visible through the contact's
inspection hole. Slide the contact-conductor
assembly into the open crimping tool; make sure
that the contact is pushed fully into the positioner.
Close the tool.
Remove from crimping tool and check that
conductor is secure in contact and shows in
inspection hole. Arrange the contact-conductor
assemblies according to the insert marking (see last
page for example), avoiding any twisting of the
conductors.
Fit the contacts gently into the insulator ➇; check
that no conductor overlaps another and push the
contacts into the insulator. Check that all the
contacts are correctly located in the insulator: 1) by
verifying the alignment of the contacts at the front
of the insulator and 2) by gently pulling on the
insulator; the contact alignment must remain in
correct position.
 Loading...