7
3. MAINTENANCE
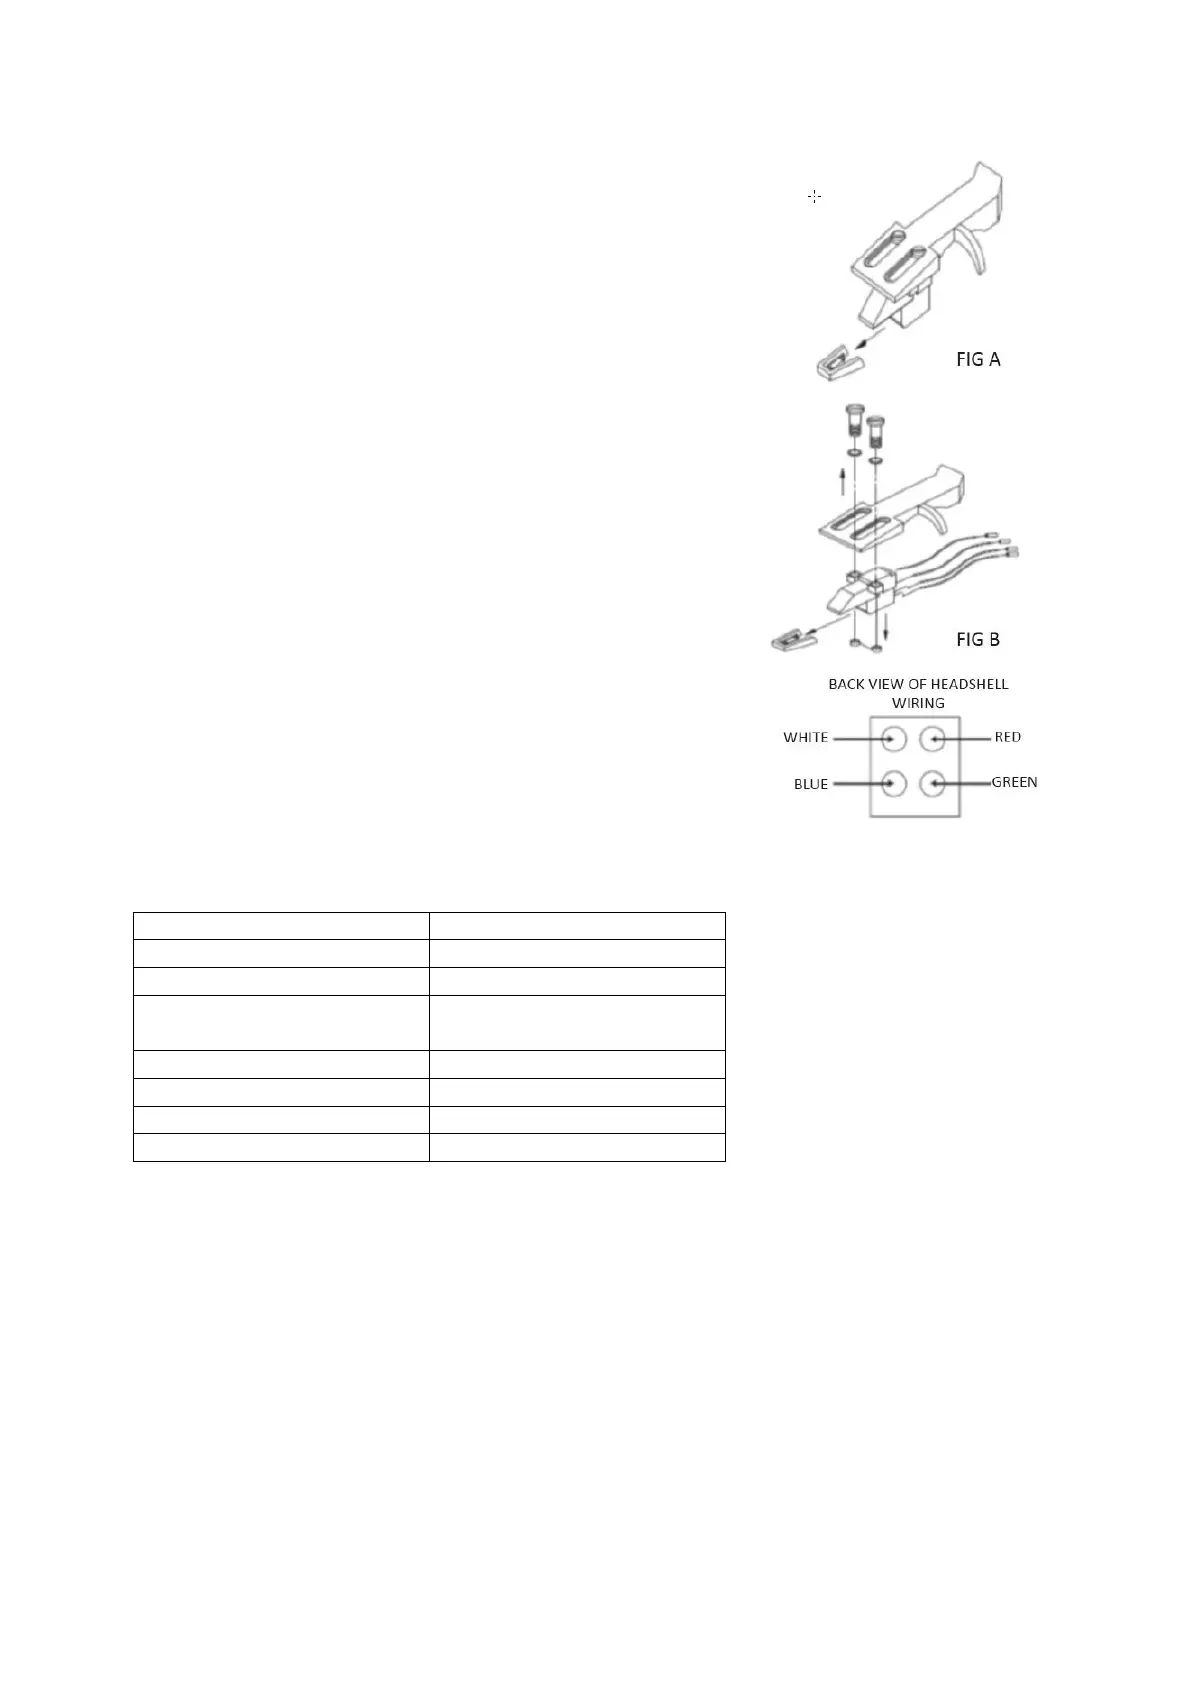
TO REPLACE THE STYLUS (FIG A):
- Secure the tone arm in place using the tone arm lock.
- Pull the orange stylus unit forward in the directoin of the
arrow and remove it.
- Put in the new stylus following the reverse procedure.
TO DISASSEMBLE THE CARTRIDGE (FIG B):
- Secure the tone arm in place using the tone arm lock
- Remove the stylus (see section above).
- Release the screws, nuts and washer and then the
headshell and cartridge can be disassembled.
- Disconnect the four link wires at the level of the pick up
head.
TO INSTALL A NEW CARTRIDGE
- Connect the four colored wires as shown in figure B.
- Push the cartridge up into the headshell.
- Reinstall the stylus.
BACK VIEW OF HEADSHELL
WIRING
BACK VIEW OF HEADSHELL
WIRING
IMPORTANT RECOMMENDATIONS
We advise you to clean your records using an impregnated rag with an antistatic product for
maximum enjoyment of your records and also to make them last.
We would also point out that for the same reason your stylus should be replaced periodically
(approximately every 250 hours).
Dust the stylus from time to time using a very soft brush dipped in alcohol (brushing from the back
to the front of the cartridge).
Basic operation