EasyManua.ls Logo

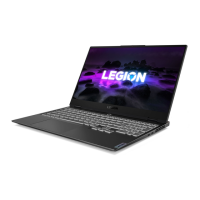
Lenovo CAMPUS LEGION SLIM 7-15ACH User Manual

Lenovo CAMPUS LEGION SLIM 7-15ACH
68 pages
To Next Page IconTo Next Page
Page #1 background imageLoading...
Page #1 background image
Hardware Maintenance Manual
Lenovo Legion Slim 7 (15, 6)
Question and Answer IconNeed help?

Do you have a question about the Lenovo CAMPUS LEGION SLIM 7-15ACH and is the answer not in the manual?

Lenovo CAMPUS LEGION SLIM 7-15ACH Specifications

General IconGeneral
BrandLenovo
ModelCAMPUS LEGION SLIM 7-15ACH
CategoryLaptop
LanguageEnglish

Summary

Chapter 1. Safety information

General safety

Rules for general safety during maintenance.

Electrical safety

Rules for working on electrical equipment.

Safety inspection guide

Guide to identify potentially unsafe conditions.

Handling devices that are sensitive to electrostatic discharge

Precautions for handling ESD-sensitive parts.

Grounding requirements

Importance of electrical grounding for safety and function.

Safety notices (multilingual translations)

List of languages for safety notices.

Chapter 2. General checkout

Important notes

Key points before following checkout instructions.

What to do first

Information required when returning an FRU.

CRU list

List of Customer Replaceable Units (CRUs).

Chapter 3. Identifying FRUs (CRUs)

Locate FRUs and CRUS

How exploded illustrations help identify FRUs/CRUs.

Chapter 4. Removing a FRU or CRU

Service tools

Tools needed for servicing Lenovo computers.

General guidelines

Rules to follow when removing or replacing FRUs.

Remove the lower case

Steps to remove the lower case.

Remove the solid-state drive (SSD) module

Steps to remove the SSD module.

Remove the battery pack

Steps to remove the battery pack.

Remove the Wi-Fi card

Steps to remove the Wi-Fi card.

Remove the solid-state drive (SSD) mylar

Steps to remove the SSD mylar.

Remove the DC-in bracket

Steps to remove the DC-in bracket.

Remove the memory module mylar

Steps to remove the memory module mylar.

Remove the memory module

Steps to remove the memory module.

Remove the heat sink

Steps to remove the heat sink.

Remove the fans

Steps to remove the fans.

Remove the solid-state drive (SSD) bracket

Steps to remove the SSD bracket.

Remove the USB board module

Steps to remove the USB board module.

Remove the CMOS battery

Steps to remove the CMOS battery.

Remove the speakers

Steps to remove the speakers.

Remove the touchpad cable

Steps to remove the touchpad cable.

Remove the system board

Steps to remove the system board.

Use a Golden Key U1 tool to flash-write key id information

Using a tool to flash-write system information.

Remove the fingerprint board cable

Steps to remove the fingerprint board cable.

Remove the fingerprint board and Cu Foil mylar

Steps to remove the fingerprint board and mylar.

Remove the strip cover

Steps to remove the strip cover.

Remove the LCD module

Steps to remove the LCD module.

Remove the LCD bezel

Steps to remove the LCD bezel.

Remove the hinge cover

Steps to remove the hinge cover.

Remove the LCD panel

Steps to remove the LCD panel.

Remove the camera privacy shutter

Steps to remove the camera privacy shutter.

Remove the camera module

Steps to remove the camera module.

Remove the microphone rubbers

Steps to remove the microphone rubbers.

Remove the microphone board and the EDP cable

Steps to remove microphone board and EDP cable.

Remove the LCD cover

Steps to remove the LCD cover.

Appendix A. Label locations

All base cover labels

Table detailing base cover labels and their application.
Trademarks

Related product manuals