34
Chapter 2. Using your computer
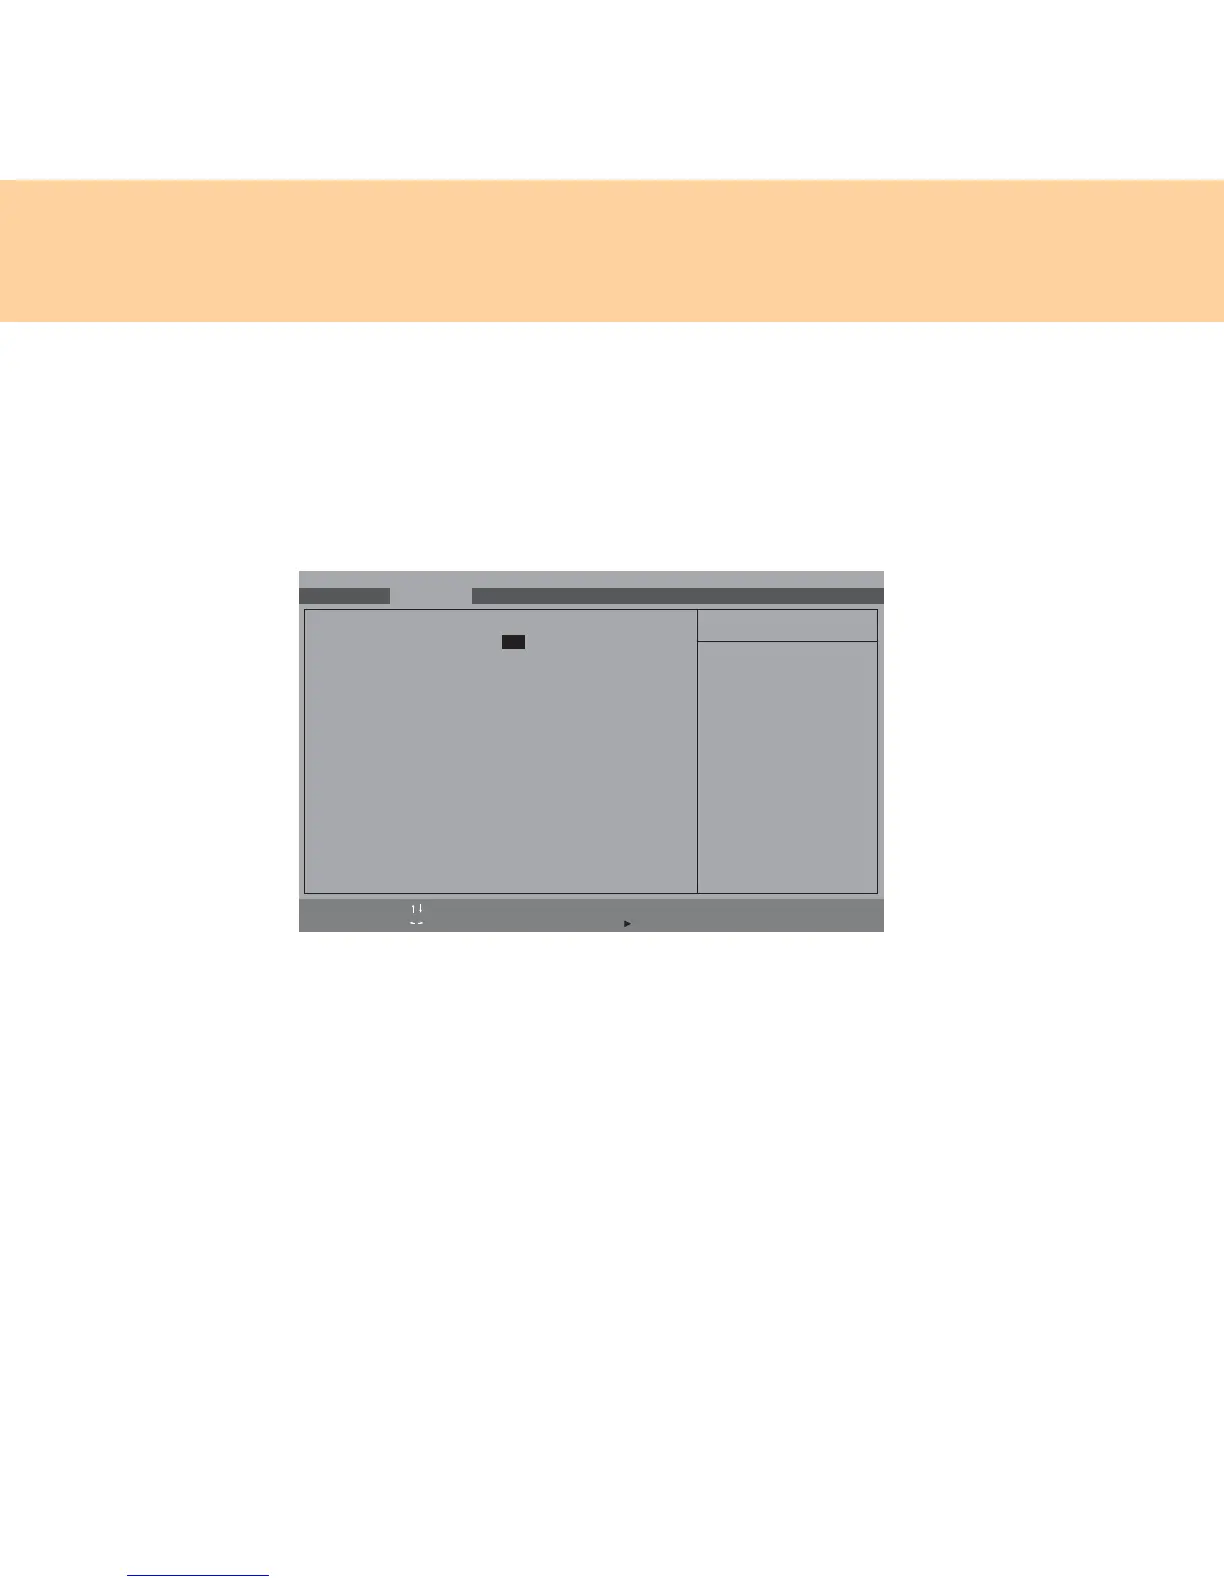
Installing the Windows XP operating system
To install the Windows XP operating systems to the machine, please follow
the following steps:
1
Start the computer. When displaying the initial screen, press
F2
, BIOS
setup Utility screen opens. Then, use the cursor keys to select
Advanced
.
2 In the SATA Mode Selection, select IDE mode, and press F10 to save
settings and exit.
3 Use the Windows XP CD-ROM to install the Windows XP system.
4 After completing the installation, install each driver in the supplied
drive disc.
Attention:
After installing the ICH9 SATA AHCI driver, please be sure to click the
start to select Restart.
Main Advanced Security
Phoenix SecureCore(tm) Setup Utility
Boot Exit
Legacy OS Boot: [Enabled]
SATA Mode Selection: [IDE]
Modem Device: [Enabled]
WLAN Device: [Enabled]
LAN Device: [Enabled]
WWAN Device: [Enabled]
Express Card Device: [Enabled]
1394 Device: [Enabled]
Media slot Device: [Enabled]
PC Card Device: [Enabled]
Serial Port Device: [Enabled]
Bluetooth Device: [Enabled]
USB Port Device: [Enabled]
USB Port Device: [Enabled]
USB Port Device: [Enabled]
E-SATA Device: [Enabled]
Determines how SATA
controller(s) operate.
Item Specific Help
F1 Help Select Item
-
/+ Change Values F9 Setup Defaults
Esc Exit Select Menu Enter Select Sub-Menu F10 Save and Exit




 To Next Page