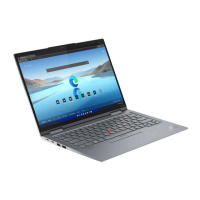
Do you have a question about the Lenovo ThinkPad X1 Nano Gen 3 and is the answer not in the manual?
Rules for safe handling and operation of the notebook computer.
Precautions for working with electrical components and avoiding shock.
Checklist to identify potentially unsafe conditions before servicing.
Procedures to protect components from electrostatic discharge damage.
Importance of proper grounding for operator safety and system function.
Warning notices provided in multiple languages for user safety.
Guidelines and best practices for replacing Field Replaceable Units (FRUs).
Specific procedures and precautions for replacing SSDs, including data backup.
Guidance on interpreting error codes and messages for troubleshooting.
Information on CTO, special-bid, standard models and identifying FRUs.
Steps to identify specific Field Replaceable Units using Lenovo's support site.
Initial steps and information required when returning a FRU for exchange.
Procedures for identifying and correcting problems using diagnostic tests.
Methods for troubleshooting computer issues, including using preinstalled software.
Using diagnostic programs for troubleshooting, especially when Vantage app is not installed.
How to use the preinstalled UEFI diagnostic tool for system checks.
Creating and using bootable media for system diagnostics and information.
Procedures to verify the functionality of the AC power adapter and battery.
Instructions for resetting or restoring the Windows OS using Lenovo options.
Information on setting and managing Power-on, Supervisor, and System Management passwords.
Explanation of sleep and hibernation modes for reducing power consumption.
A guide linking symptoms and error codes to specific FRUs for replacement.
Diagrams showing the location of various ports, buttons, and indicators on the computer.
Explains the difference between FRUs and CRUs and how to identify them.
Illustrated list of major Field Replaceable Units and Customer Replaceable Units.
Lists various small parts like screws, labels, and thermal pads.
Information to help identify system board connectors and cables for replacement.
Lists the necessary tools for servicing the computer and replacing FRUs.
Guidelines for using specific nylon-coated screws and proper tightening techniques.
Procedures for restoring system serial numbers after replacing the system board.
Essential safety and procedural guidelines before and during FRU replacement.
Precautions and preparation steps before commencing any service work.
Steps to disable the internal battery before removing components.
Instructions to disable Fast Startup and the built-in battery.
Procedure for removing the nano-SIM card and its tray.
Steps for removing and replacing the base cover assembly of the computer.
Procedure for removing and replacing the M.2 solid-state drive.
Steps for removing and replacing the Wireless-WAN card.
Procedure for removing and replacing the thermal fan assembly.
Steps for removing and replacing the power button board and cable.
Important notices and removal steps for the built-in battery.
Procedure for removing and replacing the speaker assembly near the battery.
Steps for removing and replacing the trackpad and fingerprint reader cable.
Procedure for removing and replacing the trackpad.
Steps for removing and replacing the fingerprint reader module and bracket.
Procedure for removing and replacing the wireless-LAN antenna assembly.
Important notices and steps for removing and replacing the system board.
Procedure for removing and replacing the wireless-WAN antenna assembly.
Steps for removing and replacing the speaker assembly near the hinges.
Procedure for removing and replacing the LCD unit.
Steps for removing the keyboard bezel assembly and keyboard.
